|
|
|
Area personale
Tag
Cerca in questo Blog
Menu
Ultime visite al Blog
Chi pu“ scrivere sul blog
I commenti sono moderati dall'autore del blog, verranno verificati e pubblicati a sua discrezione.


Keel: the scarphs are on the vertical plane, so they won't be seen. 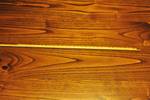
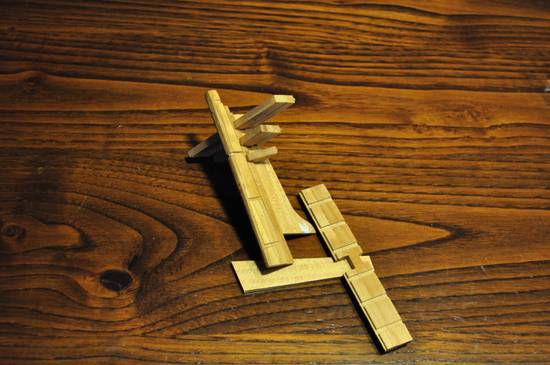
Stempost and apron: ok, including the rabbet (laminated); the boxing has still to be sanded a little.

Sternpost and inner post: on the plans there is just the silhouette; on top of that if you cut the assembly in one piece, the transoms will have to be in two pieces; to make them as they were I have cut a sternpost and its innerpost, wich keeps in place the four transoms, and a sternson. By the way I liked the transoms a little more "light", so I reshaped them with the proportions I remembered : width 1 inch per foot of lenght; depth: five twelfths of the width., which in metrics should be about mm 9 and 4mm.
Between the inner and the sternpost there is a short rabbet. The rising wood has been modified accordingly, and the filling chocks will be hopefully prepared when the fashion pieces will be in position. Fun as it was, I hope I didn't mess it up making all those modifications. Here are the pieces "assembled" just for the photo.
In the meantime naturally I go on cutting and milling the wood for the frames. It will be a long story. I have seen on Internet a little machine which in Italy is only available as an expensive professional tool: a bobbin spindle sander. hmmmmm...
|
|
Choosing the new model took me ages, including getting the ship plans from Mr. Hahn. This blog will hopefully be a good reminder of the difficulties I will be facing during the construction of the HMS Druid , just to avoid repeating my own errors. Why in English? I happened to learn all the nautical terms while I was working in UK, after my first visit to the Victory, followed by others to Greenwich, etc. etc. and now I cannot ,for my dear life, remember the italian terms. Why the Druid? It is going to be (if I'll live long enough) the first built from scratch, and I wanted a not- too - difficult model. She is (and was) not particularly attractive, but has personality: a 300 tons sloop of war (14 six pounders, 2 three pounders, 10 swivels and 100 men)
Born to be a cargo, (named Brilliant, carrying loads of virginian tobacco to England), after a single trip she was bought for The Royal Navy, and had some share of the war, loosing eleven men including her Captain Carteret (info from Mr Hahn book "Ships of the American Revolution") in a close quarter fight protecting a convoy with the Camel (22) and the Weazel (16), against the american Raleigh (with only a few cannons mounted) and the Alfred (74)
Et de hoc satis.
I have to shoot some photos of the few elements I am building, and I am also waiting for some new needed tools.
The wood. Two years ago I had the luck to find some 20 year old boards of swiss pear, of which I bought half cubic meter. Then I had it milled in more manageable size, and that is the main source of the wood I'll use for the model
The frames
There are 44 frames, including the cant ones, each made up of two half frames. Adding up floors and futtocks there are some 397 elements to cut and assemble. So I started to cut a first lot of 27 mm strips of wood and plane them down (with a Proxxon DH 40) to a thickness of 3,6 mm. Then I started cutting the different elements using the jigs suggested by Mr Hahn, as in the photo below.

The pieces of the half blank are then assembled and glued on a photocopy of the same blank, and this is the result:

As this will take some time I also started the backbone of the ship and the frame assembly Jig
|
|