Electronic Service Tool 9.4 (EST) Engineering Level* (software only) – used by New Holland dealer technicians to connect with vehicles that have a Controller Area Network (CAN) BUS.
The brand new version of New Holland CNH EST works with OS Windows 8 64 bit / 8.1 64 bit / 10 64 bit, except Home editions). If you have windows 7, we can offer you a previous version of CNH EST, as the 9.4(9.3) versions no longer support Windows 7 and in some cases won’t even loading.
*for advanced dataset registration and a lot of hidden options programming for vehicles, raw message simulations.
Optionally, you can purchase eTimGo for CNH EST 04.2021 for all brands OFFLINE which is a completely offline repair and diagnostics information database. With PIN search support.
The software EST v9.4 comes as:
CNH EST 9.4.0.0.0 installation file,
CNH EST 9.4.0.0.2 (EST9400Up1) update,
CNH EST 9.4.0.0.3 (EST9400Up2) update,
CNH EST 9.4.0.0.4 (EST9400Up3) update,
CNH EST 9.4.0.0.5 (EST9400Up4) update,
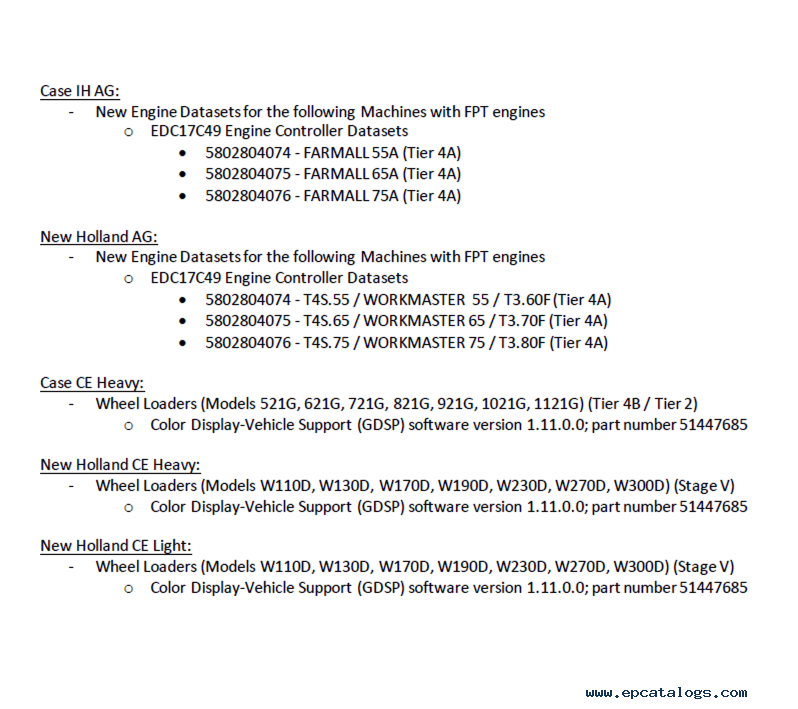
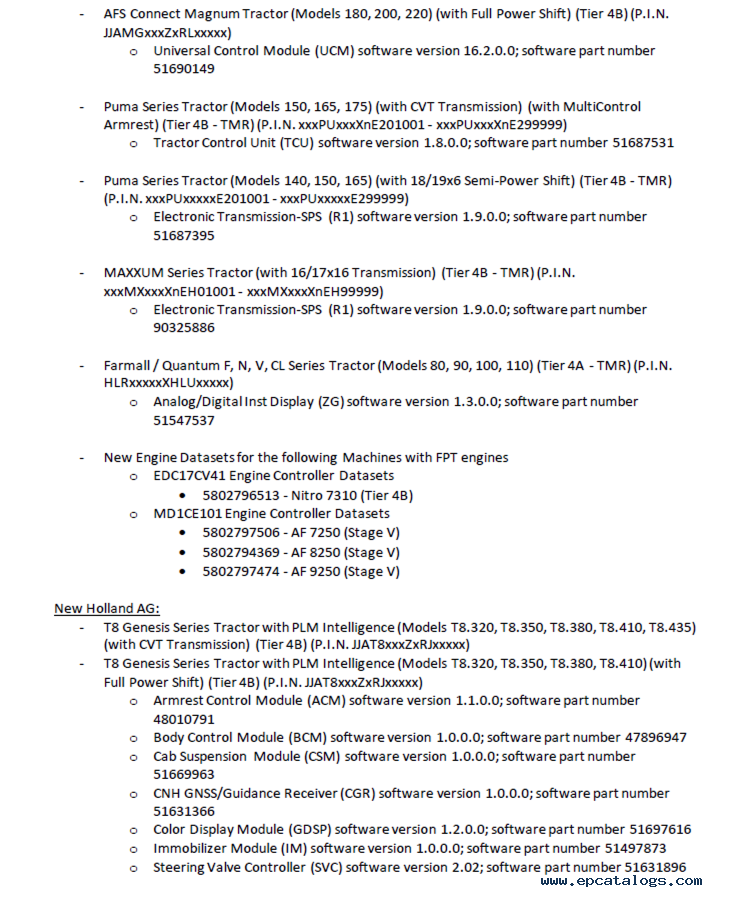
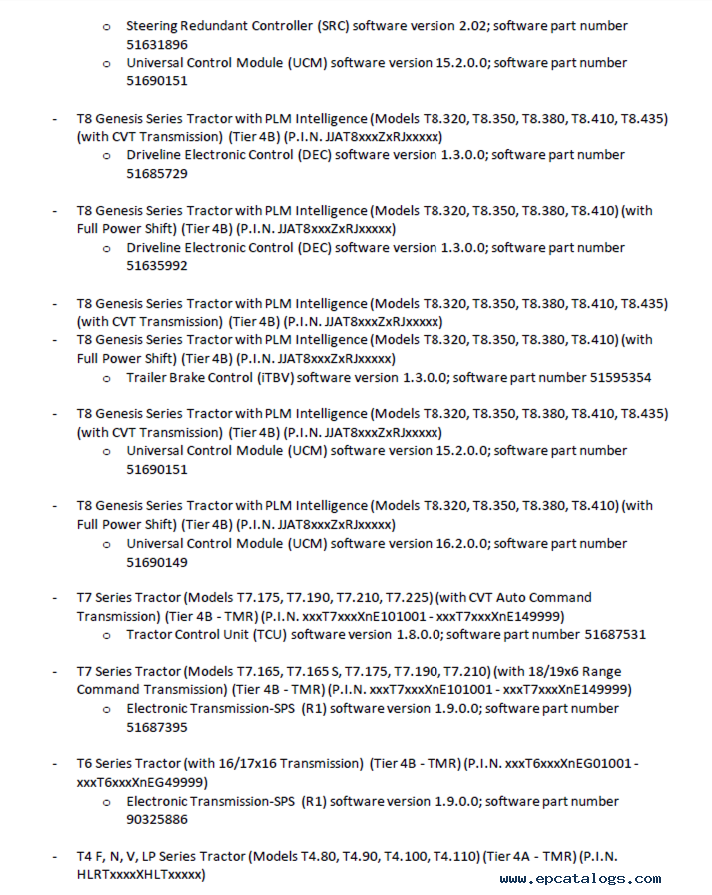
Vehicle Controller Files v46,
Legacy Multilanguage Diagnostic Procedures installer,
Optionally, by request, with Additional assistant Programs,
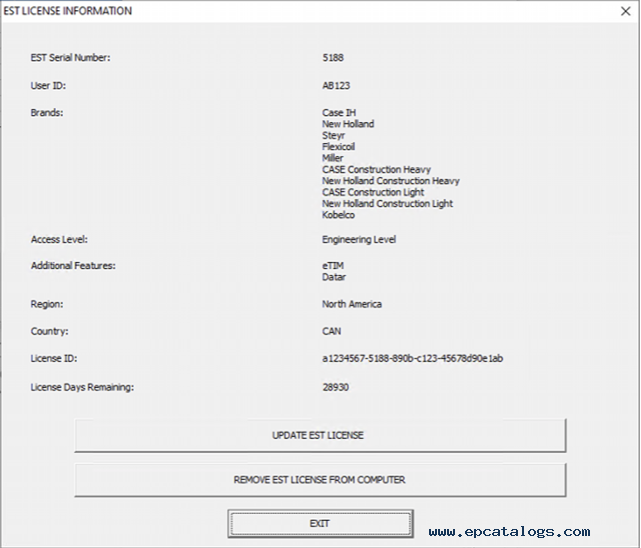
PC Locked Activation tool with the engineering access level.
The software EST v9.3 comes as:
CNH EST 9.3.0.0.0 installation file,
CNH EST 9.3.0.0.2 – 9.3.0.0.7 (EST9300Up5) updates,
Legacy Multilanguage Diagnostic Procedures installer,
Optionally, by request, with Additional assistant Programs,
PC Locked Activation tool with the engineering access level.
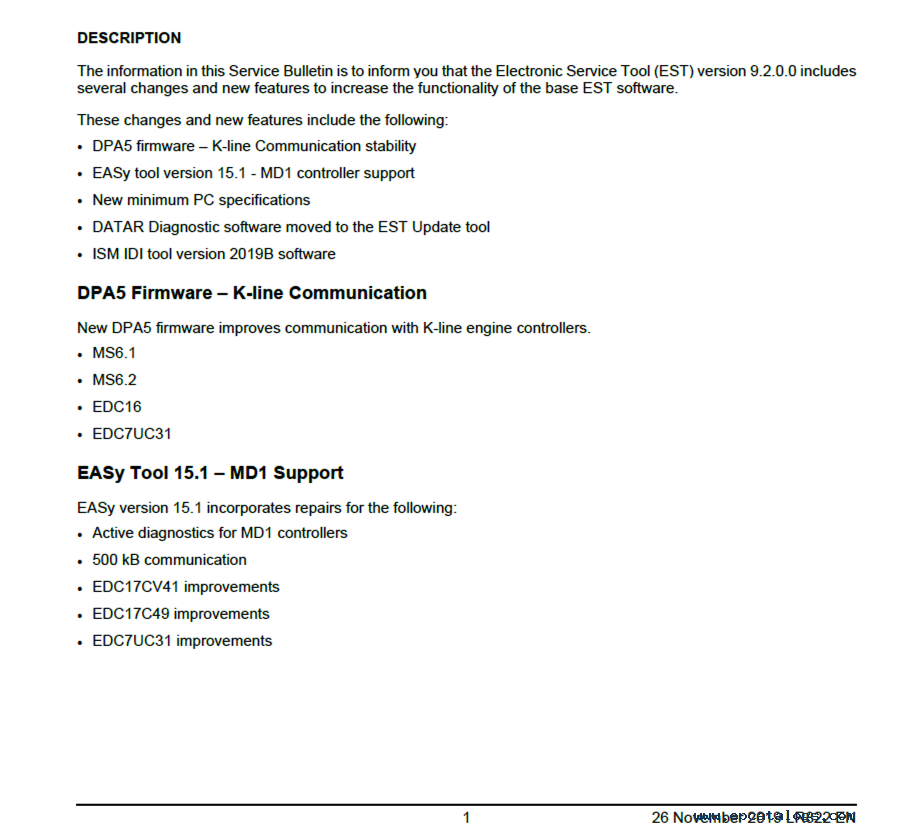
What’s new in the CNH EST v9.2 upd. 1 – 10
IMPORTANT NOTICE. Service Manuals, Schemes available only online.
In case if your PC/Laptop doesn’t fit with the minimum hardware requirements, we can offer the CNH EST v9.0 (2019/01), which is still compatible with the 32-bit windows and 3/4 Gb of RAM. Please indicate the desired application version in the comments field. Or via the contact us form.
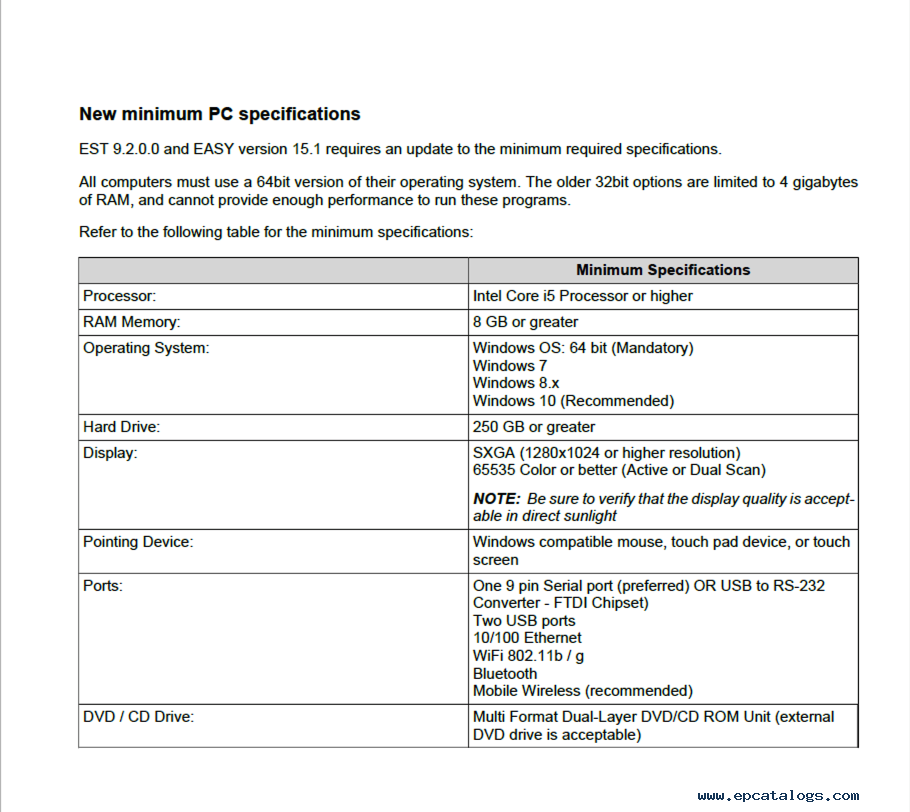
New minimum PC specifications
All computers must use a 64-bit version of their operating system. The older 32bit options are limited to 4 gigabytes of RAM, and cannot provide enough performance to run these programs.
Minimum Specifications
Processor: Intel Core i5 Processor or higher;
RAM Memory: 8 GB or greater;
Operating System: Windows OS: 64-bit (Mandatory)
Windows 7
Windows 8.x
Windows 10 (Recommended)
Hard Drive: 250 GB or greater;
Ports: One 9 pin Serial port (preferred) OR USB to RS-232
Converter – FTDI Chipset)
Two USB ports
10/100 Ethernet
WiFi 802.11b / g
Bluetooth
Mobile Wireless (recommended)
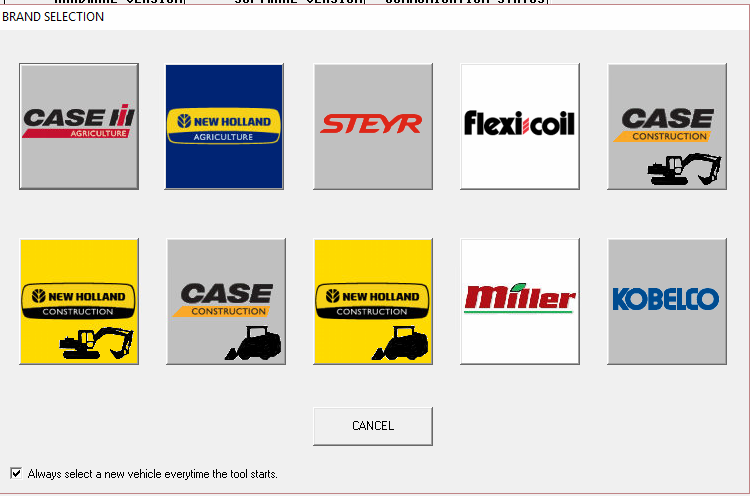
The following brands of the CNH group are covered:
New Holland (Agriculture and Construction)
New Holland FK (Fiat-Kobelco)
New Holland O&K (Orenstein & Koppel)
CASE (Agriculture and Construction)
STEYR
KOBELCO
Iveco (Astra) (articulated dump trucks only)
Flexi-Coil
Sumitomo (S.H.I.)
Link-Belt
The last version of CNH EST with technical documents is 7.6. If you need electrical schemes, please consider purchasing CNH EST 7.6 version on virtual PC with Windows XP Works with any Windows platform.
New Holland Electronic Service Tool allows you to:
• Check the status of parameters;
• Retrieve faults;
• Run diagnostic tests;
• Make ECU and parameter programming;
• Monitor active and logged diagnostics;
• View and change ECU configuration;
• View diagnostic procedures and schematics.
• Troubleshoot problems;
• Run scope diagnostics;
CNH EST can be downloaded, or we can send it as a set of DVDs
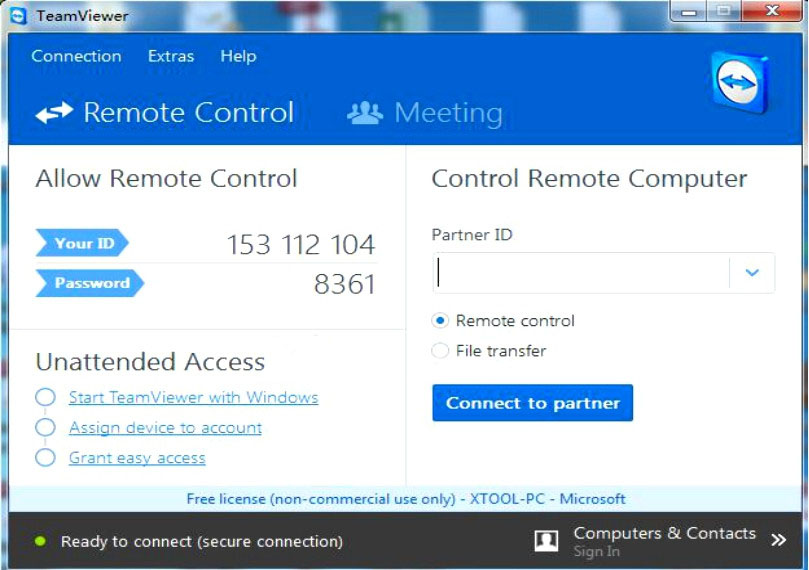
We recommend using our free remote assistance with the setup and activation process.
If you have advanced Computer Skills, we can provide you with all the information for installation and activation
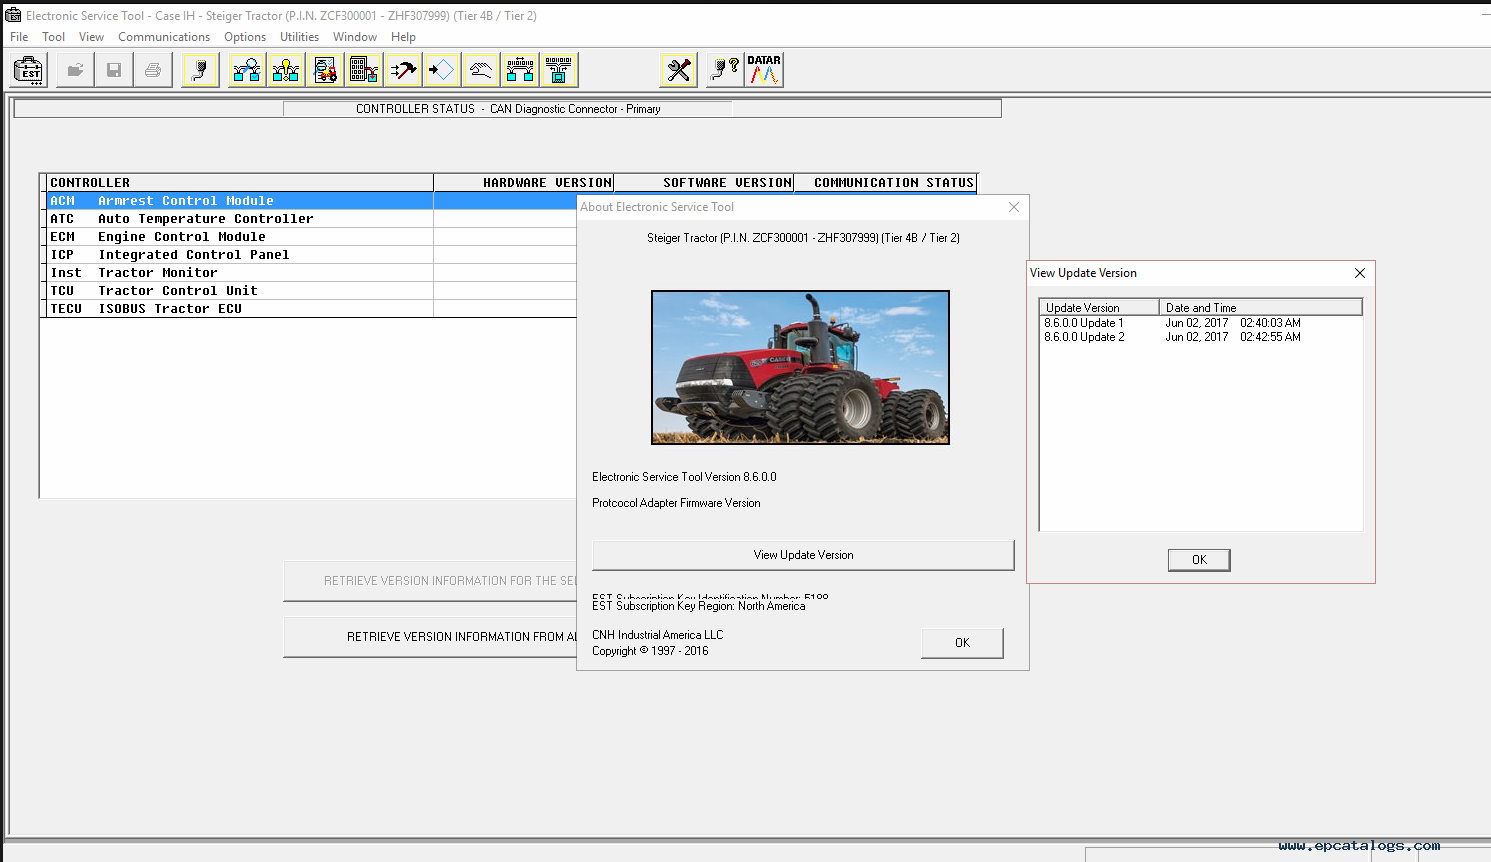
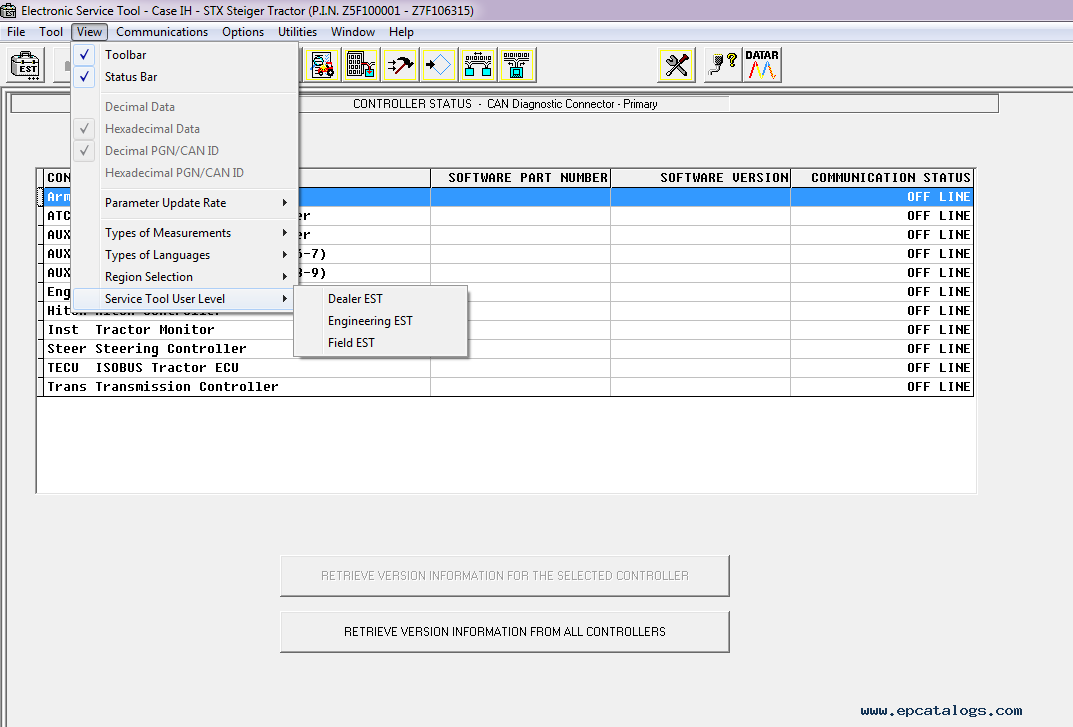
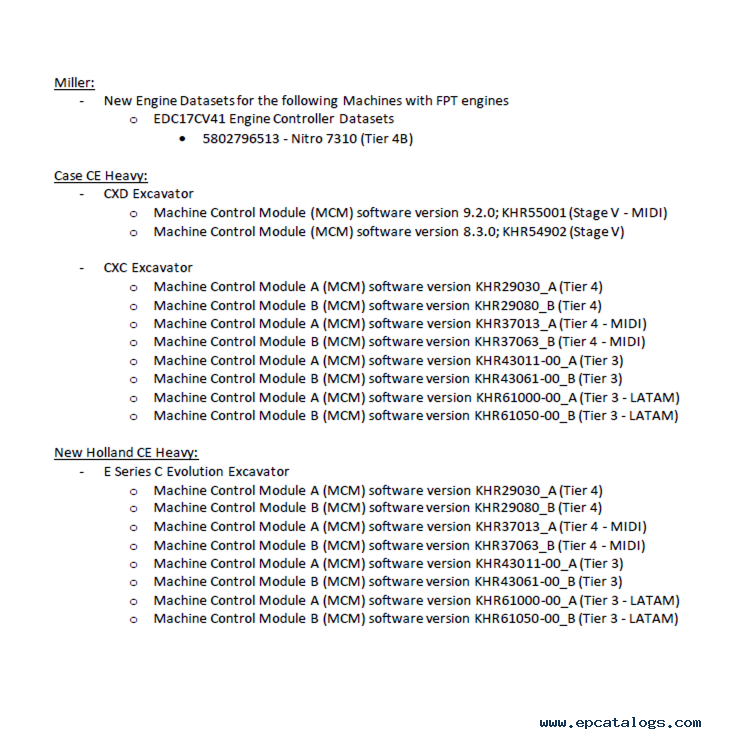
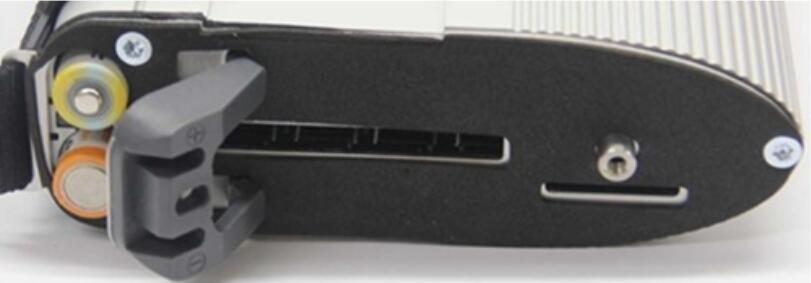
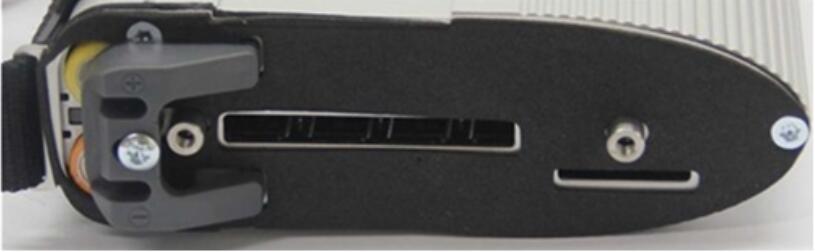
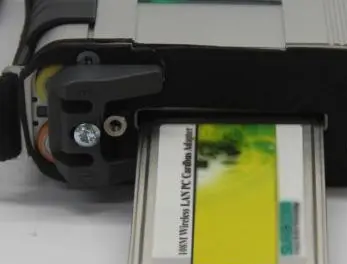
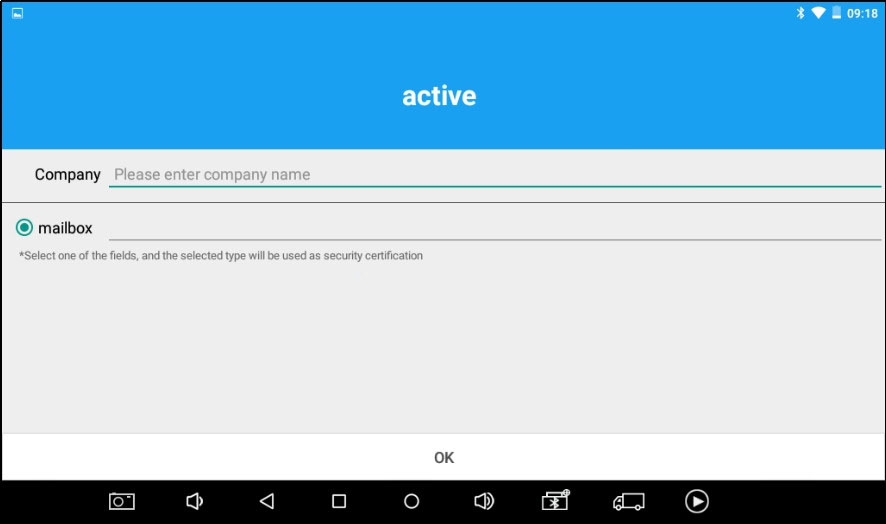
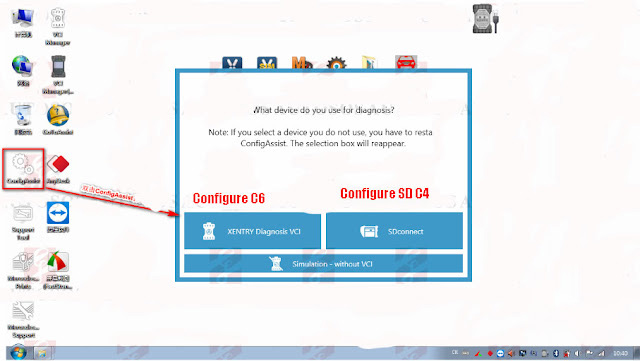
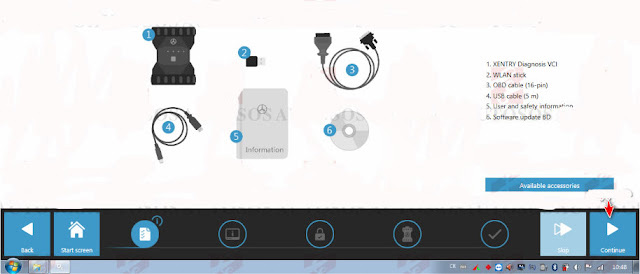
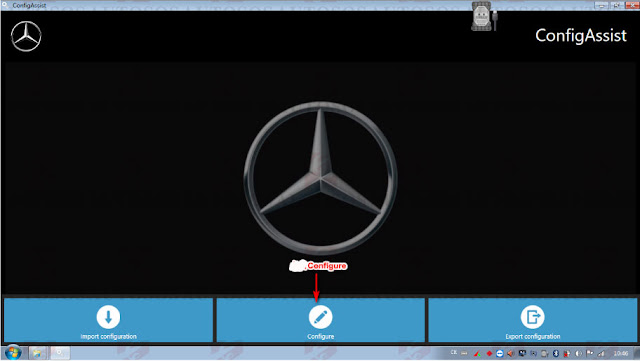
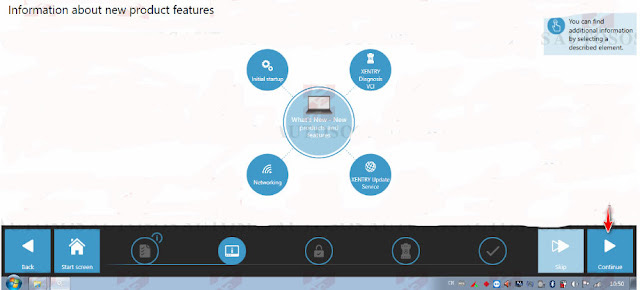
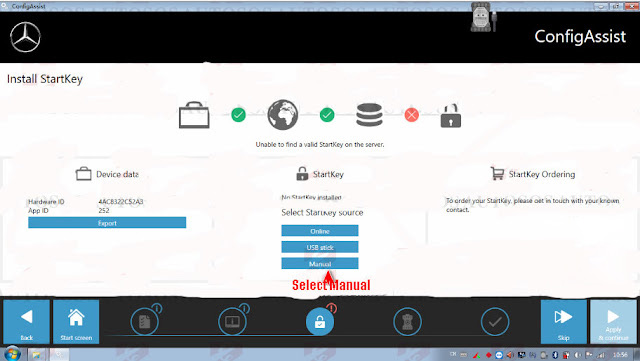
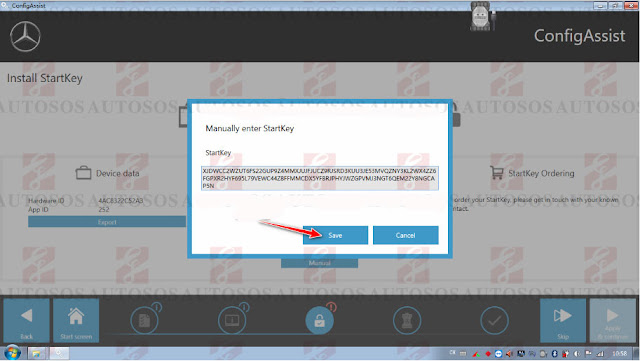
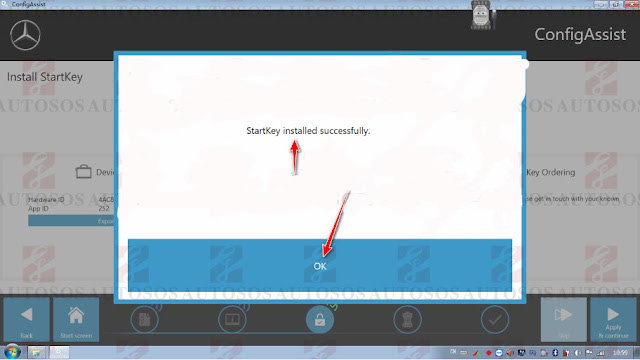
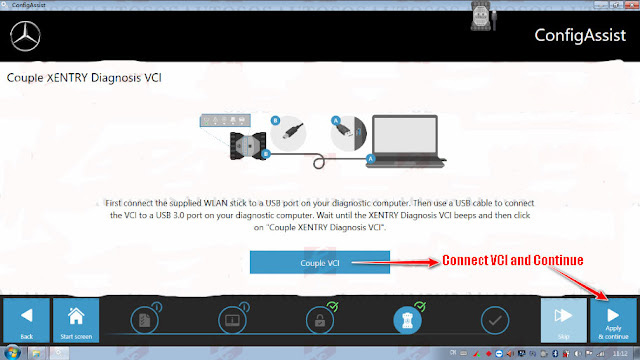
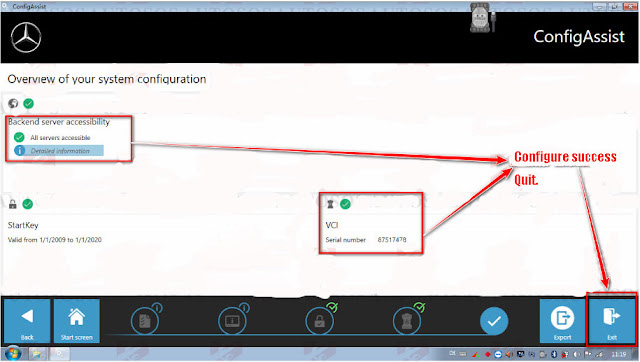
Screenshots for New Holland Electronic Service Tools (CNH EST 9.4) Upd. 4 (replaces v9.3) Diagnostic Software: