In recent years, lace front wigs have gained immense popularity in the beauty industry. These wigs provide wearers with the opportunity to change their hairstyle effortlessly and without damaging their natural hair. Among the various types of lace front wigs available, water wave lace front wigs have become a must-have for anyone looking for a natural and voluminous hairstyle. In this blog post, we will explore the reasons why water wave lace front wigs are highly sought after and why you should consider having one in your collection.
What are water wave lace front wigs?
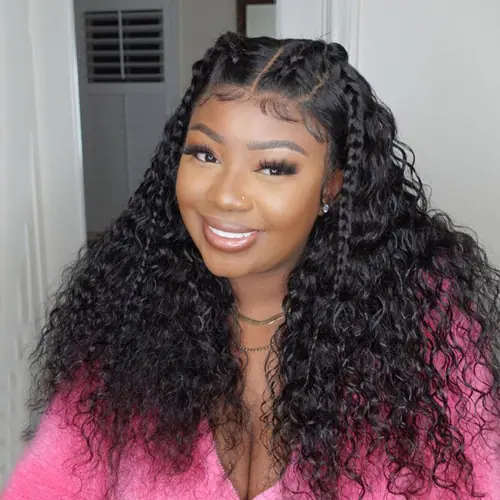
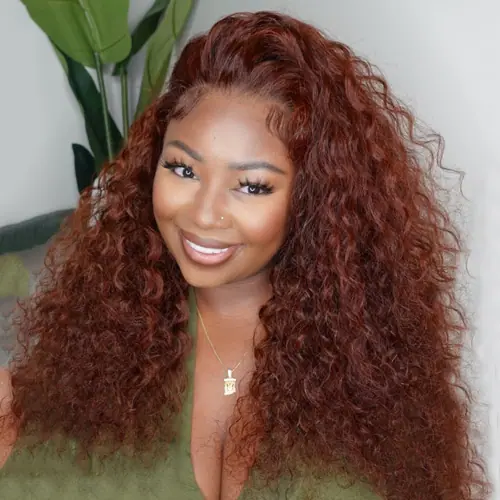
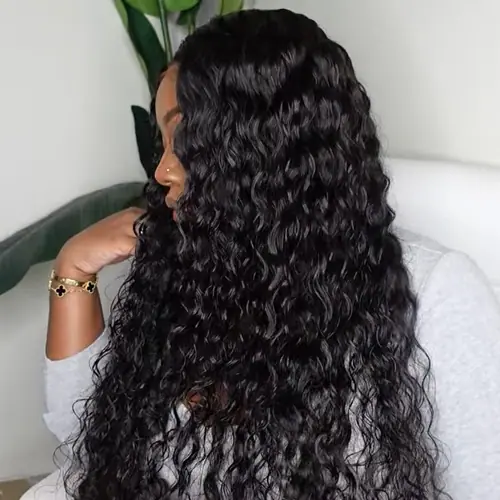
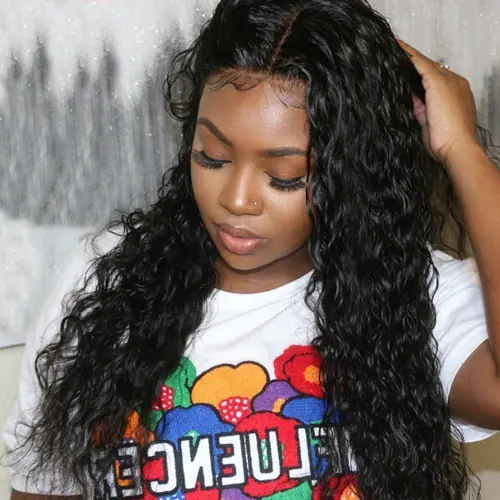
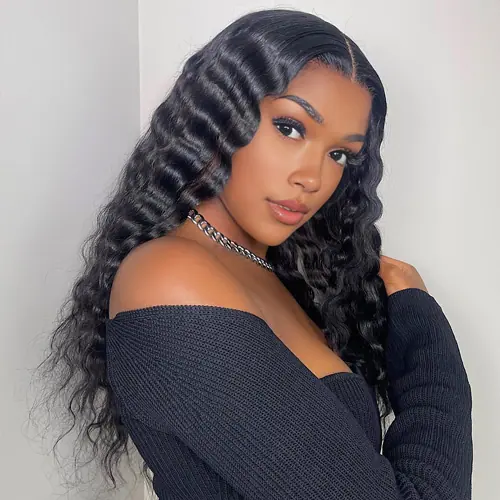
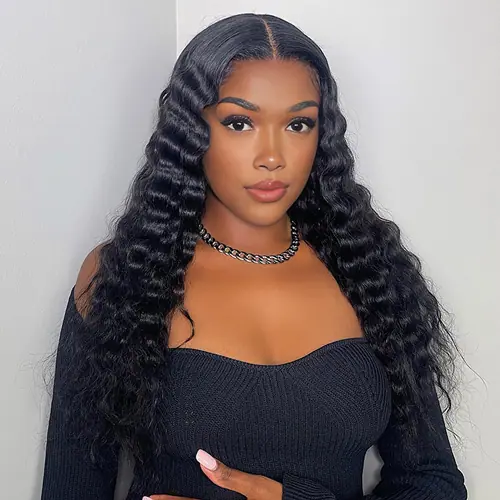
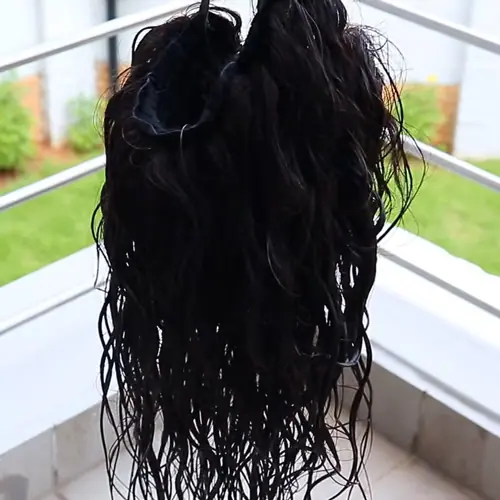
Water wave lace front wigs are a type of wig that features a lace front construction with water wave curls. The lace front allows for a seamless and natural-looking hairline, while the water wave curls mimic the appearance of natural waves. These wigs are made from high-quality synthetic or human hair and are available in various lengths, colors, and densities.
Why must you try the water wave wigs?
1. Natural and voluminous look
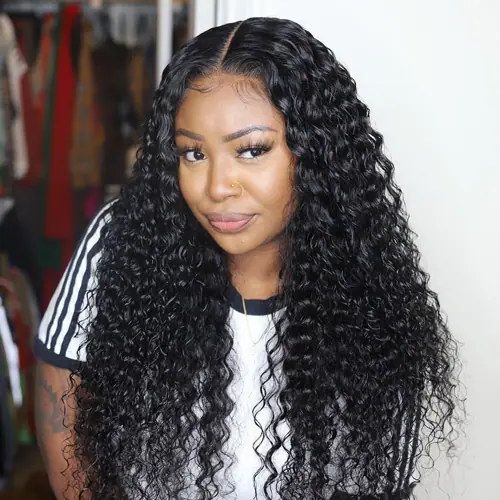
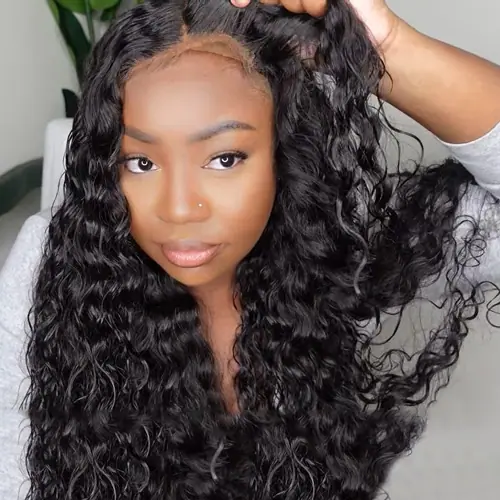
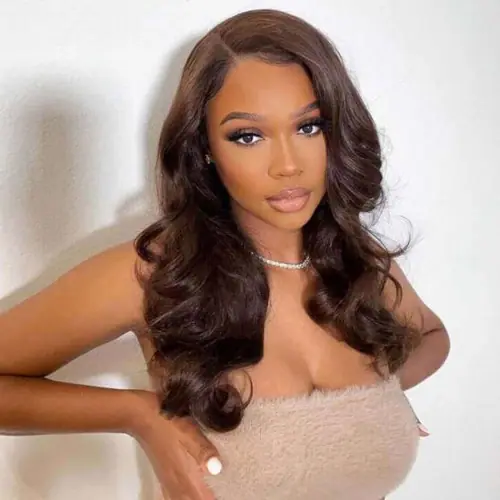
One of the main reasons why water wave lace front wigs are so popular is because of the natural and voluminous look they offer. The water wave curls create a soft and bouncy appearance that closely resembles natural waves. This hairstyle is versatile and can be worn for both casual and formal occasions, making it a perfect choice for anyone looking to enhance their overall appearance.
2. Easy to style
Water wave lace front wigs are incredibly easy to style. The curls hold their shape well and require minimal maintenance. You can simply run your fingers through the curls or use a wide-toothed comb to maintain the desired shape. Additionally, these wigs can be cut, dyed, and styled according to your preference, allowing for endless possibilities and versatility.
3. Protection for natural hair
By wearing water wave lace front wigs, you can protect your natural hair from damage caused by heat styling, chemical treatments, and environmental factors. These wigs act as a protective barrier, allowing your natural hair to grow and thrive without the risk of breakage or dryness. With proper care and maintenance, you can enjoy the benefits of a stylish hairstyle while keeping your natural hair healthy.
You can try Recool Hair water wave lace front wigs?
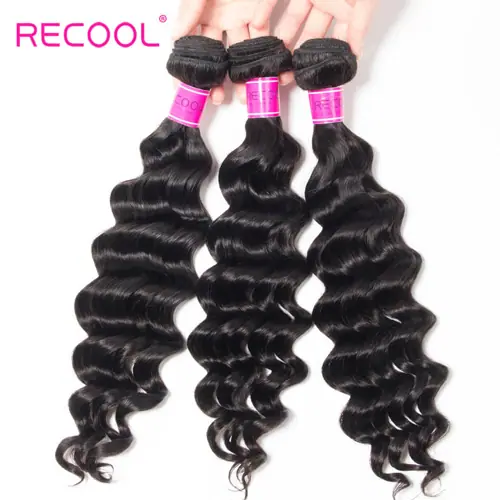
All wigs, including water wave lace front wigs, are 100% human virgin hair in Recool Hair.
Made from real human hair, these wigs blend seamlessly with your own hairline and can be styled using heat tools. They are durable and can last for years with proper care.
The realistic movement and texture of the human hair add to the natural appearance of the wig.
Additionally, human hair wigs can be customized through dyeing, cutting, and styling to achieve a personalized look.
Final thoughts
Water wave lace front wigs offer a natural, voluminous, and convenient hairstyle option for anyone looking to enhance their overall appearance. Welcome to Recool Hair to get the best quality of wigs. There is a great promotion with coupon codes you can use. All wigs are cheaper than ever. You cannot miss them, dear.
Among the various wig options available, glueless lace wigs have gained immense popularity. Offering a seamless and natural-looking hairline without the need for adhesive products, glueless lace wigs have revolutionized the way we can transform our hair effortlessly. In this comprehensive guide, we will explore the wonders of glueless lace wigs, from understanding their construction and application methods to maintenance and styling tips.
I. Fully Understand the Glueless Lace Wigs.
A. What are Glueless Lace Wigs?
Glueless lace wigs are a type of wig construction designed to provide a natural-looking hairline without the need for adhesive products such as glue or tape. These wigs are crafted using a delicate lace material that mimics the appearance of the scalp, allowing for a seamless and undetectable blend with your natural hairline. The lace is typically located at the front of the wig, extending from ear to ear, and sometimes covers the entire wig cap for added versatility in styling.
B. Types of Lace Material.
Swiss Lace: Swiss lace is known for its fine and delicate texture. It is soft, thin, and offers a high level of flexibility, which makes it comfortable to wear. Swiss lace is also highly breathable, allowing for proper airflow to the scalp.
French Lace: French lace is slightly thicker and more durable than Swiss lace. It provides a good balance between durability and natural appearance. The holes in French lace are slightly larger, making it less fragile but still effective in creating a realistic hairline.
HD Lace: High-definition (HD) lace is a newer type of lace material that offers an even more natural look. It is ultra-thin and blends seamlessly with various skin tones. HD lace is virtually undetectable when applied correctly.
C. Different Cap Construction Options.
Full Lace Wigs: Full lace wigs feature a lace cap construction that covers the entire head. The lace allows for versatile styling options, including parting the hair anywhere on the wig.
Lace Front Wigs: Lace front wigs have lace at the front hairline, extending from ear to ear. The rest of the wig cap is typically constructed with a more durable material, such as a stretchy net or monofilament. Lace front wigs provide a natural-looking hairline and are more affordable than full lace wigs.
360 Lace Wigs: 360 lace wigs combine the benefits of both full lace wigs and lace front wigs. They feature a circular lace strip around the entire perimeter of the wig, allowing for versatile styling and the option to wear the hair in a high ponytail.
D. Advantages of Glueless Lace Wigs.
Natural Appearance: Glueless lace wigs provide a realistic hairline, making them virtually undetectable when properly applied. The lace material blends seamlessly with the scalp, creating the illusion of hair growing from your own head.
Comfort and Breathability: The lace material used in glueless lace wigs is lightweight and breathable, allowing for proper ventilation to the scalp. This makes them more comfortable to wear, especially for longer durations.
Versatile Styling: With glueless lace wigs, you can style your hair in various ways, including parting it anywhere on the wig, styling in updos, and even pulling the hair back into a ponytail. The versatility of these wigs allows for creative freedom and the ability to change hairstyles effortlessly.
Easy Application and Removal: As the name suggests, glueless lace wigs eliminate the need for adhesive products. This makes the application and removal process quick and hassle-free, reducing the risk of damage to your natural hair and scalp.
Protection for Natural Hair: Glueless lace wigs can act as a protective style for your natural hair, shielding it from heat, styling products, and environmental damage. They allow your hair to grow and rest while still maintaining a stylish and put-together look.
II. Preparing for a Glueless Lace Wig.
Before you embark on your glueless lace wig journey, it’s important to make necessary preparations to ensure a seamless and comfortable experience. From choosing the right wig to preparing your natural hair for application, these steps will set the foundation for a flawless transformation.
A. Choosing the Right Wig.
Determine the Desired Style: Consider the hairstyle, length, texture, and color you want to achieve with your glueless lace wig. Whether you prefer straight, wavy, curly, or kinky hair, select a wig that aligns with your desired look.
Select the Hair Type: Glueless lace wigs are available in a variety of hair types, including human hair, synthetic hair, and blended options. Human hair offers the most natural appearance and allows for heat styling, while synthetic hair is low maintenance and comes in pre-styled options.
Consider the Wig Density: Wig density refers to the amount of hair present on the wig. Choose a density level that suits your preferences and desired volume. Higher density wigs provide a fuller look, while lower density wigs offer a more natural and lightweight feel.
B. Determining the Correct Wig Size.
Measure Your Head: Use a soft measuring tape to measure the circumference of your head, starting at the hairline and going around the back. Note down the measurement in inches or centimeters.
Check the Wig Size Chart: Compare your head circumference measurement with the wig size chart provided by the wig manufacturer. This will help you determine the appropriate wig size (small, medium, large, etc.) that will fit your head comfortably.
C. Preparing Natural Hair for Wig Application.
Cleanse and Condition: Before wearing a glueless lace wig, ensure that your natural hair and scalp are clean and conditioned. This promotes a healthy environment for your hair and helps maintain the wig’s longevity.
Moisturize and Seal: Apply a moisturizer or leave-in conditioner to your natural hair to keep it hydrated. Seal in the moisture with a light oil or natural butter to prevent dryness.
Protect Your Hairline: If you have sensitive or fragile edges, consider applying a light layer of oil or gel around your hairline to provide a protective barrier. This can help prevent friction and potential damage when wearing the wig.
D. Customization and Personalization Options.
Pre-Plucked Hairline: Some glueless lace wigs come with pre-plucked hairlines, which mimic the natural appearance of baby hairs and create a more realistic look. If your wig does not come pre-plucked, you can customize the hairline by plucking a few hairs along the edge of the wig to create a softer and more natural hairline.
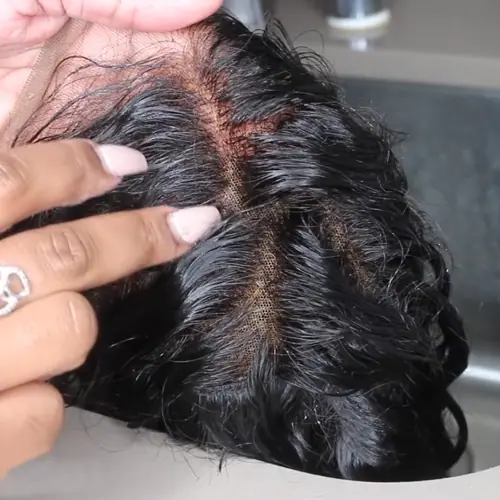
Bleaching the Knots: The knots on the lace of a wig can be bleached to make them less visible. This technique helps create a more seamless and natural-looking hairline. However, it’s important to exercise caution when bleaching knots to avoid damaging the wig.
III. Application Methods for Glueless Lace Wigs.
One of the significant advantages of glueless lace wigs is the absence of adhesive products. These wigs can be securely and comfortably worn using different application methods. Whether you prefer an elastic band, adjustable straps, or combs and clips, there is a method suitable for your needs. Let’s explore the various application methods for glueless lace wigs.
A. Elastic Band Method.
Step-by-Step Application:
a. Secure the wig cap: Wear a wig cap that matches your skin tone to create a smooth base for the wig. Ensure that your natural hair is tucked under the cap.
b. Adjust the wig cap: Position the wig cap so that it sits comfortably on your head and covers your hairline.
c. Attach the elastic band: Many glueless lace wigs come with an adjustable elastic band sewn inside the wig cap. Adjust the elastic band to fit snugly around your head, providing a secure fit.
d. Secure the wig: Place the wig on your head, aligning the front hairline with your natural hairline. Adjust the wig to ensure it fits securely and evenly around your head.
e. Secure the wig with the elastic band: Pull the elastic band over your head and adjust the tension to your comfort level. The elastic band will hold the wig in place without the need for adhesive.
B. Adjustable Straps Method.
a. Prepare the wig cap: Wear a wig cap that matches your skin tone, ensuring that your natural hair is tucked under the cap.
b. Position the wig cap: Adjust the wig cap so that it covers your hairline and fits comfortably on your head.
c. Secure the wig cap: Many glueless lace wigs have adjustable straps located at the back of the wig cap. Fasten the straps to tighten or loosen the wig according to your preference, ensuring a secure fit.
d. Place the wig on your head: Position the wig on your head, aligning the front hairline with your natural hairline.
e. Adjust the straps: Secure the wig by tightening or loosening the adjustable straps to achieve a snug fit. The straps will keep the wig in place without the need for adhesive.
C. Comb and Clip Method.
a. Prepare your natural hair: Style your natural hair in a way that creates a flat base for the wig. You can braid your hair, create cornrows, or twist it into a bun.
b. Position the wig cap: Wear a wig cap that matches your skin tone and covers your natural hair completely.
c. Attach combs and clips: Glueless lace wigs often come with built-in combs or clips along the hairline and sides. Insert the combs into your natural hair or attach the clips onto the wig cap to secure the wig in place.
d. Place the wig on your head: Align the front hairline of the wig with your natural hairline and gently place the wig on your head.
e. Adjust the combs and clips: Ensure that the combs or clips are securely fastened to your natural hair or the wig cap. This will keep the wig in place throughout the day.
D. Tips for a Secure and Comfortable Fit.
Wig Cap: Wear a wig cap to provide a smooth and even base for the wig. This helps to prevent friction and ensures a more secure fit.
Wig Adjustment: Adjust the wig straps, elastic band, combs, or clips to achieve a snug but comfortable fit. Avoid pulling the wig too tightly, as it can cause discomfort or damage to the wig or your natural hair.
Wig Positioning: Align the front hairline of the wig with your natural hairline for a seamless and natural-looking blend. Ensure that the wig is centered on your head and sits evenly.
IV. Caring for Glueless Lace Wigs.
Proper care and maintenance are essential for prolonging the lifespan and maintaining the natural beauty of your glueless lace wig. By following a regular cleaning and styling routine, storing it correctly, and protecting the hairline, you can enjoy your wig for an extended period. Let’s delve into the essential care tips for glueless lace wigs.
A. Washing and Conditioning Techniques.
Detangle: Before washing your wig, gently detangle it using a wide-toothed comb or a wig brush. Start from the ends and work your way up to minimize hair breakage.
Shampooing: Fill a basin with lukewarm water and add a small amount of wig shampoo. Submerge the wig into the water and gently swirl it around. Avoid rubbing or wringing the hair, as this can cause tangling or damage.
Rinsing: Rinse the wig thoroughly with lukewarm water to remove all the shampoo. Ensure that no residue is left in the hair.
Conditioning: Apply a wig conditioner to the hair, avoiding the lace and knots. Leave the conditioner on for a few minutes to hydrate and nourish the hair, then rinse it out with lukewarm water.
Drying: Gently pat the wig with a towel to remove excess water. Avoid rubbing or wringing the hair. Place the wig on a wig stand or a wig head to air dry naturally. Avoid using heat styling tools or blow dryers, as excessive heat can damage the hair fibers.
B. Storing the Wig Properly.
Detangling and Brushing: Before storing the wig, ensure that it is thoroughly detangled. Use a wide-toothed comb or a wig brush to gently comb through the hair, starting from the ends and working your way up.
Wig Stand or Head: Place the wig on a wig stand or a wig head to maintain its shape and prevent tangling. This helps the wig retain its style and prevents unnecessary pulling or stress on the hair fibers.
Covering: If you are storing the wig for an extended period, consider covering it with a wig net or a breathable bag to protect it from dust and dirt.
Avoid Direct Sunlight: Store the wig in a cool and dry place, away from direct sunlight. Prolonged exposure to sunlight can cause the color of the hair to fade.
C. Detangling and Styling Tips.
Detangling: To detangle the wig, start at the ends and gently work your way up, using a wide-toothed comb or a wig brush. Avoid pulling or tugging too forcefully, as this can cause shedding or damage to the hair.
Heat Styling: If your glueless lace wig is made of human hair, you can use heat styling tools such as flat irons, curling irons, or hot rollers to create different hairstyles. Remember to use a heat protectant spray before applying heat to the hair to minimize damage.
Avoid Excessive Styling: Excessive heat styling or manipulation can lead to hair damage or loss of the wig’s natural luster. Limit the use of heat styling tools and opt for alternative styling methods such as flexi-rods, braids, or bantu knots to achieve different looks.
Avoid Sleeping with the Wig: It’s recommended to remove the wig before going to bed to prevent tangling and minimize friction.
D. Protecting the Hairline and Edges.
Avoid Tension and Pulling: Be mindful of the tension and tightness when wearing your glueless lace wig, as excessive pulling or tension can strain your hairline and edges. Ensure that the wig is secured comfortably without causing discomfort or stress on your natural hair.
Use Edge Control Products: Apply a small amount of edge control gel or cream along the hairline to smooth and tame any flyaways. This helps to protect the hairline and maintain a polished look.
Take Breaks: Give your natural hair and edges a break from wearing the wig continuously. Take regular intervals without the wig to allow your hair to breathe and prevent any potential damage.
V. Troubleshooting and Common Challenges with Glueless Lace Wigs.
While glueless lace wigs offer convenience and versatility, you may encounter certain challenges during their use. Understanding how to troubleshoot common issues will help you overcome these obstacles and ensure a seamless experience with your wig. Here are some common challenges and tips for addressing them:
A. Dealing with Slippage or Shifting.
Adjust the Straps or Elastic Band: If your wig is slipping or shifting, check the adjustable straps or elastic band and tighten them to achieve a more secure fit.
Use Wig Clips: Adding additional wig clips or combs to the wig can provide extra support and prevent slippage. Insert the clips into your natural hair or attach them onto the wig cap in strategic areas for added security.
B. Addressing Itching or Irritation.
Cleanse and Moisturize the Scalp: Before wearing the wig, ensure your scalp is clean and moisturized to minimize itching. Use a gentle scalp cleanser and follow up with a lightweight moisturizer or oil.
Avoid Harsh Chemicals: Ensure that any products you use on your natural hair or scalp do not contain harsh chemicals that may cause irritation. Opt for gentle, hypoallergenic products whenever possible.
Proper Ventilation: If you experience itching or discomfort due to lack of airflow, consider using a wig cap or wig liner made of breathable materials to promote better ventilation.
C. Tackling Shedding or Tangling.
Gentle Handling: Handle the wig with care to minimize shedding and tangling. Avoid rough brushing or combing, and use a wide-toothed comb or wig brush specifically designed for wigs to detangle the hair.
Proper Storage: Store the wig on a wig stand or a wig head to maintain its shape and prevent tangling. Avoid storing it in a crowded or tangled state, as this can lead to excessive shedding.
D. Restoring the Wig’s Freshness and Luster.
Washing and Conditioning: Regularly wash and condition your wig to remove product buildup and restore its freshness. Use wig-specific shampoo and conditioner, and follow the recommended care instructions provided by the manufacturer.
Deep Conditioning Treatments: Periodically treat your wig with deep conditioning masks or treatments to nourish and revive the hair fibers. This helps to maintain its natural luster and prevent dryness.
Avoid Overstyling: Excessive heat styling or manipulation can cause the wig to lose its shine and become dull. Limit the use of heat styling tools and opt for non-heat styling methods whenever possible.
The Top 2 Glueless Lace Wig Picks You Must Consider.
The Water Wave Glueless Wig is a versatile and natural-looking wig made from high-quality human hair. It features a 4×4, 5×5, or 13×4 lace frontal, constructed with HD lace for an undetectable hairline. The water wave texture gives a soft and bouncy look, mimicking the natural waves of wet and wavy hair. With the glueless design, you can wear this wig without the need for adhesive products, providing a comfortable and secure fit. Perfect for those who desire a convenient and realistic hair transformation, the Water Wave Glueless Wig offers flexibility in styling and is available in various lengths and densities.
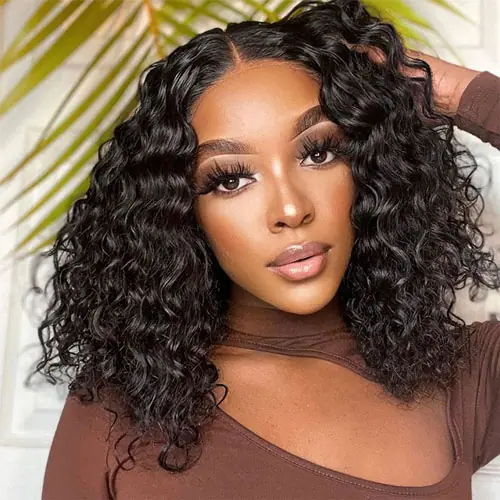
The Water Wave Glueless Bob Wig is a short and stylish wig option that offers the beauty of water wave hair texture in a bob length. Made from high-quality human hair, this wig features a glueless 4×4 or 13×4 undetectable lace front construction, providing a natural-looking hairline and easy styling versatility. The water wave pattern adds volume and movement to the hair, giving a vibrant and youthful look. With its glueless design, you can wear this wig comfortably and securely without the need for adhesive products. Whether for a casual day out or a special occasion, the Water Wave Glueless Bob Wig is a fashionable choice.
In A Nutshell.
Glueless lace wigs have become a game-changer for individuals looking to transform their hairstyles with ease and confidence. With their seamless application, natural appearance, and versatility, these wigs have gained popularity among wig enthusiasts and hairstylists alike. By following the guidelines and tips provided in this ultimate guide, you can embark on your glueless lace wig journey and experience the freedom of effortlessly changing your look. Remember, the key to maintaining a flawless and long-lasting wig is proper care, styling, and a touch of personal flair.
The world of hair color offers a vast array of possibilities, allowing you to express your unique style and personality. Whether you’re looking to enhance your natural features or make a bold statement, choosing the right hair color can make all the difference. However, with so many options available, it can be challenging to determine which shade will complement your skin tone the best. In this comprehensive guide, we will walk you through the process of choosing the perfect hair color to match your skin, taking into account various factors such as undertones, complexion, and personal preferences.
Find Your Skin Undertones.
Before delving into the selection process, it’s crucial to understand your skin undertones. Undertones are the subtle hues that lie beneath the surface of your skin, influencing how colors appear on you. There are three main undertones: warm, cool, and neutral. Identifying your undertones is a fundamental step in determining the most flattering hair colors for your complexion.
Determining Warm Undertones.
Warm undertones are characterized by hints of yellow, peach, or golden hues. To determine if you have warm undertones, observe the veins on your wrist. If they appear greenish, you likely have warm undertones. People with warm undertones generally have skin that tans easily and may have a golden or olive complexion.
Recommended Hair Colors for Warm Undertones.
If you have warm undertones, you can enhance your natural warmth by choosing hair colors that complement your complexion. Here are some recommended hair colors that work well with warm undertones:
Golden Blonde:
Golden blonde is a warm, sunny shade that beautifully enhances warm undertones. It adds radiance to your complexion and creates a sun-kissed look that complements your natural warmth.
Caramel or Honey Brown:
Caramel or honey brown shades bring out the warmth in your undertones. These rich, golden hues create depth and dimension in your hair, resulting in a beautiful and natural look.
Copper:
Copper is a vibrant and warm shade that complements warm undertones. It adds a fiery and bold touch to your hair, creating a stunning contrast against your skin and enhancing your overall complexion.
Warm Chestnut:
Warm chestnut brown is a versatile shade that complements warm undertones. It’s a deep and rich brown hue with hints of red or golden undertones, adding warmth and richness to your hair.
Strawberry Blonde:
Strawberry blonde is a delightful blend of warm blonde and red tones. This hair color creates a soft and romantic look that enhances warm undertones and complements your complexion with a touch of femininity.
Rich Chocolate Brown:
Rich chocolate brown is a warm, deep brown shade that adds richness and depth to your hair. It beautifully complements warm undertones, enhancing your overall warmth and creating a sophisticated look.
Reddish Mahogany:
Reddish mahogany is a deep, warm brown shade with red undertones. This color adds vibrancy and dimension to your hair, creating a captivating look that beautifully complements your warm undertones.
Determining Cool Undertones.
Cool undertones are characterized by hints of pink, blue, or purple hues. To identify cool undertones, examine the veins on your wrist. If they appear bluish or purple, you likely have cool undertones. People with cool undertones typically have fair, rosy, or porcelain complexions that may burn easily in the sun.
Recommended Hair Colors for Cool Undertones.
If you have cool undertones, you can enhance your complexion by choosing hair colors that complement your cool hues. Here are some recommended hair colors that work well with cool undertones:
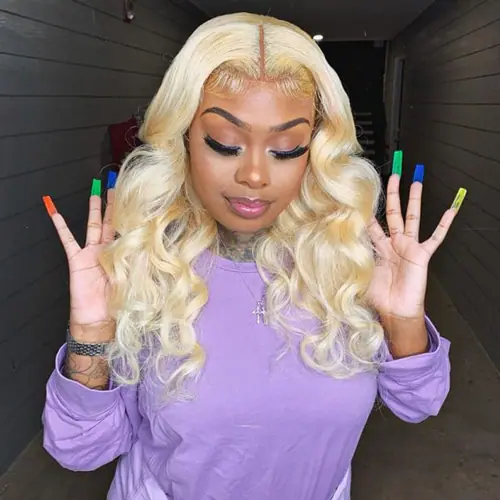
Platinum Blonde:
Platinum blonde is a cool-toned shade that beautifully complements cool undertones. Its icy, silvery tones create a striking contrast against your skin, resulting in a bold and chic look.
Cool Brown:
Cool brown shades, such as espresso or dark chocolate, work well with cool undertones. These rich, deep colors provide a beautiful contrast against your skin, adding depth and intensity to your hair.
Jet Black:
Jet black hair can create a stunning contrast against cool undertones. The deep, cool-toned black hue can make your complexion appear porcelain-like and accentuate your features.
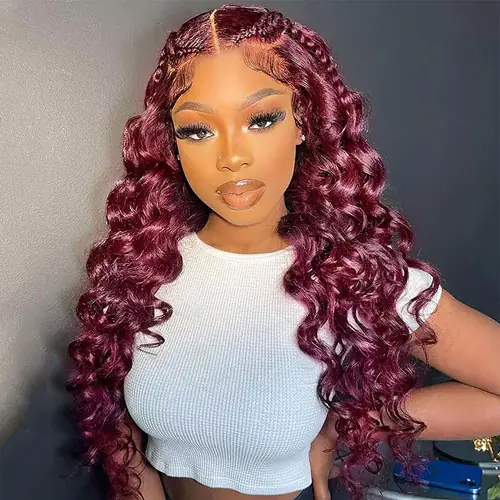
Burgundy:
Burgundy is a vibrant, cool-toned red shade that complements cool undertones. It adds a touch of drama and intensity to your hair, creating a striking look that beautifully enhances your complexion.
Silver or Gray:
Embracing your cool undertones can involve going for a stylish silver or gray hair color. These futuristic shades can be a bold and unique choice, allowing you to stand out and make a fashion-forward statement.
Determining Neutral Undertones.
Neutral undertones have a balanced mix of warm and cool tones, making it easier to pull off a wide range of hair colors. If the veins on your wrist appear blue-green or if you find it challenging to identify whether you lean warm or cool, you likely have neutral undertones. People with neutral undertones often have a versatile complexion that can adapt to various hair colors.
Recommended Hair Colors for Neutral Undertones.
If you have neutral undertones, consider yourself lucky! You can experiment with a broad spectrum of hair colors that will complement your skin beautifully. Whether you prefer warm or cool tones, the choices are endless. From golden highlights to chestnut browns, from ash blonde to rich reds, you have the freedom to explore and find the perfect hair color that matches your style and preferences. Here are some recommended hair colors that work well with neutral undertones:
Honey Blonde:
A warm, golden blonde shade with hints of honey can complement your neutral undertones beautifully. It adds warmth and radiance to your complexion without overpowering it.
Chestnut Brown:
This rich, medium brown shade with both warm and cool undertones can create a harmonious balance with your neutral complexion. It adds depth and dimension to your hair while enhancing your natural features.
Ash Blonde:
Ash blonde is a cool-toned shade that complements neutral undertones by adding a touch of sophistication. The cool, silvery hues create a striking contrast against your skin, resulting in an effortlessly chic look.
Dark Chocolate Brown:
A dark chocolate brown shade brings out the richness of your neutral undertones. It’s a versatile color that exudes elegance and looks stunning against various skin tones.
Auburn:
Auburn is a reddish-brown shade that combines warm and cool tones, making it an ideal choice for neutral undertones. It adds warmth and vibrancy to your hair, enhancing your overall look.
Platinum Blonde:
If you’re feeling daring and want to make a statement, platinum blonde can be a striking option for neutral undertones. The cool, icy tones create a dramatic contrast against your skin, resulting in a bold and edgy look.
Mahogany:
Mahogany is a rich, reddish-brown shade that complements neutral undertones beautifully. Its deep, warm hues add depth and intensity to your hair, creating a stunning visual impact.
Bottom line.
Choosing the best hair color to match your skin is an exciting process that allows you to transform your appearance and boost your confidence. Remember, the most important thing is to choose a hair color that makes you feel like the best version of yourself, as that will radiate through every aspect of your life.
Lace wigs have become increasingly popular in recent years due to their natural-looking appearance. However, one common issue with lace wigs is the visibility of knots where the hair is tied to the lace. Bleaching the knots can help to make the wig look even more realistic by reducing the visibility of these knots. In this blog post, we will discuss a quick and effective way to bleach the knots on your lace wig. Keep on reading, and you will love this blog.
What is a lace wig?
A lace wig is a type of wig that is constructed with a sheer lace base, typically at the front hairline. The lace base creates a natural-looking hairline and allows for the wig to be easily styled and parted in various ways. The hair strands are individually hand-tied to the lace, giving the wig a more realistic appearance and allowing for a natural movement of the hair.
Why choose the human hair lace wigs to bleach the knots?
Choosing human hair lace wigs to bleach the knots is preferred for several reasons:
Realistic appearance
Human hair lace wigs are made from 100% real human hair, which closely mimics the texture, shine, and movement of natural hair. When the knots on a human hair lace wig are bleached, the result is a more natural-looking scalp-like appearance, as the bleaching lightens the color of the knots to match the wearer’s scalp.
Versatility in styling
Human hair lace wigs can be styled and manipulated just like natural hair. Bleaching the knots on a lace wig allows for more versatile styling options, as the lighter knots make it easier to create different parting styles and hairline designs. This gives the wearer more freedom to achieve their desired look.
Longevity
Human hair lace wigs are known for their durability and longevity compared to synthetic wigs. When properly cared for, a human hair lace wig can last for a long time. Bleaching the knots on a human hair lace wig does not compromise its quality or lifespan, as long as the bleaching process is done correctly and with care.
Customization
Human hair lace wigs can be customized to suit the wearer’s preferences. By bleaching the knots, the wig can be tailored to match the individual’s skin tone and create a seamless blend between the wig and the scalp. This customization helps to achieve a more natural and undetectable look. It is important to note that while human hair lace wigs offer these advantages, the process of bleaching knots should be done carefully and by following proper instructions to avoid any damage to the wig.
What you will need
Before we begin, let’s gather all the necessary materials:
Lace wig
Bleaching powder
Developer (20 or 30 volumes)
Mixing bowl
Applicator brush
Plastic wrap
Gloves
Towel
Shampoo and conditioner
Step-by-Step Guide
Now that we have everything ready, let’s dive into the step-by-step process of bleaching the knots on your lace wig:
Step 1: Prepare the Bleaching Mixture
In a mixing bowl, combine the bleaching powder and developer according to the instructions on the packaging. Make sure to wear gloves during this process to protect your hands.
Step 2: Apply the Bleaching Mixture
Using an applicator brush, carefully apply the bleaching mixture onto the lace wig’s knots. Start from the front and work your way toward the back, ensuring that all the knots are evenly covered.
Step 3: Let it Process
Once the bleaching mixture is applied, cover the lace wig with plastic wrap. This will help to trap heat and speed up the bleaching process. Leave the wig to process for about 30-45 minutes, or as recommended by the bleaching product instructions.
Step 4: Check the Progress
After the recommended processing time, remove the plastic wrap and check the progress of the bleaching. If the knots are not lightened to your desired shade, you can reapply the bleaching mixture and repeat the process.
Step 5: Rinse and Wash
Once you are satisfied with the level of bleaching, thoroughly rinse the lace wig with lukewarm water to remove all the bleach residue. Follow up with a shampoo and conditioner specifically designed for wigs to keep the hair soft and manageable.
Step 6: Dry and Style
Gently pat the wig dry with a towel and allow it to air dry completely. Once dry, you can style the wig as desired using heat styling tools or by simply combing it. When using heat setting tools, pay attention to thermal protection, such as using thermal protection liquid and using the lowest power, so as to protect your wig.
Final thoughts
Bleaching the knots on your lace wig can significantly enhance its natural appearance. By following the step-by-step guide mentioned above, you can achieve a realistic and seamless look. Remember to always take proper precautions and follow the instructions provided by the bleaching product manufacturer. With a little bit of effort, you can enjoy a beautifully bleached lace wig with minimal visible knots.
Recool Hair has various types of high-quality human hair extensions. They are all human hair in 10A quality. You can get them at affordable prices in Recool Hair.
Peruvian hair refers to a type of hair extension that is sourced from the native people of Peru. It is known for its high quality and versatility, making it popular among women all over the world. In this blog post, we will explore what Peruvian hair is, its characteristics, and why it is in such high demand.
What is Peruvian hair?
Peruvian hair is sourced from the indigenous people of Peru, who are known for their thick and lustrous hair. This hair type is highly sought after due to its natural beauty and durability. The hair is collected from donors who maintain healthy hair through a strict hair care routine.
Characteristics of Peruvian hair
Peruvian hair is known for its density, thickness, and natural shine. It is usually straight or slightly wavy, making it easy to style and maintain. The hair is also highly durable and can withstand heat styling, chemical treatments, and frequent washing without losing its quality.
Why Peruvian hair is popular?
1. Natural Look
Peruvian hair has a texture that closely resembles that of African-American hair, making it blend seamlessly with natural hair. This gives a more natural and realistic look when the extensions are applied.
2. Versatility
Peruvian hair can be easily styled and manipulated to achieve various looks. It can be straightened, curled, or dyed without causing significant damage to the hair.
3. Durability
Peruvian hair is known for its longevity and ability to withstand the rigors of daily styling. With proper care, Peruvian hair extensions can last up to a year or longer.
Low Maintenance: Due to its natural thickness and shine, Peruvian hair requires minimal maintenance. It does not tangle easily and can be easily managed with a wide-toothed comb or brush.
4. Availability
Peruvian hair is readily available in the market, making it accessible to a wide range of consumers. It can be purchased online or from beauty supply stores.
5. Softness
Peruvian hair is known for its soft and silky texture. It feels incredibly smooth to the touch, giving a luxurious feel when worn as extensions. The softness of the hair enhances the overall comfort and natural look.
How to Care for Peruvian Hair?
1. Washing
Use a gentle shampoo and conditioner to wash the hair extensions. Avoid rubbing or scrubbing vigorously as it can cause tangling or damage to the hair.
2. Conditioning
Apply a deep conditioning treatment to restore moisture to the hair. Leave it on for a few minutes before rinsing thoroughly.
3. Styling
Use heat-protectant products before using heat-styling tools such as straighteners or curling irons. Avoid excessive heat as it can damage the hair extensions.
4. Storage
When not in use, store the hair extensions in a cool and dry place, preferably in a satin or silk bag to prevent tangling and frizz.
5. Brushing
Use a wide-toothed comb or a brush with soft bristles to detangle the hair gently. Start from the ends and work your way up to avoid pulling or causing breakage.
6. Avoid excessive heat
While Peruvian hair can withstand heat styling, excessive heat can still cause damage over time. Use heat styling tools at a moderate temperature and limit the frequency of heat styling to prevent dryness and breakage.
7. Avoid harsh chemicals
Minimize the use of harsh chemicals such as bleach or strong hair dyes on your Peruvian hair extensions. These chemicals can strip the hair of its natural moisture and weaken the hair shaft, leading to breakage and loss of quality.
Final thoughts
Peruvian hair is a high-quality hair extension that offers a natural look, versatility, and durability. With proper care, it can last for a long time, making ita popular choice among women looking to enhance their hair. If you want a Peruvian hair extension, you can come to Recool Hair and get the best quality. You can choose the wigs or hair weaves with bundles freely.
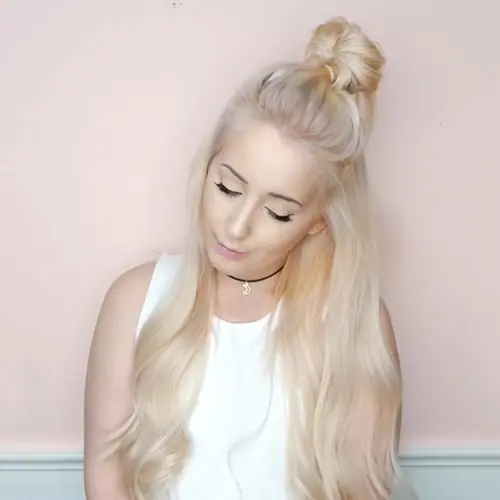
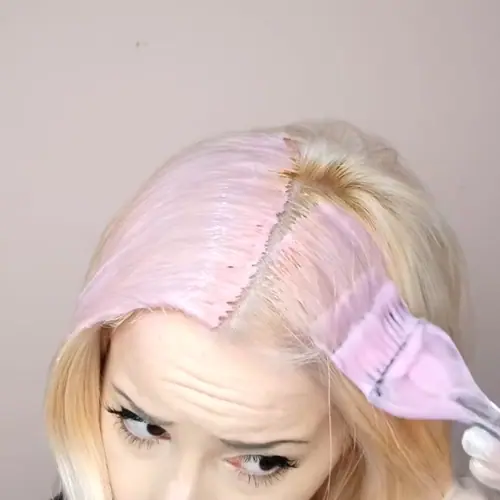
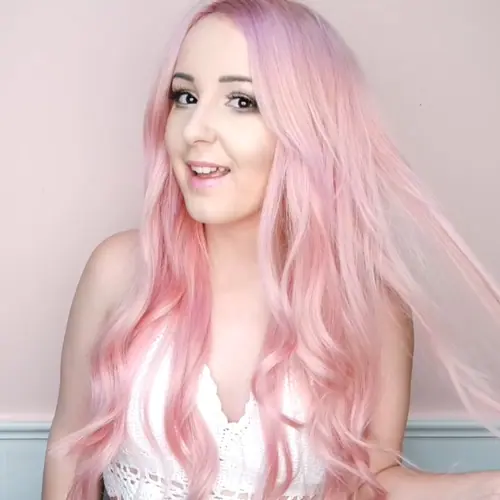
Blonde hair has always been a canvas for creative hair color transformations, and one of the trendiest options is the pastel pink shade. This whimsical and delicate color can give your blonde hair a fresh and playful twist. If you’re looking to embark on this beautiful hair journey, this comprehensive guide will walk you through the process of dyeing your blonde hair to a stunning pastel pink color. From preparation to aftercare, we’ve got you covered!
Preparing for the Dyeing Process:
Before diving into the exciting world of pastel pink hair, it’s essential to prepare properly. Consider the following steps:
a. Assess your hair’s condition:
Evaluate your hair’s health and assess any existing damage. If your hair is severely damaged or over-processed, it’s recommended to consult with a professional stylist to avoid further harm.
b. Choose the right shade of pastel pink:
Pastel pink encompasses a broad range of shades, from pale baby pink to vibrant rose gold. Consider your skin tone and personal preferences to select a shade that complements you best.
c. Gather the necessary tools:
Ensure you have all the tools required for the dyeing process, including hair dye, developer, mixing bowl, tinting brush, gloves, clips, and a wide-toothed comb.
Lightening your Blonde Hair:
Achieving a vibrant pastel pink color on blonde hair requires a lightening process, as the pigment needs a light base to show up properly. Follow these steps carefully:
a. Perform a strand test:
Test the lightening product on a small section of hair to determine the time required to achieve the desired lightness. This will help you avoid potential hair damage or uneven results.
b. Choose the appropriate lightening product:
Opt for a hair bleach or lightening powder that is specifically formulated for use on the scalp. Follow the manufacturer’s instructions and mix the product with the developer as directed.
c. Apply the lightening product:
Divide your hair into manageable sections and apply the lightening product evenly, starting from the ends and working your way up to the roots. Use a wide-toothed comb to distribute the product evenly.
d. Monitor the lightening process:
Keep a close eye on your hair during the lightening process, as the duration will vary depending on your starting color and desired lightness. Avoid over-processing, which can lead to hair damage.
e. Rinse and condition:
Once you’ve reached the desired lightness, rinse your hair thoroughly with lukewarm water. Apply a deep conditioning treatment to restore moisture and nourishment to your strands.
Choosing and Applying the Pastel Pink Hair Dye:
Now that your hair is beautifully lightened, it’s time to add the pastel pink color. Follow these steps to achieve a flawless result:
a. Select a high-quality pastel pink dye:
Look for a reputable brand that offers a wide range of pastel pink shades. Read reviews and check for any additional information provided by the manufacturer.
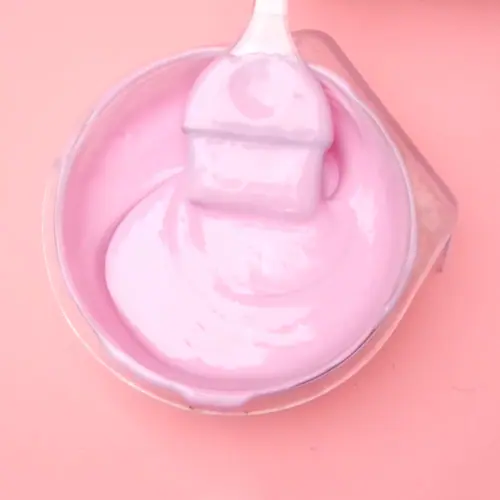
b. Mix the dye:
Follow the instructions provided with your chosen hair dye to prepare the mixture. Most pastel pink dyes require mixing with a developer or conditioner to achieve the desired shade.
c. Apply the dye:
Section your hair and start applying the dye from the roots to the ends, ensuring even distribution. Use a tinting brush or gloved hands, depending on your preference. For a more intense color, leave the dye on for the recommended time.
d. Rinse and condition:
Once the dyeing time is complete, rinse your hair thoroughly with cool water until the water runs clear. Apply a color-safe conditioner to lock in moisture and enhance the vibrancy of your new pastel pink color.
Maintaining and Caring for Pastel Pink Hair:
To keep your pastel pink hair looking fresh and vibrant, it’s crucial to adopt a proper hair care routine:
a. Use sulfate-free and color-safe products:
Opt for shampoos, conditioners, and styling products specifically formulated for colored hair. Sulfates can strip away the color and leave your hair looking dull.
b. Wash your hair less frequently:
Over-washing can cause the color to fade faster. Try to extend the time between washes and use dry shampoo to freshen up your hair in between.
c. Cold water rinses:
When rinsing your hair, use cool water instead of hot water. Cold water helps seal the cuticle, locking in the color and enhancing its longevity.
d. Protect your hair from heat and the sun:
Heat styling tools and exposure to the sun can fade your pastel pink color. Apply a heat protectant spray before styling and wear a hat or use a UV protectant spray when spending time outdoors.
e. Regular touch-ups:
Pastel pink colors tend to fade over time. To maintain the vibrancy, schedule regular touch-up sessions to keep your hair looking fresh and flawless.
When I dye my hair what should I notice?
When dyeing your hair, there are several important things to notice and pay attention to in order to achieve the desired results and ensure the health of your hair. Here are some key aspects to consider:
1. Read and Follow Instructions:
Carefully read the instructions provided with the hair dye product you are using. Follow the manufacturer’s guidelines regarding mixing ratios, application techniques, and processing times.
2. Patch Test:
Before applying the dye to your entire head, perform a patch test on a small section of hair or on an inconspicuous area of your scalp. This will help you identify any potential allergic reactions or adverse effects before proceeding with the full application.
3. Color Expectations:
Keep in mind that the final color may vary depending on your starting hair color, hair condition, and the specific brand and shade of dye you choose. Blonde hair tends to absorb color more easily, but the result can still be influenced by these factors.
4. Even Application:
Ensure that the dye is evenly distributed throughout your hair for a uniform color result. Use a tinting brush or your gloved hands to apply the dye from roots to ends, making sure to saturate each section thoroughly.
5. Processing and Development:
During the processing time, keep an eye on the color development. This is especially important for pastel shades, as they can appear different during the development process. If necessary, refer to the recommended development time for the specific shade you are using.
6. Rinse Thoroughly:
Once the processing time is complete, rinse your hair with cool water until the water runs clear. Make sure to remove all excess dye from your hair to avoid staining clothes or surfaces later on.
7. Condition and Moisturize:
After rinsing out the dye, apply the recommended conditioner or a deep conditioning treatment to replenish moisture and nourish your hair. This step is crucial for maintaining healthy hair and enhancing the longevity of your color.
Summary up:
Dyeing your blonde hair to a pastel pink color is an exciting journey that can transform your look and add a touch of whimsy. By following the steps outlined in this comprehensive guide, you’ll be well-prepared to achieve a stunning and long-lasting pastel pink hue. Remember to prioritize hair health, take necessary precautions during the lightening process, and maintain your new color with proper care and maintenance. Embrace the beauty of pastel pink and enjoy your captivating new look!
Welcome to this blog post where we will guide you through the process of doing a quick Malaysian straight weave installation with your leave-out hair. This installation method is perfect for those who want to achieve a natural look while wearing a weave. We will provide detailed instructions and tips to help you achieve the best results.
What is a Malaysian straight weave?
A Malaysian straight weave refers to a type of hair extension made from human hair that has a straight texture. It is popular among those who desire a sleek and smooth hairstyle. The term “Malaysian” is used to indicate the origin of the hair, suggesting that it is sourced from Malaysia.
This type of weave is known for its high quality and natural appearance, which allows it to blend seamlessly with the wearer’s hair. It can be attached using various methods, such as sewing, bonding, or clipping, depending on personal preference and the hairstylist’s recommendation.
Overall, a Malaysian straight weave provides versatility and the opportunity to achieve a straight and voluminous hairstyle.
Materials needed for the installation
Make sure you have the following resources available before we start:
1. Malaysian straight hair weave
Choose a high-quality hair weave that matches your desired color and texture. Malaysian straight hair is known for its silky and smooth texture, making it a popular choice for many.
2. Weaving thread
Opt for a strong and durable weaving thread that matches the color of your hair or weave. This thread will be used to secure the weave onto your braided hair.
3. Weaving needle
Use a weaving needle specifically designed for hair extensions. This needle will make it easier to sew in the weave.
4. Hair scissors
Have a pair of sharp hair scissors on hand to trim any excess thread or weave.
5. Wig cap
A wig cap will help secure your natural hair and create a smooth surface for the weave. Choose a wig cap that matches your skin tone for a more natural look.
6. Hair glue or adhesive
If you prefer to use hair glue or adhesive to secure the weave, make sure to choose a high-quality and skin-friendly product. Otherwise, the bad-quality adhesive will damage your hairline and hurt your skin.
7. Rat tail comb
A rat tail comb will come in handy for parting your hair and creating neat sections.
8. Flat iron or hair straightener
You will need a flat iron or hair straightener to blend your natural hair with the weave for a seamless look.
9. Hair moisturizer or oil
To keep your hair and weave moisturized and nourished, have a hair moisturizer or oil on hand.
Step-by-Step guide
Step 1: Prepare your hair
Start by preparing your natural hair. Wash and condition it thoroughly using your preferred hair care products. Make sure to detangle your hair gently to avoid any breakage. After washing, blow dry or air dry your hair until it is completely dry.
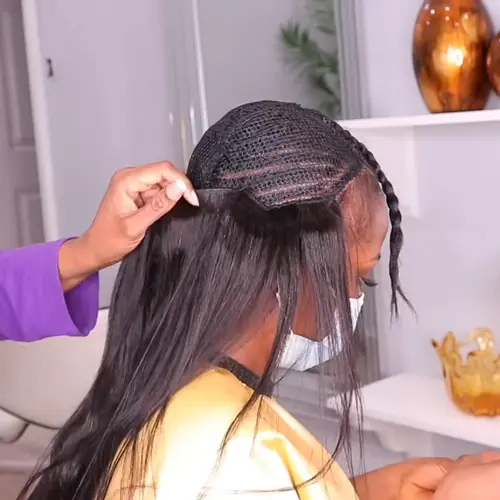
Step 2: Braid your hair
Next, section off your hair into small, tight braids. These braids will serve as the foundation for your weave. Use a rat tail comb to create neat and even sections. Secure each braid with a rubber band or hair clip to keep it in place.
Step 3: Put on the wig cap
Put on a wig cap to help secure your natural hair and create a smooth surface for the weave. Make sure the wig cap is tightly fitted to your head and covers all your braids.
Step 4: Measure and cut the weave
Measure the length of the track of your weave against your head. Cut the weave accordingly, leaving a small piece of track at the end to ensure it stays in place. Use hair scissors to cut the weave, making sure to have clean and straight edges.
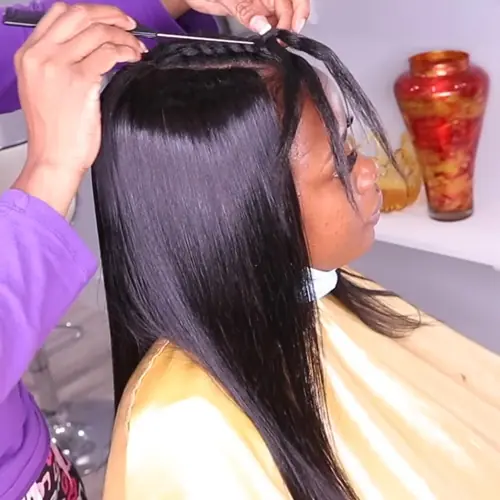
Step 5: Sew in the weave
Using the weaving needle and thread, sew the weave onto your braided hair. Start from the back of your head and work your way up, making sure to secure the tracks tightly. Take small stitches to ensure the weave is securely attached. Repeat this process until you have sewn in all the tracks.
Step 6: Blend your natural hair
Now it’s time to blend your natural hair with the weave. Take small sections of your leave-out hair and use a flat iron or hair straightener to match the texture of the weave. This will create a seamless blend between your natural hair and the weave. Make sure to apply heat protectant spray before straightening your hair to minimize damage.
Step 7: Style and finish
Once your natural hair is blended with the weave, style it as desired. You can curl, straighten, or leave it as it is. Experiment with different hairstyles to find the one that suits you best. Apply a hair moisturizer or oil to shine and nourish your hair. Remember to take care of your hair and the weave to ensure longevity and maintain its natural look.
Final thoughts
By following these step-by-step instructions, you can achieve a quick and flawless Malaysian straight weave installation with your leave-out hair. Take your time and be patient during the process to ensure the best results.
Remember to maintain proper hair care and keep your weave and natural hair moisturized to prolong its lifespan. Enjoy your new hairstyle and embrace the versatility that a weave can offer!
Recool Hair is a very nice hair shop for high-quality human hair extensions, including various types of hair weaves, bundles, wigs, etc. If you have any questions, you can contact us freely.
Brazilian hair is renowned for its lustrous appearance, soft texture, and versatility. However, to maintain its natural beauty and prolong its lifespan, proper care and maintenance are crucial. One essential aspect of hair care is washing.
I. Overview of Brazilian Hair:
Brazilian hair refers to human hair extensions or wigs that are sourced from individuals of Brazilian descent. It has gained immense popularity in the beauty industry due to its exceptional quality and versatility.
Brazilian hair is highly regarded for its natural thickness, lustrous shine, and soft texture. It blends seamlessly with various hair types, making it a popular choice for women looking to add length, volume.
II. Preparing for the Hair Washing Process.
2.1 Gathering the Required Materials:
Before washing Brazilian hair, it is essential to gather the necessary materials to ensure a smooth and effective washing process. Here are the materials you will need:
Shampoo: Choose a mild, sulfate-free shampoo specifically formulated for human hair extensions or wigs. Look for products that are nourishing and moisturizing to maintain the hair’s natural shine and softness.
Conditioner: Opt for a hydrating conditioner that helps to replenish moisture and nourish the hair. Look for products that are suitable for use on human hair extensions or wigs.
Wide-toothed Comb: Use a wide-toothed comb to detangle the hair before washing. This helps prevent breakage and tangling during the washing process.
Towel: Have a soft, microfiber towel on hand for drying the hair after washing. Microfiber towels are gentle on the hair and help to minimize frizz.
Spray Bottle: Fill a spray bottle with water to lightly mist the hair during detangling and styling.
2.2 Detangling the Hair:
Before washing Brazilian hair, it is crucial to detangle it gently to minimize breakage and ensure a smooth washing process. Here’s how to detangle the hair effectively:
Start by holding the hair at the weft or base and gently comb through the ends using a wide-toothed comb. Work your way up towards the roots, gradually removing any knots or tangles.
Take your time and be patient while detangling to avoid pulling or damaging the hair.
Once the hair is detangled, divide it into manageable sections using hair clips or bands. This will make the washing process more convenient and ensure that every part of the hair is thoroughly cleaned.
2.3 Choosing the Right Shampoo and Conditioner:
Selecting the appropriate shampoo and conditioner is essential for maintaining the quality and longevity of Brazilian hair. Consider the following tips when choosing these hair care products:
Look for sulfate-free formulas: Sulfates can strip the hair of its natural oils and moisture, leading to dryness and dullness. Opt for sulfate-free shampoos that are gentle and won’t cause unnecessary damage to the hair.
Moisturizing properties: Brazilian hair, like natural hair, thrives on moisture. Choose shampoos and conditioners that provide hydration and nourishment to keep the hair soft, manageable, and vibrant.
III. Step-by-Step Guide to Washing Brazilian Hair.
3.1 Wetting the Hair:
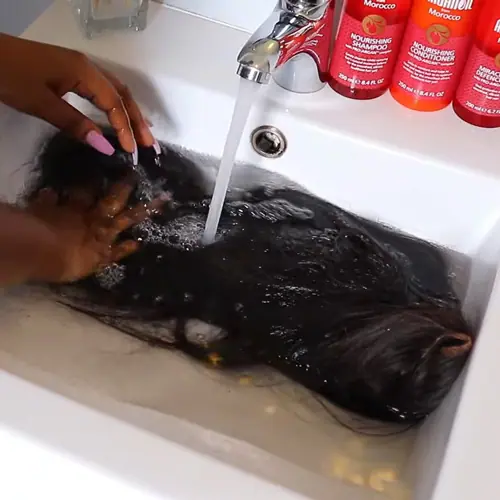
Before applying shampoo, wet the Brazilian hair thoroughly. Follow these steps for proper wetting:
– Fill a basin or sink with lukewarm water. Lukewarm water helps to open the hair cuticles and allows for effective cleansing.
– Hold the Brazilian hair by the weft or base and gently submerge it into the water. Avoid excessive rubbing or agitating the hair to prevent tangling.
– Use your fingers to gently comb through the hair while it is submerged to ensure that all strands are evenly wet. Be gentle to avoid unnecessary tangling or breakage.
3.2 Applying Shampoo:
Now that the hair is wet, it’s time to apply shampoo. Follow these steps for optimal results:
– Dispense a small amount of shampoo into your palm. The amount needed will depend on the length and thickness of the hair.
– Gently rub your palms together to distribute the shampoo evenly.
– As you massage the scalp, work the shampoo down the length of the hair, being careful not to tangle or roughen the strands.
– Avoid excessive scrubbing or pulling, as this can cause tangling or damage to the hair.
3.3 Gently Massaging the Scalp and Hair:
While applying shampoo, take the opportunity to provide a soothing and beneficial scalp massage. Follow these steps:
– Use the pads of your fingers, not your nails, to gently massage the scalp in circular motions. This helps to remove any buildup or impurities from the scalp and promotes a healthy scalp environment.
– Extend the massage to the hair strands by running your fingers through the hair from root to tip. This ensures that the shampoo is evenly distributed and helps to cleanse the hair thoroughly.
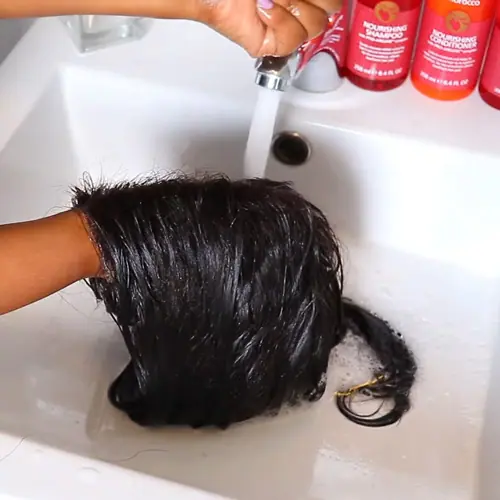
3.4 Rinsing the Shampoo:
Proper rinsing is crucial to remove all traces of shampoo from the hair. Follow these steps for effective rinsing:
– Hold the Brazilian hair by the weft or base and carefully rinse it under lukewarm running water. Allow the water to flow in the same direction as the hair to prevent tangling.
– Gently squeeze the hair to encourage the shampoo to be rinsed out completely. Continue rinsing until the water runs clear and there are no more suds or residue.
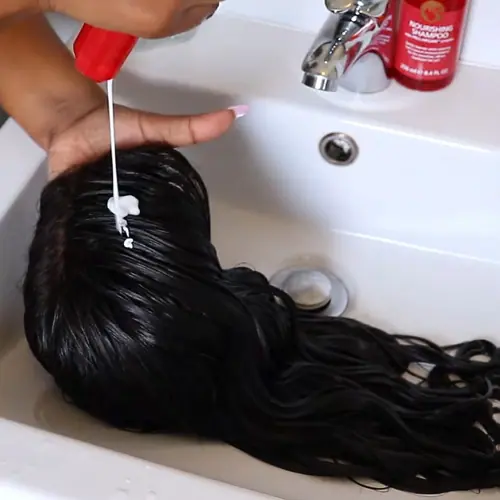
3.5 Applying Conditioner:
After rinsing the shampoo, it’s time to apply conditioner to nourish and hydrate the hair. Follow these steps for optimal conditioning:
– Dispense a generous amount of conditioner into your palm. The amount needed will depend on the length and thickness of the hair.
– Rub your palms together to distribute the conditioner evenly.
– Apply the conditioner to the mid-lengths and ends of the hair. Avoid applying conditioner directly to the scalp, as it can weigh down the hair or cause greasiness.
3.6 Detangling the Hair:
After applying conditioner, it’s important to detangle the hair gently. Follow these steps to minimize breakage:
– Starting from the ends, use a wide-toothed comb or your fingers to gently remove any tangles or knots. Work your way up towards the roots, being patient and gentle to avoid causing damage.
– If you encounter stubborn tangles, apply more conditioner or use a detangling spray to help ease the process.
– Take your time and be gentle when detangling to prevent unnecessary breakage and maintain the hair’s integrity.
3.7 Rinsing the Conditioner:
Thoroughly rinsing the conditioner is essential to prevent product buildup and maintain the hair’s softness. Follow these steps for effective rinsing:
– Hold the Brazilian hair by the weft or base and rinse it under lukewarm running water. Again, allow the water to flow in the same direction as the hair to prevent tangling.
– Gently squeeze the hair to ensure that all conditioner is rinsed out completely. Continue rinsing until the water runs clear and there are no more traces of conditioner.
– Take extra care to rinse the hair thoroughly, ensuring that no residue remains.
– Once the hair is free of conditioner, gently squeeze out any excess water using your hands.
IV. Drying and Styling Brazilian Hair.
4.1 Towel Drying:
After washing Brazilian hair, it’s important to remove excess water before moving on to the drying and styling process. Follow these steps for towel drying:
– Take a soft, microfiber towel and gently wrap it around the hair. Gently press the towel against the hair to absorb the excess water. Avoid rubbing or vigorously towel-drying, as this can cause frizz and damage the hair.
– Continue blotting the hair with the towel until it feels damp but not dripping wet. Be gentle and patient during this process to minimize frizz and maintain the hair’s natural texture.
4.2 Air Drying:
Air drying is a gentle and natural way to dry Brazilian hair, allowing it to maintain its natural texture and minimize heat damage. Follow these steps for air drying:
– Once the hair is towel-dried, allow it to air dry naturally. Avoid using a hairdryer or excessive heat during this process.
– To encourage even drying and minimize tangling, gently finger comb or use a wide-toothed comb to detangle the hair while it is damp.
– If desired, you can apply a leave-in conditioner or a hair serum to provide additional moisture and enhance the hair’s natural shine.
– Allow the hair to air dry completely. This process may take several hours or overnight, depending on the hair’s thickness and length.
4.3 Blow Drying:
If you prefer to use a blow dryer for faster drying, follow these steps to minimize heat damage:
– Set your blow dryer to a low or medium heat setting. High heat can damage the hair and cause frizz.
– Apply a heat protectant spray or serum to the hair before blow drying. This helps to minimize heat damage and protect the hair from excessive drying.
– Divide the hair into sections using hair clips or bands for easier styling. Start with the lower sections and work your way up.
– Move the blow dryer continuously to avoid concentrating heat in one area for too long.
– Once the hair is dry, you can use a cool shot button on the blow dryer to set the style and add extra shine.
4.4 Styling Tips:
When styling Brazilian hair, it’s important to use heat styling tools wisely and minimize excessive manipulation. Here are some tips:
– Use heat styling tools, such as flat irons or curling irons, at a low to medium heat setting to prevent damage to the hair.
– Apply a heat protectant spray or serum before using any heat styling tools. This creates a barrier between the hair and the heat, minimizing damage.
– Avoid using heat styling tools on wet or damp hair, as this can cause the hair to become brittle and prone to breakage.
– Limit the use of styling products that contain alcohol or harsh chemicals, as they can dry out the hair and cause damage over time.
– Avoid excessive brushing or combing, especially when the hair is dry, as this can lead to breakage and frizz.
Summary up.
Remember, caring for Brazilian hair is an ongoing process that requires patience and a commitment to providing it with the care it deserves. With proper care, your Brazilian hair will continue to impress with its natural beauty and versatility.