7 Key Factors for Choosing Your Auto Body Repair Shop

We all know that jarring crunch. That gnarly, gut-punching noise of metal hitting metal. It might have been just a gentle tap from another car in the parking lot or maybe a more serious scrape with a too-tight street corner. Either way, it’s a pain. A pain in your car’s body, and now, a pain in yours. But learning about extreme auto repair can help you in many ways.


But here’s a silver lining for you. That dent, that scratch, or that “I’m not sure what that used to be” can be fixed. We’re living in a glorious age of extreme auto repair. Technicians are like the surgeons of the vehicular world, able to mend and mold your car back to its pristine state. Sounds fantastic, and it certainly can be, if you pick the right auto body repair shop.  You can also visit us here: “TM Chiptuning“, for more information.


Picking the wrong one? Now that can lead to a world of frustration, empty wallets, and a car that still looks like it went twelve rounds with a rogue shopping cart. No one wants that.


So, how do you make sure you’re handing your precious vehicle to the right professionals? By knowing what to look for and asking the right questions. In this article, we’ll walk you through the seven key things you need to keep in mind when selecting an auto body repair shop.


So, buckle up, and let’s navigate this road together. Your car (and your peace of mind) will thank you for it.


1. Qualification and Training


So, you’ve had your mishap, and you’ve decided that a roll of duct tape just won’t cut it this time. You need professionals. But how do you know that the team you’ve found are really the “car whisperers” they claim to be?


When it comes to extreme auto repair, qualification and training are what you should look for. You wouldn’t want a doctor who got his medical degree from a cereal box, right? The same goes for your car. Look for technicians who have been properly trained and certified in extreme auto repair. Associations like ASE (Automotive Service Excellence) in the US provide certification for technicians that meet certain standards of training and experience.


2. Recommendations and Reviews


Remember that time you bought the “world’s best” ice cream maker, only to find out it couldn’t even churn out a decent vanilla? Yep, we’ve all been there. Online shopping, right? When it comes to choosing an auto body repair shop, you want to avoid that kind of disappointment.


Enter the power of recommendations and reviews. Talk to your friends, family, and co-workers about their experiences. Hit the online review sites. Take a look at the shop’s Google, Yelp, and Facebook reviews. Check out the star ratings and read through some of the comments. Did the shop communicate well? Were there any surprise costs? Was the work completed on time?


But remember, you’re not just looking for 5-star reviews. You’re looking for real experiences from real people. If all you see are glowing reviews with little detail, be skeptical.


Let’s consider our friend Alice. Alice was searching for a place to fix her beloved sports car after a slight “miscalculation” with her garage door. She found an auto body shop nearby with a sleek website and amazing before-and-after photos. But Alice was smart. She checked the reviews. While there were many 5-star ratings, she noticed several 1 and 2-star reviews mentioning poor communication and surprise costs. Alice decided to go with a different shop with more balanced and consistent feedback. Alice didn’t get any unpleasant surprises.


3. Warranty Offerings


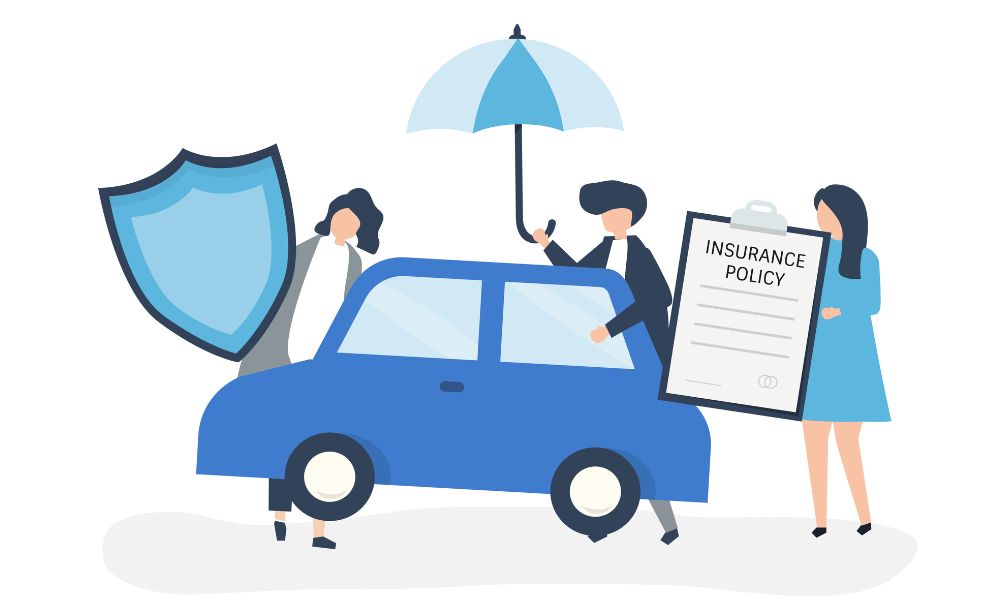
A warranty is like that umbrella you stashed in the trunk of your car. You might not think about it much on sunny days, but when the rain starts pouring, you’re more than glad you have it. The same goes for extreme auto repair.


When choosing an auto body repair shop, pay close attention to their warranty offerings. A good shop stands behind its work, and a warranty is a clear sign of that commitment. This can be especially important for more extensive and complex jobs, like extreme auto repair.


Picture our friend Steve. He decided to modify his truck for off-roading adventures. Let’s just say the adventures were a bit too “adventurous” for his truck. Steve needed serious repairs. When looking for a repair shop, he made sure to choose one that offered a comprehensive warranty. After a few weeks of repairs, his truck was back on (and off) the road. But not too long after, a problem cropped up. Thanks to the warranty, Steve was able to get it fixed without having to break the bank.


4. Certifications


While you’re checking out a repair shop, take a look around. Do you see any certifications on the wall? Or perhaps listed on their website? Certifications from manufacturers or industry organizations can tell you a lot about a shop’s expertise and commitment to staying up-to-date with the latest technologies and techniques.


Think about our friend Lucy. She’s the proud owner of a shiny, high-end European car. After an unfortunate meeting with a particularly pothole-ridden road, her car needed some work. Lucy didn’t just want anyone working on her prized vehicle. She sought out a repair shop with specific certifications from her car’s manufacturer. That way, she knew the technicians were well-trained in dealing with her car’s make and model. And wouldn’t you know it, her car came out looking just as gorgeous as before.


Remember, not all certifications are created equal, so it’s worth doing a bit of research to understand what each one means. In our next section, we’re going to touch on something you may not have considered – location and overhead. It’s more important than you might think, so stick around.


5. Location and Overhead


Let’s face it, we all love convenience. That’s why we get our coffee from that drive-through around the corner, even though the stuff at the coffee shop a few blocks down is way better. But when it comes to your auto body repairs, you might want to rethink your convenience-first strategy.


Believe it or not, the location of the shop can impact the cost of your repairs. A shop in a swanky, high-rent district may have higher rates just to cover their overheads. So, that little shop on the corner of “Not-So-Fancy Lane” might be able to do just as good a job, for less.


Picture our friend, Dan. Dan had a nasty fender bender and needed some repairs. The flashy repair shop downtown quoted him an eye-watering price. But Dan did his research. He found a smaller, family-owned shop just outside of town. They did fantastic work, and Dan saved enough to take a small vacation.


6. Transparency in Estimates and Billing

Extreme Auto Repair Shop Selection

Ever had that sinking feeling when you get a bill that’s higher than you expected? Maybe it was that dinner at the fancy restaurant where you didn’t quite understand all the fancy names (or the fancy prices). Well, when it comes to auto body repair, you want to avoid those “Oh, what’s this charge?” surprises.


That’s where transparency in estimates and billing comes in. A reputable shop should be able to give you a clear, itemized estimate for the work they plan to do, including parts, labor, and any other charges. Don’t be afraid to ask questions. After all, it’s your money.


7. Services Offered


When it comes to choosing an auto body repair shop, it’s important to consider the range of services they offer. While the immediate concern may be fixing visible damage, a reputable shop should be equipped to handle a variety of services, ensuring comprehensive care for your vehicle.


Look for a shop that goes beyond simple dent and scratch repairs. Consider additional services such as frame repair, paint matching, paintless dent removal, wheel alignment, windshield replacement, bumper repair, mechanical repairs, and more. Having a shop that can address various needs demonstrates their expertise and ability to deliver high-quality results.


By choosing a shop with a wide range of services, you can have all your car’s needs taken care of under one roof. This saves you time and effort in seeking multiple shops for different repairs or modifications.


Additionally, stay updated on advancements in the industry. Some shops may embrace innovative technologies and techniques that enhance the repair process. For instance, they might offer paintless dent removal, a method that removes dents without the need for repainting, preserving your vehicle’s original factory finish. Such advancements can provide efficient and cost-effective solutions.


When researching shops, check their websites or call them directly to inquire about the services they offer. A shop that can accommodate your specific needs and requirements ensures a more convenient and satisfying experience.


Conclusion


Choosing the right auto body repair shop is not a decision to take lightly. By keeping these seven key factors in mind; qualification and training, recommendations and reviews, warranty offerings, certifications, location and overhead, transparency in estimates and billing, and services offered, you can ensure that your car receives the care it deserves.


Don’t be afraid to do your research, ask questions, and compare your options. Your car is an investment, and finding the right shop will not only give you peace of mind but also result in a successful repair experience.


Now, go forth and find that perfect auto body repair shop. Your car (and your wallet) will thank you.

Different Techniques in Transformer Oil Testing

You know, in our everyday lives, we are surrounded by machines and gadgets that function tirelessly to provide us with the conveniences we’ve grown so accustomed to. One of these often-overlooked workhorses is the transformer, a critical element in our power systems. If you need more information, then visit our website here: ” Verity Labs “.


What is the lifeblood of these transformers, you ask? Well, it’s the transformer oil. Much like how our bodies rely on blood to function, transformers need oil to operate optimally. This oil serves several important purposes – from cooling and insulation to protecting the internal parts of the transformer from oxidation.


Now, it isn’t enough to just fill up a transformer with oil and forget about it. We need to keep a close watch on the quality of this oil, because any deterioration could lead to problems that might disrupt the transformer’s operation. And that’s where transformer oil testing comes into play.


In this blog post, I am going to break down the different techniques used in transformer oil testing. From dissolved gas analysis to PCB detection, we’ll look at why each method is essential, and the steps involved in the testing process. This post aims to provide you with a comprehensive understanding of these techniques and their critical role in maintaining our power systems. So, let’s jump right in.


Dissolved Gas Analysis (DGA)


The first stop on our tour of transformer oil testing techniques is Dissolved Gas Analysis or DGA for short. This method is widely acknowledged as one of the most critical tests in transformer oil analysis. 


As transformers work, they produce gases within the oil, and these gases can tell us a great deal about the condition of the transformer. Essentially, the types and quantities of these gases serve as a sneak peek into what’s going on inside the transformer.


So, how does DGA work?


At its core, DGA is based on the fact that different faults within a transformer lead to the creation of different gases. These gases, such as hydrogen, methane, ethylene, acetylene, carbon monoxide, and carbon dioxide, among others, dissolve into the transformer oil. The types and quantities of these gases can provide valuable insights into the health of the transformer and potentially indicate the existence of specific faults.


The process of DGA is relatively straightforward. 

  1. First, a sample of transformer oil is collected. The collection process must be carefully executed to ensure that the sample remains uncontaminated and accurately represents the state of the transformer.
  2. Once the sample is collected, it is transported to a laboratory where the actual gas analysis takes place. The lab uses specialized equipment to extract the dissolved gases from the oil. This extraction is often done by either heating the oil or applying a vacuum to it, causing the gases to separate out.
  3. After the gases are extracted, they are identified and quantified. This is typically done using Gas Chromatography, a powerful analytical technique. The gas chromatograph separates the different gases based on their specific properties, allowing each one to be measured individually.


The results of the DGA, often given in parts per million (ppm), detail the concentration of each gas present in the oil. The interpretation of these results is a crucial part of the DGA process. Each gas, or combination of gases, can signify different issues within the transformer. For example, a high concentration of hydrogen might indicate partial discharge (a type of electrical breakdown), while a high concentration of acetylene could suggest an electrical arc or fault.


So, in essence, DGA is like a detective, meticulously analyzing the gases in the transformer oil to pinpoint potential issues and faults within the transformer. By understanding the ‘language’ of these gases, we can monitor the condition of the transformer, identify any potential problems early on, and take the necessary steps to ensure the transformer continues to operate effectively.


Dielectric Breakdown Voltage


Moving on, let’s talk about Dielectric Breakdown Voltage testing. In simpler terms, this is a measure of the oil’s ability to withstand electric stress without breaking down. If the oil can’t hold up under electric stress, it might lead to electrical discharge, which, as you can guess, isn’t good news for a transformer.


Testing for Dielectric Breakdown Voltage involves placing a sample of the oil between two electrodes and then steadily increasing the voltage between these electrodes. We keep a close watch to see at what voltage the oil breaks down and allows a spark to pass between the electrodes. A lower breakdown voltage can indicate that the oil isn’t up to par and may need to be replaced or treated.


Interface Tension 


Over time, the oil in a transformer can begin to degrade, leading to the creation of decay products. These aren’t something we want in our transformer oil as they can interfere with its functionality. That’s where IFT testing swoops in to save the day.


When performing an IFT test, we essentially allow the oil to interact with water and then measure the force needed to break the surface, or interface, between the oil and the water. The presence of decay products can decrease this tension, meaning less force is needed to break the interface.


So, in a nutshell, if the IFT value of an oil sample is lower than expected, it could be a sign that the oil has begun to degrade and might be housing decay products. It’s amazing what a bit of oil and water can reveal, isn’t it?


Water Content Analysis


You might think, “Water in oil? Why should I be worried?” Well, here’s the deal – water is indeed a common contaminant in transformer oil, and its presence could lead to problems such as reduced insulation and an increased risk of internal faults.


The process of Water Content Analysis starts with sampling the oil, much like the other tests. The sample is then taken to a laboratory, often specialized water analytical laboratories, for examination. Here, the sample is subjected to tests that can accurately measure the amount of water present. If the water content exceeds the acceptable limit, actions may need to be taken to remove the water and prevent potential damage to the transformer.


PCB Analysis


PCBs, or Polychlorinated Biphenyls, were once commonly used in transformer oils due to their excellent insulating properties. However, they were later discovered to be harmful to the environment and human health. While transformers manufactured today do not use oils containing PCBs, some older transformers still in operation may contain them.


Testing for PCBs is therefore crucial to ensure the safety and environmental compatibility of transformer oils. During PCB Analysis, the oil sample is extracted and analyzed using techniques such as Gas Chromatography. This process helps in identifying and quantifying any PCBs that might be present in the oil.


Comparative Analysis


Now that we’ve had a look at the different transformer oil testing methods, let’s do a quick comparison. Each of these techniques provides unique insights into the oil’s condition and the overall health of the transformer. 


Dissolved Gas Analysis (DGA)

– Usage: Regular monitoring of transformer health, fault detection.

– Advantages: Can predict potential internal faults, provides crucial insights about the types of faults.

– Disadvantages: Requires lab analysis, interpretation of results may need expert knowledge.

– Timing: Typically performed annually, or immediately if a fault is suspected.


Dielectric Breakdown Voltage

– Usage: Evaluating the oil’s insulating properties.

– Advantages: Quick, relatively easy to perform, can indicate contamination or degradation of oil.

– Disadvantages: Does not identify specific contaminants.

– Timing: Routinely performed, often annually or semi-annually.


Interface Tension (IFT)

– Usage: Detecting decay products in transformer oil.

– Advantages: Effective at identifying oil degradation.

– Disadvantages: Does not provide information about the specific types of decay products.

– Timing: Generally performed as part of a routine maintenance schedule.


Acid Number Test

– Usage: Assessing the risk of corrosion within the transformer.

– Advantages: Directly relates to the potential for corrosion, relatively easy to perform.

– Disadvantages: Higher acid number does not always correlate with immediate transformer issues.

– Timing: Typically performed as part of regular oil testing regimen.


Water Content Analysis

– Usage: Identifying water contamination in transformer oil.

– Advantages: Indicates the potential for reduced insulation and increased risk of internal faults.

– Disadvantages: Does not identify other potential contaminants.

– Timing: Routinely performed, especially in humid environments or if the transformer is located outdoors.


PCB Analysis

– Usage: Ensuring the safety and environmental compatibility of transformer oils, especially in older transformers.

– Advantages: Identifies harmful PCBs, important for environmental and human safety.

– Disadvantages: May not be necessary for newer transformers.

– Timing: Performed on older transformers or when a transformer is decommissioned.


By understanding when and how to use each method, we can ensure a comprehensive approach to maintaining the performance and longevity of transformers. Each method has its place and together, they form a robust strategy for transformer oil testing.


Conclusions


Understanding these testing techniques is essential, not just for professionals in the field but for anyone keen on understanding how our power systems are maintained. Regular transformer oil testing is crucial to keep transformers in good health and ensure a steady supply of power.


So the next time you switch on a light or charge your phone, remember there’s a lot going on behind the scenes, or rather, behind the transformer casings, to make it all possible.

Finding Your Flushing Velocity: The Perfect Flow Test Speed

When it comes to flushing, we often find ourselves caught in a whirlwind of questions. How fast should the water flow? Is there an ideal velocity for achieving the best results? In this post, we’ll uncover the secrets of the perfect flushing velocity. For more details, visit our website here: “New England Manufacturing“. Join us as we dive into the world of flow tests, and discover how finding the right flow test speed which can make all the difference in your flushing experience. Let’s begin, shall we?


Why Velocity Matters in Flushing


In the quest for the perfect flush, velocity plays a crucial role. The speed at which water flows through your pipes determines how effectively it can clear away waste and maintain a healthy plumbing system. Imagine a lazy river versus a rushing stream: the difference in speed can drastically impact the flushing performance.

Slow-moving water can struggle to push waste through the pipes, leading to partial clogs and a sluggish system. On the other hand, excessively fast water flow can create turbulence and splashing, resulting in messy and inefficient flushing. Striking the right balance ensures optimal waste removal without unnecessary water waste or potential backups.

To determine the ideal velocity, experts often recommend conducting a flow test. This simple yet informative procedure allows you to measure the flow rate of your plumbing system, enabling you to make adjustments and optimize your flushing experience.


Conducting a Flow Test: The Basics


To conduct a flow test, you will need a few basic tools. Begin by turning off all faucets and water-consuming appliances in your home. Next, locate a faucet that allows easy access to the water supply. Attach a flow meter or a container with marked measurements to the faucet, ensuring a secure connection. Think of it as adding a fun accessory to your faucet dance party.

Now, turn on the faucet to the maximum flow and measure the time it takes for the water to fill the container to the desired level. As you watch the water fill up, imagine it as a performance, and you’re the audience eagerly awaiting the grand finale.

Remember to conduct the flow test under normal circumstances, as changes in water pressure or usage can affect the results. Once you have completed the test, you will have a better understanding of the flow rate and can adjust accordingly to find your perfect velocity.


The Ideal Flow Test Speed


Now that you’ve conducted a flow test, it’s time to analyze the results. Picture yourself as a scientific explorer, examining the data and seeking the perfect balance.

The ideal flow test speed can vary depending on factors such as pipe diameter, water pressure, and the specific fixtures in your plumbing system. However, as a general guideline, most experts recommend aiming for a flow rate between 6 and 12 gallons per minute (GPM) for optimal flushing.

Within this range lies the sweet spot that ensures efficient waste removal without excessive water usage. It’s like discovering the perfect rhythm in a dance routine: not too slow to lose momentum, and not too fast to lose control. This balance not only promotes effective flushing but also contributes to water conservation, a crucial aspect in today’s environmentally conscious world.


Adjusting the Velocity: Techniques for Improvement


If your flow test speed falls outside the recommended range, don’t fret. There are several playful techniques you can employ to improve your flushing velocity and achieve the desired flow rate. Get ready to put on your plumber’s hat and dive into some DIY fun.

One common method is to adjust the water pressure. By regulating the pressure at the main water supply, you can increase or decrease the flow rate in your plumbing system. It’s like turning up or down the volume on your favorite song to find the perfect groove. Remember to proceed with caution and consult a professional plumber if you’re unsure how to make these adjustments safely.

Additionally, upgrading your fixtures can make a significant difference. Imagine your plumbing system as a team of synchronized swimmers, each with its own role to play. Low-flow toilets and aerated faucets, for example, are star performers designed to optimize water usage without compromising performance.

By investing in these water-efficient fixtures, you can improve your flushing velocity while reducing your environmental footprint. It’s like giving your team shiny new medals and watching them excel.


The Perks of Optimal Flushing Velocity

Flow Test Speed

Now that we’ve discussed how to find the perfect flushing velocity, let’s explore the perks that come along with it. Imagine a curtain rising to reveal a stage filled with benefits, ready to take a bow.

Firstly, a well-calibrated flow rate ensures efficient waste removal, reducing the risk of clogs and backups in your plumbing system. Say goodbye to the frustration of slow drains and hello to smooth, unobstructed flushing. This not only saves you from potential headaches but also prevents costly repairs in the long run. It’s like having a backstage crew that keeps everything running smoothly, ensuring the show goes on without a hitch.

Moreover, finding the right velocity promotes water conservation. As you dance through the flow test speed range, you’ll discover the magic of responsible water usage. By achieving an optimal flow rate, you can minimize water waste, which is not only beneficial for the environment but also for your utility bills.

Embracing an eco-friendly approach to flushing is a win-win situation that benefits both you and the planet. It’s like joining a global movement and doing your part to protect our precious resources.


Conclusion


In this exploration of flushing velocity, we’ve discovered the importance of conducting a flow test to find the perfect speed. By striking the ideal balance between efficiency and water conservation, you can ensure a smooth flushing experience that keeps your plumbing system in top shape.

Remember, the flow test speed may vary depending on your specific plumbing setup, so it’s essential to conduct periodic checks and make necessary adjustments. As you embrace the flow, you become the choreographer of your flushing routine, finding the rhythm that brings harmony to your plumbing system.

So, next time you find yourself pondering the right velocity for flushing, dive into the world of flow tests and embrace the joy of finding your perfect flow test speed. With the right tools at your disposal, you can unlock the secret to optimal flushing and enjoy the perks of a well-calibrated flow rate.

Get Professional Sound Quality with These 7 Audio Recording Tips

Do you find yourself struggling to achieve crisp, professional sound quality when recording audio? Are your audio recordings coming out muffled and distorted? If you’re looking to improve the sound of your recordings then it’s time to get serious about sound system design. If you want to know more about this all, then I insist you visit us on our page ” Rian/Hunter Production ” and learn more. With the right knowledge and equipment, you can learn how to take your audio recordings to the next level with these 7 tips for better audio recording.


Tip 1: Get a Professional Audio Interface

An audio interface is hardware that connects your microphone to your computer, allowing you to record sound directly into your software. A good audio interface will make sure you’re getting the best sound possible without any background noise or distortion. Look for an interface with low latency and high-quality converters so you can be sure you’re getting the best sound out of your recording setup.


Tip 2: Invest in Quality Microphones

The quality of your microphone will have a major effect on the sound of your recordings, so it’s important to invest in a good one. Look for microphones that have high-quality capsules and low self-noise levels to ensure you’re getting the best sound. Make sure to check compatibility with your audio interface and always buy from a reputable manufacturer for peace of mind.


Tip 3: Use Acoustic Treatments

To get the best possible sound system design out of your recordings, it’s essential that you invest in acoustic treatment for your recording space. This includes wall panels and other acoustic foam materials to absorb sound waves and stop them from reflecting off the walls. This will help minimize reverberation and give you clearer recordings with less background noise.


Tip 4: Use Cables That Are Built For Audio Recording

Cheap cables can be tempting, but they won’t do your audio recordings any favors. Invest in quality cables specifically designed for recording to ensure that your signal isn’t distorted or interrupted. Make sure all of your cables are working properly before you start recording and keep them in good condition by replacing them regularly if they need to be.


Tip 5: Monitor Your Audio Levels

Sound system design

Properly monitoring your audio levels is super important for getting great sound quality. Make sure to adjust the levels of your microphone, preamps, and other gear to the correct levels before you start recording. You could try software plugins or hardware meters to make sure all of your equipment is working properly and that you’re not overloading any inputs with too much signal.


Tip 6: Use Compression Wisely

Compression is an essential tool for controlling the dynamic range of your audio recordings. It can be used to boost quiet sections and tame loud peaks, but it’s important to use it carefully so you don’t over-compress your audio and end up with a dull, lifeless sound.


Tip 7: Experiment

There are no hard and fast rules when it comes to recording audio, so don’t be afraid to experiment with different techniques and recording methods. Keep an open mind and try new ideas, you never know what you might come up with. With practice and experimentation, you can learn how to get the best sound out of your audio recordings.


By following these 7 tips for better audio recording, you can ensure that you’re getting the best sound possible out of your setup. Invest in quality audio hardware, use acoustic treatment and cables designed for recording, monitor your levels properly, and experiment with different techniques to take your recordings to the next level. With a bit of practice and dedication, you’ll be able to get crisp, professional-sounding audio recordings every time.

Mechanics Workshop Wisdom: Top 10 Tools Every DIY Car Repair Enthusiast Needs

Hello to all the DIY enthusiasts out there. If you’re reading this, chances are, you’re as interested in the ins and outs of vehicles as I am. There’s something uniquely satisfying about rolling up your sleeves, popping open that hood, and getting your hands a bit dirty, isn’t there? This post is dedicated to those brave souls who take on the challenge of DIY car repairs, and to those who are just starting their journey and turning their garage into a mini mechanics workshop. If you need more info, then you can also visit us at: “TM Chiptuning“.


Having your own set of tools is like a rite of passage in the world of car repairs. It’s a sign that you’re ready to take control, understand your vehicle better, and maybe save a few bucks along the way. But let’s be clear: not all tools are created equal. While some are absolutely essential, others might be more of a nice-to-have or specific to certain tasks.


In today’s blog post, we’re going to delve into what I believe to be the top 10 tools that every DIY car repair enthusiast should have in their arsenal. These are the ones that will cover the majority of basic and intermediate jobs you’re likely to tackle. So, whether you’re just starting to build your collection or you’re looking to expand it, this guide is for you. Let’s dive in, shall we?


Why You Need Quality Tools


Before we dive into the actual tools, let’s pause for a moment and talk about quality. Now, I know what some of you might be thinking: “Hey, I’m just starting out, I don’t need those fancy, top-of-the-line tools!” Trust me, I’ve been there. It can be tempting to skimp on quality and go for those cheaper tools. But let me tell you something from my years of experience – investing in good quality tools from the get-go can make a world of difference.


Why, you ask? Well, for starters, good-quality tools are built to last. They can take a beating and keep on going, while cheaper tools might fail or even cause damage to your car. Plus, there’s nothing more frustrating than a tool that breaks or wears out in the middle of a job.


Quality tools also provide a better fit, which reduces the risk of stripping or damaging bolts and screws. The precision that these tools offer is unparalleled and can make your DIY project go smoother and faster.


Finally, there’s the matter of safety. Quality tools are safer to use. They’re designed to handle the stresses they’re put under, reducing the chance of breakages or accidents that could injure you or damage your car.


So, while that bargain bin wrench set might be appealing to your wallet, think about the long term. A solid, reliable set of tools is an investment in your DIY journey. It’s like adding a superpower to your mechanics workshop. Now, let’s move on to what those essential superpowers are, shall we?


Top 10 Tools Every DIY Car Repair Enthusiast Needs


Alright, now that we’ve covered the importance of investing in quality tools, let’s move on to the list. Keep in mind, this list is not exhaustive; there are definitely more specialized tools out there for specific tasks. But for anyone just starting their DIY journey or looking to cover the basics, these ten tools are your go-to:


1. Socket Set:

This is the bread and butter of any mechanics workshop. A good socket set is as versatile as it is essential. Whether it’s removing spark plugs or loosening and tightening various nuts and bolts, you’re going to need a socket set that has a wide range of sizes to cover all your bases. If you’re starting from scratch, look for a set that includes both metric and standard sizes. It’s one of those tools you’ll reach for time and time again.


2. Wrench Set:

Complementing your socket set, a wrench set is another indispensable tool in your arsenal. Especially for those hard-to-reach spots where a socket just won’t do the job. A set with both open-end and box-end wrenches is ideal. And remember, just like with sockets, you’ll want both metric and standard sizes.


3. Screwdriver Set:

No, not just for your IKEA furniture assembly. A good set of screwdrivers – both flathead and Phillips – is essential for any DIY car enthusiast. They’re used for a wide array of tasks like adjusting carburetors, removing door panels, or replacing lights. A magnetic tip can be a real lifesaver when retrieving dropped screws.


4. Pliers:

A trusty pair of pliers can be your best friend in many a situation, especially when you need to grip, bend, pull, or cut something firmly. They come in various types, such as needle-nose (great for reaching into those tight spots), slip-joint (for gripping different-sized objects), and cutting (to easily cut through wires). Need to pull out a stubborn oil filter? Needle-nose pliers to the rescue!


5. Car Jack and Stands:

When it comes to underbody repairs, tire changes, or merely inspecting the underside of your vehicle, a car jack and stands are essential. A reliable jack lifts your vehicle, and sturdy stands keep it elevated, ensuring your safety as you work. So the next time you need to swap out a punctured tire or change your oil, these two will be your indispensable companions.


6. Torque Wrench:

Mechanics workshop

For precise bolt tightening, nothing beats a torque wrench. This tool helps you tighten bolts to the exact specification, eliminating the risks of over-tightening that could lead to stripped threads or broken bolts. Changing cylinder head bolts or securing lug nuts on your wheels? Your torque wrench is your go-to for accuracy.


7. Wire Cutters and Strippers

As our cars incorporate more and more electronics, tools for dealing with electrical wires have become a necessity. Wire cutters and strippers are vital for repairing or installing new electrical components. Whether you’re installing a new car stereo or replacing a worn-out electrical wire, these tools are your trusty assistants.


8. OBD-II Scanner:

An OBD-II scanner is like having a conversation with your car’s computer. It allows you to understand the problem codes your vehicle’s computer generates when something isn’t right. Is the engine light on? Plug in your OBD-II scanner to read the trouble code and figure out what the issue might be.


9. Multimeter:

To diagnose electrical issues, a multimeter is indispensable. This device measures voltage, current, and resistance. If your car isn’t starting, a multimeter can help you determine if the issue lies with the battery (by measuring its voltage) or perhaps a blown fuse (by checking for current).


10. Work Light:

Don’t underestimate the importance of a good work light. Trying to peer into the shadows of your engine bay or under your car can be a struggle. A portable, bright, and durable work light illuminates your workspace, making every task easier and safer. Whether you’re working on your engine or changing a tire in the dark, a work light is essential.


Tips on Caring for Your Tools


Alright, now that we’ve armed you with the knowledge of the top 10 tools every DIY car repair enthusiast should have, let’s take a moment to discuss how to care for these invaluable investments. After all, your tools take care of your car, and in turn, they deserve a little TLC too.


First up, Cleanliness is Key. Always clean your tools after each use. You’d be surprised how grime, grease, and dirt can quickly accumulate and cause your tools to deteriorate. A simple wipe-down with a rag can do wonders, and for tougher grime, a bit of WD-40 or a similar cleaner can help.


Next, let’s talk about Proper Storage. Tools are best kept in a dry, secure location to prevent any moisture-induced rust and unnecessary wear and tear. A toolbox, drawer, or cabinet can be a great investment to keep your tools organized and protected. For your larger tools, like your car jack and stands, ensure they’re stored in a place where they won’t be knocked over or damaged.


Third, Regular Maintenance is a must. Some tools require a bit more maintenance than others. For example, your torque wrench should be calibrated regularly to ensure it’s still giving accurate readings. And tools with moving parts, such as your pliers, may require a little oil now and then to keep them functioning smoothly.


Finally, Inspect Regularly. Before and after each use, take a moment to inspect your tools. Look for any signs of damage, such as cracks, rust, or wear. If a tool is damaged, it’s best to replace it rather than risk it breaking during a job or, worse, causing injury.


Taking care of your tools not only extends their lifespan but also ensures they perform their best when you need them. And when your vehicle’s health is on the line, you want your tools in tip-top shape. So remember, a little care goes a long way.


Conclusion


And there we have it, the top 10 tools you need in your mechanics workshop if you’re a DIY car repair enthusiast. Now, armed with this information, you’re better prepared to roll up your sleeves and face those mechanical problems head-on. But remember, owning the tools is just the first step. Learning how to use them efficiently and safely is the real key to becoming a proficient DIY car mechanic. Take your time to understand each tool, its uses, and the best way to maintain it. Build your collection gradually, and before you know it, you’ll have a fully-equipped mechanics workshop right in your own garage.

The Power of Guided Play: How It Can Enhance Your Child’s Development

Hi there, fellow parents and caregivers.


Today, we’re exploring a topic that holds incredible value for our children’s development: guided play. In a world dominated by structured activities and screens, it’s important to recognize the magic that unfolds when children are given the freedom to play and explore.


The guided play strikes a balance between structure and imagination. It’s a type of play where kids take the lead, but we’re there to offer support and gentle guidance. It’s not about strict rules or predetermined outcomes; it’s about creating an environment that encourages curiosity, creativity, and growth. For further info, you can also visit us here: “Big Books By George (BBBG)“.


In this blog post, we’ll explore 5 ways guided play can enrich your child’s life, including how it boosts cognitive development, nurtures social and emotional skills, enhances language and literacy, promotes physical abilities, and supports executive functioning. Plus, we’ll share practical examples and tips to help you incorporate guided play into your daily routines.


Let’s get started.


1. Promotes Cognitive Development


When it comes to your child’s development, cognitive growth plays a crucial role in shaping their abilities to think, reason, problem-solve, and imagine. The guided play offers a rich environment that stimulates cognitive development in various ways.


In guided play, children are presented with opportunities to exercise their problem-solving skills and engage in critical thinking. Unlike structured activities that provide step-by-step instructions, guided play allows children to explore, experiment, and find their own solutions. Whether it’s figuring out how to stack blocks to build a stable tower or navigating through an imaginative obstacle course, these experiences enhance their ability to analyze situations, make decisions, and think creatively.


Guided play ignites your child’s imagination and nurtures their creativity. Instead of following predetermined narratives or scripts, they have the freedom to invent their own stories, characters, and scenarios. Whether they’re role-playing as superheroes, creating imaginative artwork, or building elaborate structures, their minds are set free to explore new realms of possibility.


By engaging in guided play, children also develop their concentration and focus. As they immerse themselves in play experiences, they learn to sustain their attention, block out distractions, and remain engaged in activities for extended periods. These skills are essential for future academic success and lifelong learning.


So, how can you incorporate guided play into your child’s routine? Here are a few examples:


  1. Create open-ended play setups: Set up play areas with materials like blocks, art supplies, and open-ended toys that allow your child’s imagination to flourish. Let them freely explore and create their own play scenarios.


  1. Engage in pretend play: Encourage your child to engage in pretend play, whether it’s playing house, setting up a pretend grocery store, or acting out their favorite story. Join them in their imaginative adventures to enhance the experience and foster their cognitive development.


  1. Encourage problem-solving activities: Provide puzzles, building sets, and other problem-solving games that challenge your child’s thinking abilities. Offer support when needed but allow them to take the lead and find solutions independently.


Remember, the beauty of guided play lies in the balance between providing guidance and allowing your child to take the lead. By fostering cognitive development through guided play, you’re setting the stage for your child’s lifelong love of learning, curiosity, and intellectual growth.


2. Fosters Social and Emotional Skills


In addition to cognitive development, nurturing your child’s social and emotional skills is of paramount importance. Guided play serves as a valuable tool for fostering these essential aspects of your child’s growth.


Guided play provides a natural environment for children to interact and collaborate with their peers, siblings, or even adults. As they engage in play together, they learn important social skills such as sharing, taking turns, and cooperating. These experiences lay the foundation for building meaningful relationships and developing empathy, communication, and teamwork skills that will serve them well throughout their lives.


Within the realm of guided play, children have the opportunity to navigate various social situations and learn how to express themselves effectively. Whether they’re negotiating roles in a pretend play scenario, resolving conflicts over toys, or collaborating on a building project, they develop invaluable skills in empathy, active listening, and compromise. These skills enable them to understand and respect the perspectives of others, fostering a sense of community and cooperation.


Guided play also provides a safe space for children to explore and express their emotions. They can role-play different scenarios and experiment with different emotional responses, allowing them to develop emotional intelligence and regulation. Whether they’re pretending to be a character experiencing joy, sadness, or frustration, they learn to recognize and navigate their own emotions while understanding the emotions of others.


To incorporate guided play for social and emotional development, here are some ideas:


  1. Arrange playdates: Set up playdates with other children to encourage social interaction and cooperation. Provide opportunities for collaborative play and guide them in resolving conflicts or sharing resources.


  1. Facilitate cooperative games: Engage in cooperative games or activities that require teamwork and communication, such as building a fort together or solving a puzzle as a group. Encourage them to work together and listen to each other’s ideas.


  1. Role-play and storytelling: Encourage your child to engage in pretend play and storytelling to explore different emotions and practice expressing themselves. Use props or puppets to facilitate imaginative play scenarios.


By embracing guided play, you’re giving your child the opportunity to develop essential social and emotional skills that will positively impact their interactions with others and their overall well-being.


3. Language and Literacy Development


Language and literacy skills serve as the foundation for communication, learning, and future academic success. The guided play offers a nurturing environment to enhance your child’s language development and literacy skills in exciting and engaging ways.


During guided play, children engage in conversations, storytelling, and imaginative play scenarios that naturally expand their vocabulary and language fluency. As they communicate their ideas, listen to others, and engage in interactive play, they develop important language skills such as comprehension, expression, and articulation. They learn to use language to express their thoughts, needs, and emotions, fostering effective communication skills that will benefit them throughout their lives.


Non-fiction books play a significant role in guided play, offering a wealth of knowledge and vocabulary enrichment. Introducing your child to age-appropriate books allows them to explore various topics, expand their understanding of the world, and develop a broader vocabulary. From books about animals and nature to books about science and history, non-fiction books provide opportunities for meaningful discussions and learning experiences during guided play.


Here are some ideas to incorporate language and literacy development in guided play:


  1. Storytelling and puppet shows: Encourage your child to create and tell stories using puppets or props. This activity stimulates their imagination, language skills, and narrative abilities.


  1. Reading together: Set aside dedicated time for reading non-fiction books with your child. Discuss the content, ask questions, and encourage them to share their thoughts and observations.


  1. Dramatic play: Engage in role-playing activities where your child can assume different roles and use language to interact with others. Encourage them to speak in full sentences, ask questions, and express their ideas.


  1. Writing and drawing: Provide writing materials and encourage your child to write or draw about their play experiences. This helps them develop literacy skills, creativity, and the ability to express themselves through written language.


By incorporating guided play that focuses on language and literacy, you’re not only fostering a love for reading and learning but also equipping your child with vital communication and comprehension skills that will benefit them in all aspects of life.


Next, let’s explore how guided play can enhance your child’s motor skills and physical development, promoting a healthy and active lifestyle.


4. Enhances Motor Skills and Physical Development


In addition to cognitive, social, and emotional growth, guided play also plays a vital role in promoting your child’s motor skills and physical development. Through various play activities, children engage their bodies, fine-tune their coordination, and strengthen their muscles.


Guided play provides ample opportunities for children to engage in both gross motor and fine motor activities. Gross motor skills involve the movement and coordination of large muscle groups, while fine motor skills focus on the dexterity and control of small muscle movements.


Activities such as running, jumping, climbing, and playing outdoor games stimulate gross motor skills. Guided play allows children to explore their physical abilities in a safe and supportive environment. They can develop their balance, coordination, and strength as they navigate obstacle courses, play catch, or engage in active play with their peers.


Fine motor skills, on the other hand, can be enhanced through activities that involve precise hand-eye coordination and manipulation of objects. Building with blocks, threading beads, drawing, and playing with playdough are just a few examples of guided play activities that refine fine motor skills. These activities help children develop their hand muscles, finger control, and hand-eye coordination, which are crucial for tasks such as writing, drawing, and self-care activities.


To incorporate guided play for motor skills and physical development, consider the following ideas:


  1. Outdoor playtime: Encourage outdoor play and provide opportunities for running, jumping, climbing, and exploring. Set up play structures or engage in nature walks to enhance gross motor skills.


  1. Arts and crafts: Engage in arts and crafts activities that require cutting, coloring, and manipulating small objects. These activities promote fine motor skills and hand dexterity.


  1. Building and construction: Provide building blocks, Legos, or other construction sets that require precise manipulation and coordination. This encourages the development of both fine motor and spatial awareness skills.


  1. Sensory play: Engage in sensory play activities such as playing with sand, water, or sensory bins filled with different materials. These activities stimulate tactile exploration and fine motor skills.


By incorporating guided play activities that focus on motor skills and physical development, you’re not only encouraging an active and healthy lifestyle but also laying the foundation for your child’s physical abilities and coordination.


5. Supports Executive Functioning Skills


Executive functioning skills are essential cognitive abilities that enable your child to plan, organize, and regulate their behavior. Guided play provides a supportive environment for developing these skills, empowering your child with the tools they need to succeed in various aspects of life.


In guided play, children are presented with opportunities to exercise their self-control and decision-making abilities. Whether they’re engaged in a pretend play scenario or tackling a problem-solving activity, they learn to regulate their impulses, think before acting, and make thoughtful choices. These experiences lay the groundwork for developing self-discipline and responsible decision-making skills that will serve them well throughout their lives.


Furthermore, guided play enhances your child’s planning and organization skills. As they engage in play activities, they learn to set goals, make plans, and follow through with their intentions. Whether it’s building a structure with blocks or creating a pretend play scenario, they learn to break tasks into manageable steps, sequence their actions, and adapt their plans as needed. These skills are vital for future academic success and lifelong productivity.


Another aspect of executive functioning supported by guided play is attentional control. In guided play, children learn to sustain their focus and resist distractions. Whether it’s engaging in a complex game or following the rules of a pretend play scenario, they develop the ability to concentrate and pay attention to relevant details. This skill transfers to other areas of their life, such as classroom learning or completing tasks at home.


To incorporate guided play for the development of executive functioning skills, consider these ideas:


  1. Games and puzzles: Engage in age-appropriate games and puzzles that require planning, problem-solving, and attention to detail. Encourage your child to think strategically and consider different options before making decisions.


  1. Role-play scenarios: Set up role-play scenarios that require your child to plan and organize their actions. This could involve playing a specific character, organizing a pretend event, or engaging in imaginative play with clear objectives.


  1. Daily routines and responsibilities: Introduce age-appropriate responsibilities and routines that require planning and organization. This can include tasks such as tidying up toys, planning a simple meal, or organizing personal belongings.


  1. Reflection and goal-setting: Encourage your child to reflect on their play experiences and set goals for future play sessions. This helps them develop metacognitive skills, self-awareness, and the ability to plan for future activities.


Conclusion:


Congratulations, fellow parents and caregivers, on exploring the incredible power of guided play and its impact on your child’s development. You can now see the benefits it offers, from cognitive growth to social skills, language development to physical abilities, and executive functioning. I hope you can find ways to incorporate guided play into your child’s life and create a nurturing environment where they can learn, explore, and grow at their own pace. Embrace the joy of play, follow your child’s lead, and provide gentle guidance when needed.


Happy playing and learning, dear parents and caregivers.

A Guide to Understanding the Symbolic Power of Apples Red in New England Folklore and Traditions

New England is known for its stunning fall foliage, pumpkin patches, and cider mills. But there is one fruit that is deeply ingrained in the region’s culture: apples red. Apples have played a significant role in New England’s folklore and traditions for centuries, and their symbolic power has not diminished. In this guide, we will explore the cultural significance of apples red in New England’s history, literature, and traditions. If you need more information, you can also visit our website here: “Champlain Orchards“.


The Historical Roots of Apple Culture in New England


Apples red have been grown in New England since the 17th century when European settlers brought apple seeds and saplings with them. Apples quickly became a staple food, and the region became famous for its apple orchards. In the 19th century, New England produced more apples red than any other region in the country, earning it the nickname “The Apple Capital of the World.”


As apples became more abundant, they also became more symbolic. They represented prosperity, health, and fertility, and they were often used in religious ceremonies and rituals. The Puritans, for example, believed that apples were a symbol of the Garden of Eden, and they used them in their Thanksgiving celebrations.


Apples in New England Literature and Folklore


Apples have also played a prominent role in New England literature and folklore. Nathaniel Hawthorne’s short story, “The Celestial Railroad,” uses apples as a symbol of temptation and sin. In the story, the protagonist, Mr. Smooth-it-away, offers passengers on a train ride apples that are “of a peculiarly luscious flavor.” However, the apples are poisoned, and the passengers who eat them become sick and eventually die. The story serves as a warning against the dangers of temptation and the corrupting influence of materialism.


In another classic New England tale, “Johnny Appleseed,” apples are a symbol of generosity and kindness. The story follows the life of John Chapman, a real-life pioneer who traveled across the country planting apple trees. Johnny Appleseed is remembered for his eccentric clothing and kind demeanor, and he is often depicted carrying a bag of apple seeds. He is a symbol of the pioneer spirit and the American dream.


In addition to Johnny Appleseed, there were many other people who played important roles in New England’s apple-growing history. For example, in the early 20th century, a man named Frank Knight developed a new method of grafting apple trees that allowed farmers to grow more trees in a smaller space. This method, known as the “Frank Knight system,” helped to revolutionize the apple industry in New England.


Apples in New England Traditions


Apples continue to play an important role in New England’s traditions today. One of the most popular traditions is apple picking. Every fall, families flock to apple orchards to pick their own apples red, taste fresh cider, and enjoy the autumn scenery. Many orchards also offer hayrides, corn mazes, and pumpkin patches, making apple picking a fun-filled family activity.


Another New England tradition that involves apples is the making of apple cider. Cider is made by pressing fresh apples and then fermenting the juice. The resulting beverage can be alcoholic or non-alcoholic, and it is a favorite fall drink in New England. Many cider mills offer tours and tastings, allowing visitors to see the cider-making process firsthand.


Finally, apples play a central role in New England’s most iconic dessert: apple pie. Apple pie is a staple of Thanksgiving dinner and is often served with a dollop of vanilla ice cream. The recipe for apple pie has been passed down through generations of New England families, and it is a symbol of the region’s culinary heritage.


In addition to apple pie, there are many other traditional New England apple desserts. For example, apple crisp is a popular dessert made with apples, sugar, butter, and a topping made of flour, oats, and spices. Another classic New England dessert is apple pandowdy, which is a type of cobbler made with sliced apples red and a biscuit-like topping.


The Symbolic Power of Red Apples


While all apples are important in New England’s culture, one type of apple holds a special place in the region’s folklore: the red apple. Red apples are associated with love, passion, and temptation, and they have been used in many works of literature and art to symbolize these themes.


One example is the story of “Adam and Eve.” In the Bible, Eve is tempted by a serpent to eat the fruit of the forbidden tree, which is often depicted as an apple. The apple represents temptation and the fall from grace, and it has become a powerful symbol in Western culture.


In New England, red apples also have a more specific cultural significance. They are a key ingredient in one of the region’s most beloved treats: caramel apples red. Caramel apples red are made by dipping apples in melted caramel, which hardens into a sweet, crunchy coating. They are a popular fall treat and are often sold at fairs and festivals throughout the region. While caramel apples red are a popular treat in New England, they are not actually a traditional New England food. They were first created in the early 20th century in the Midwest, and their popularity spread throughout the country from there.


Red apples are also an important part of Halloween traditions in New England. In the popular game “Bobbing for apples red,” participants try to grab apples out of a tub of water using only their teeth. The game has its roots in Celtic and Roman traditions and was brought to the United States by early immigrants. It remains a favorite Halloween activity in many parts of New England.


The Importance of Apples in Modern New England


Today, apples continue to be an important part of New England’s culture and economy. While the region no longer produces as many apples as it once did, there are still hundreds of orchards and cider mills throughout the region. Many of these businesses are family-owned and have been operating for generations.


In recent years, there has been a resurgence of interest in heirloom apples. These are varieties of apples that were once popular but have fallen out of favor in recent decades. Many orchards are now growing heirloom apples, and they are becoming increasingly popular with consumers. These apples are often more flavorful and have a unique texture that sets them apart from more common varieties. Apples are not just delicious and symbolic; they are also incredibly nutritious. They are high in fiber, vitamins, and antioxidants, and they have been linked to a range of health benefits. For example, studies have shown that eating apples can help lower cholesterol, reduce the risk of heart disease, and improve digestion.


Conclusion


In conclusion, apples red have played a significant role in New England’s culture for centuries. They are a symbol of prosperity, health, and fertility, and they have been used in literature, art, and religious rituals. Red apples, in particular, have a special significance, representing love, passion, and temptation. Today, apples continue to be an important part of New England’s economy and traditions, with orchards and cider mills drawing visitors from all over the world. Whether you’re picking apples, sipping cider, or enjoying a slice of apple pie, there is no denying the powerful symbolic power of this beloved fruit.

Balancing Academics and Creativity in Your School’s Curriculum

Introduction:


Welcome to the world where academia meets creativity. As educators, we often find ourselves caught between striving for academic excellence and the desire to nurture our students’ creative spirits. But it’s all about finding the perfect balance which is what this blog post will explore. It’s no secret that fostering well-rounded individuals goes beyond mastering subjects and acing exams. It is equally essential to cultivate innate creativity within students, allowing them to express themselves and explore the possibility of their imagination. That’s where enrichment writing comes in. It is a powerful tool that not only stimulates creativity but also enhances study skills curriculum and critical thinking, transforming the academic journey into a vibrant tapestry of ideas and self-expression. Keep reading to find out more. You can also visit us here: “JBH Tutoring“.


Understanding the Importance of Enrichment Writing


Before we dive into the nitty-gritty of integrating enrichment writing, let’s take a moment to understand why it’s a vital aspect of holistic education. Enrichment writing is not just about flexing those creative muscles; it’s a powerful tool that enhances students’ study skills curriculum and fosters critical thinking.


Enrichment writing nurtures imagination and creativity, allowing students to think outside the box and explore new ideas. By engaging in creative writing exercises, students learn to express themselves effectively, sharpening their communication skills. This skill set is invaluable in all areas of academia and beyond.


Enrichment writing promotes critical thinking as students analyze situations, develop logical narratives, and explore different perspectives. It encourages them to delve deeper into subjects, ask questions, and form connections between concepts. These skills directly transfer to other academic tasks, such as essay writing, problem-solving, and analyzing complex texts.


Creating Space for Enrichment Writing in the Curriculum


Now that we understand the significance of enrichment writing, let’s explore strategies to seamlessly integrate it into your school’s curriculum. Here are some practical tips and tricks:


Carving out Dedicated Writing Time:


To prioritize enrichment writing, it’s essential to set aside specific periods during the week exclusively for this purpose. By dedicating regular writing time, students have the opportunity to explore their creativity and develop their writing skills. It also sends a message that creative expression is valued and an integral part of their education.


Incorporating Enrichment Writing Across Subjects:


Enrichment writing should not be confined to language arts classes alone. By encouraging teachers from various subjects to include writing activities that spark creativity, you create a cross-disciplinary approach to learning. For example, a science class could involve writing a fictional story set in a laboratory, allowing students to apply scientific principles in an imaginative context.


Providing Writing Prompts:


Sometimes, all students need is a little push to get their creative juices flowing. Offer a range of interesting and thought-provoking writing prompts to inspire their imaginations. From “Imagine you wake up with the ability to fly” to “Create a superhero whose power is to solve math problems,” these prompts will make writing an exhilarating adventure. You can also tailor the prompts to align with specific subjects or themes, integrating enrichment writing seamlessly into the curriculum.


Showcasing the Power of Enrichment Writing


Actions speak louder than words, and in this case, examples speak louder than lectures. Let’s explore some engaging examples that highlight the positive impact of enrichment writing:


Storytelling Adventures:


Encourage students to write short stories and share them with their peers. You can even organize storytelling events where students get the chance to narrate their tales aloud. This not only boosts their confidence but also allows them to appreciate and learn from one another’s creativity.


  • Consider creating a “Storytelling Corner” in the classroom or hosting a school wide storytelling competition to celebrate the power of storytelling and provide a platform for students to showcase their creativity.


Collaborative Writing Projects:


Foster teamwork and creativity by initiating collaborative writing projects. Divide students into groups and assign them a topic or theme to develop a story collectively. This collaborative approach encourages them to build on each other’s ideas, promoting communication and cooperation. It also teaches them the valuable skill of working in a team, respecting different perspectives, and finding common ground to create a cohesive narrative.


  • For instance, you can assign groups to write a collaborative story based on a historical event or create a fantasy world together. Encourage them to brainstorm, outline, and divide writing tasks among group members. This exercise not only strengthens their writing skills but also hones their ability to work collaboratively, compromise, and negotiate ideas.


Enrichment Writing Competitions:


Organize writing competitions within your school or even partner with other institutions to create a larger platform for students to showcase their writing prowess. Competitions provide an opportunity for students to challenge themselves, set goals, and receive feedback from judges and peers.


  • Consider hosting themed writing competitions, such as a short story contest, poetry slam, or even a “writing marathon” where students have a set time limit to write as much as they can. Celebrate the winners and highlight exceptional pieces through school publications or by displaying them on bulletin boards. These competitions can ignite a sense of healthy competition, inspire students to push their boundaries, and build a writing community within your school.


Infusing Fun and Laughter into Enrichment Writing


Who says enrichment writing has to be all serious and no play? Injecting a dose of fun and humor can make the writing process enjoyable for students. Here are a few ways to infuse fun and laughter into enrichment writing:


Silly Story Starters:


Provide students with hilariously absurd story starters like “Once upon a time, a talking banana became the president of a fruit kingdom.” Encourage them to let their imagination run wild and create the most outrageous and entertaining stories. Remember, the goal is to have them laughing while using their writing skills. You can even turn it into a game where each student adds a sentence to the story, creating a collaborative and hilarious narrative.


Mad Libs Madness:


Incorporate the classic game of Mad Libs into your enrichment writing sessions. Create Mad Libs templates with blanks for nouns, verbs, adjectives, etc., and have students fill in the words to complete the story. The unexpected combinations and resulting hilarious narratives will have everyone in stitches. This activity not only reinforces grammar and vocabulary skills but also allows students to have a good laugh while creating unique stories.


Comic Strip Creations:


Break away from traditional writing formats and allow students to express themselves through comic strips. Encourage them to combine their writing skills with illustrations, creating witty and humorous stories that engage both visual and literary creativity. Who knows, you might discover the next great comic artist in your classroom.


Provide students with comic strip templates or have them create their own. They can experiment with different genres, such as superheroes, slice-of-life, or even educational comics that summarize a lesson. Not only does this activity tap into their creativity, but it also reinforces storytelling techniques, sequencing, and visual literacy.


Section 5: The Study Skills Boost


While enrichment writing adds a fun twist to the study skills curriculum, it also offers valuable study skills benefits. Here’s how it can give students an academic edge:


Enhanced Critical Thinking:


Enrichment writing prompts students to think critically, analyze situations, and develop logical narratives. These skills directly transfer to other academic tasks, such as essay writing, problem-solving, and analyzing complex texts. By engaging in creative writing exercises, students become adept at examining multiple perspectives, evaluating evidence, and constructing coherent arguments. These critical thinking skills are essential for academic success across all subjects


Improved Communication Skills:


As students explore their creativity through writing, they learn to express themselves effectively. They develop the ability to articulate their thoughts, ideas, and emotions in a clear and concise manner. This skill is invaluable in all areas of academics, from class presentations to research papers. Enrichment writing nurtures their vocabulary, sentence structure, and overall written communication skills, enabling them to convey their messages with confidence and clarity.


Increased Confidence and Motivation:


Enrichment writing provides students with a sense of accomplishment and boosts their self-confidence. When they see their ideas come to life on paper and receive positive feedback from teachers and peers, it reinforces their belief in their abilities as writers and thinkers. This confidence spills over into other academic endeavors, motivating them to take on challenges, participate actively in class discussions, and tackle complex assignments with enthusiasm.


Furthermore, when students are engaged in enrichment writing, they develop a sense of ownership and agency over their education. They become active participants in their learning process, which leads to increased motivation and a deeper connection with the study skills curriculum. This intrinsic motivation fuels their desire to excel and explore new avenues of knowledge.


Conclusion:


Integrating enrichment writing into your school’s curriculum is a journey filled with creativity, laughter, and academic growth. By understanding its importance, creating a dedicated space for it, showcasing its power through examples, and infusing fun and laughter, you can strike the perfect balance between academics and creativity. The right way to success is through a study skills curriculum that nurtures both study skills and creativity and by fostering a love for writing and creativity, you’re providing students with the tools they need to excel academically and in life.

6 Key Strategies to Lower Student Loan Payments and Boost Credit

Introduction:


Ah, the world of student loans. It’s a journey many of us embark on to pursue our dreams and education, but the financial burden that comes with it can be overwhelming. Balancing student loan payments while trying to build a solid credit history can definitely be a daunting task which is why we will give you six key strategies to help you lower your student loan payments and boost your credit score. You can also visit our website here: “Varela Financial“.


Managing your student loans wisely not only eases your financial stress but also sets you on a path towards a brighter financial future. By implementing these strategies, you can take control of your student loan repayment journey and pave the way for improved creditworthiness. From exploring income-driven repayment plans to seeking loan forgiveness programs, each strategy is designed to help you navigate the intricate world of student loans while simultaneously enhancing your credit profile.


Strategy 1: Explore Income-Driven Repayment Plans


When it comes to managing your student loan payments, one of the most powerful strategies at your disposal is exploring income-driven repayment plans. These plans are designed to alleviate the financial burden by tailoring your monthly payments based on your income and family size. By taking advantage of income-driven repayment plans, you can find relief and ensure that your loan payments are affordable and manageable.


Income-driven repayment plans are a set of programs offered by the federal government that calculate your monthly loan payments based on a percentage of your discretionary income. Unlike the standard repayment plan, which typically spans over a fixed number of years, income-driven plans provide flexibility by adjusting your payments to your financial circumstances.


Types of Income-Driven Repayment Plans


There are several income-driven repayment plans available, each with its own eligibility requirements and calculation methods. Here are a few commonly used plans:


  1. Pay As You Earn (PAYE): PAYE caps your loan payments at 10% of your discretionary income and offers loan forgiveness after 20 years of consistent payments.


  1. Income-Based Repayment (IBR): IBR also sets your payments at 10% or 15% of your discretionary income, depending on when you borrowed your loans. Loan forgiveness is available after 20 or 25 years of qualifying payments.


  1. Revised Pay As You Earn (REPAYE): REPAYE limits your payments to 10% of your discretionary income, regardless of when you borrowed your loans. It also offers loan forgiveness after 20 or 25 years, depending on the type of loan.


Benefits of Income-Driven Repayment Plans


  1. Lower Monthly Payments: Income-driven plans can significantly reduce your monthly payments, especially if you have a low income or high student loan balance. This allows you to allocate your financial resources towards other essential expenses.


  1. Financial Flexibility: By adjusting your payments based on your income, income-driven plans provide flexibility during times of financial hardship. As your income increases, your loan payments may also increase, but they will always remain affordable relative to your earnings.


  1. Potential Loan Forgiveness: Depending on the plan and your repayment period, income-driven plans offer the potential for loan forgiveness. This means that after a certain number of years of making qualifying payments, the remaining loan balance can be forgiven.


Applying for Income-Driven Repayment Plans


To explore income-driven repayment plans, you’ll need to complete an application known as the Income-Driven Repayment Plan Request. This form will require you to provide detailed information about your income, family size, and federal student loans. Once submitted, your loan servicer will review your application and determine your eligibility.


Strategy 2: Consolidate or Refinance Student Loans


If you’re juggling multiple student loans with varying interest rates and repayment terms, consolidating or refinancing your loans can be a game-changer. By consolidating or refinancing, you can simplify your repayment process, potentially secure a lower interest rate, and customize your loan terms to better suit your financial goals. Let’s delve into the details of this strategy and explore how it can benefit you.


Understanding Loan Consolidation and Refinancing


  1. Loan Consolidation: Loan consolidation involves combining multiple federal student loans into a single loan. This simplifies repayment by merging your loans into one, with one monthly payment and one interest rate. The new interest rate is determined by taking the weighted average of the interest rates of the loans being consolidated.


  1. Loan Refinancing: Refinancing, on the other hand, involves obtaining a new loan from a private lender to pay off your existing student loans. This allows you to replace your current loans with a new loan that has different terms, such as a potentially lower interest rate, revised repayment period, and even different repayment options.


Benefits of Loan Consolidation or Refinancing


  1. Simplified Repayment: Consolidating or refinancing your student loans streamlines the repayment process by combining multiple loans into one. This means you’ll have a single monthly payment to manage, making it easier to stay organized and keep track of your progress.


  1. Potential Lower Interest Rates: Through refinancing, you may qualify for a lower interest rate than what you currently have on your loans. A reduced interest rate can save you money over the life of the loan, resulting in lower monthly payments or the ability to pay off your loans faster.


  1. Customizable Loan Terms: When you refinance, you have the opportunity to customize your loan terms based on your financial goals. You can choose a new repayment period that aligns with your desired timeline and select a payment plan that suits your budget. This flexibility allows you to regain control over your loan repayment journey.


Factors to Consider Before Consolidating or Refinancing


  1. Eligibility: Loan consolidation is available for federal student loans, while loan refinancing typically applies to both federal and private loans. Be aware of the eligibility requirements for consolidation and refinancing, as private lenders may have specific criteria.


  1. Impact on Loan Benefits: Consolidating federal student loans may cause you to lose certain benefits such as loan forgiveness programs, income-driven repayment options, and interest subsidies. Consider the impact of these benefits before deciding to consolidate.


  1. Creditworthiness: Refinancing is based on your creditworthiness, which includes factors such as your credit score, income, and debt-to-income ratio. Assess your credit profile and financial situation to determine if you’re likely to qualify for favorable refinancing terms.


Strategy 3: Make Extra or Biweekly Payments


When it comes to repaying your student loans, making the minimum monthly payment is necessary, but it may not be the most effective way to reduce your debt and save money on interest. By implementing the strategy of making extra or biweekly payments, you can accelerate your loan repayment and potentially save thousands of dollars over the life of your loans. Let’s explore this powerful strategy in more detail.


Understanding Extra and Biweekly Payments


  1. Extra Payments: Making extra payments involves paying more than the minimum monthly amount due on your student loans. These additional payments go directly towards reducing the principal balance of your loan, resulting in a faster payoff and less overall interest paid.


  1. Biweekly Payments: Biweekly payments involve dividing your monthly payment in half and making payments every two weeks instead of once a month. Since there are 52 weeks in a year, you’ll end up making 26 half-payments, which is equivalent to 13 full monthly payments in a year. This strategy allows you to make one extra monthly payment annually without feeling the burden of a larger monthly payment.


Benefits of Making Extra or Biweekly Payments


  1. Faster Loan Repayment: By making extra or biweekly payments, you’ll expedite the repayment of your student loans. The additional funds directly reduce the principal balance, enabling you to become debt-free sooner.


  1. Interest Savings: Paying extra towards your loans can significantly reduce the amount of interest you’ll pay over time. Since interest accrues based on the outstanding principal balance, decreasing the balance through extra payments results in substantial long-term savings.


  1. Shortened Loan Term: By accelerating your loan repayment, you can potentially shorten the term of your loans. This means you’ll be free from student loan debt sooner, allowing you to allocate your financial resources towards other financial goals and aspirations.


Strategies for Implementing Extra or Biweekly Payments


  1. Create a Budget: Begin by examining your budget to identify areas where you can cut expenses or allocate additional funds towards your student loan payments. Small adjustments, such as reducing discretionary spending or finding ways to save on monthly bills, can free up money for extra payments.


  1. Prioritize High-Interest Loans: If you have multiple student loans, focus on making extra payments towards the loans with the highest interest rates first. By targeting high-interest loans, you’ll save more money on interest in the long run.


  1. Set Up Automatic Payments: Consider setting up automatic payments for your extra or biweekly payments. This ensures that the additional payments are made consistently without the risk of forgetting or getting off track.


  1. Communicate with Your Loan Servicer: When making extra payments, clearly communicate with your loan servicer to ensure the funds are applied correctly. Instruct them to allocate the additional payments towards the principal balance rather than future payments.


Strategy 4: Seek Loan Forgiveness Programs


Loan forgiveness programs offer the potential to have a portion, or in some cases, the entirety of your student loans forgiven. By exploring these programs, you can significantly reduce your loan burden and pave the way to financial freedom. Let’s discuss the details of seeking loan forgiveness programs:


  1. Public Service Loan Forgiveness (PSLF): PSLF is a program designed for borrowers working in public service or certain non-profit organizations. After making 120 qualifying payments, your remaining loan balance may be forgiven.


  1. Teacher Loan Forgiveness: This program is specifically for teachers who work in low-income schools or educational service agencies. Depending on your eligibility and years of service, you may be eligible for loan forgiveness of up to $17,500.


  1. Other Forgiveness Programs: There are various other loan forgiveness programs available, such as forgiveness for nurses, doctors, military personnel, and those in specific professions or areas of need. Research and identify programs that align with your career path or personal circumstances.


Eligibility and Requirements


  1. Meeting Employment Criteria: Each loan forgiveness program has specific employment criteria that you must meet. This may include working in certain fields, for eligible employers, or fulfilling specific service requirements.


  1. Making Qualifying Payments: Most loan forgiveness programs require a specific number of qualifying payments before forgiveness can be granted. Ensure you understand the payment requirements and stay on track to meet them.


Application and Enrollment


  1. Research and Gather Information: Start by researching the loan forgiveness programs that align with your situation. Understand the eligibility requirements, benefits, and application process for each program.


  1. Complete the Application: Once you’ve identified the program(s) you qualify for, complete the application accurately and thoroughly. Pay close attention to required documentation and deadlines.


  1. Maintain Records: Keep meticulous records of your employment, payments, and any other relevant documentation. These records will be crucial when applying for loan forgiveness and ensuring your eligibility.


Strategy 5: Improve Credit Score through Responsible Credit Management


Your credit score plays a crucial role in your financial life. A higher credit score not only opens doors to better interest rates and loan terms but also reflects your financial responsibility. By implementing responsible credit management strategies, you can improve your credit score while successfully managing your student loans.


  1. Credit Score Basics: Your credit score is a numerical representation of your creditworthiness and financial history. Lenders, landlords, and even potential employers use this score to evaluate your creditworthiness and assess the risk associated with lending you money.


  1. Impact on Student Loans: A higher credit score can positively impact your student loans by potentially qualifying you for lower interest rates, favorable loan terms, and refinancing options. It also showcases your financial responsibility, making you an attractive borrower to lenders.


Strategies for Improving Your Credit Score


  1. Make On-Time Payments: Paying your bills, including your student loans, on time is one of the most crucial factors in building and maintaining a good credit score. Set up automatic payments or reminders to ensure you never miss a payment.


  1. Manage Credit Utilization: Aim to keep your credit card balances low in relation to your credit limits. High credit utilization can negatively impact your credit score. As a general rule, try to keep your credit utilization below 30% to demonstrate responsible credit management.


  1. Diversify Your Credit Mix: Having a mix of different types of credit, such as student loans, credit cards, or car loans, can positively impact your credit score. This demonstrates your ability to handle different types of credit responsibly.


  1. Maintain Long-Term Credit Relationships: The length of your credit history matters. Keep old credit accounts open, even if you don’t actively use them, as they contribute to the length of your credit history. Closing old accounts can shorten your credit history and potentially lower your score.


  1. Limit New Credit Applications: Each time you apply for new credit, a hard inquiry is added to your credit report, which can temporarily lower your credit score. Limit new credit applications unless necessary.


Monitoring and Building Credit Responsibly


  1. Monitor Your Credit Report: Regularly review your credit report to ensure accuracy and identify any errors or fraudulent activity. You’re entitled to one free credit report per year from each of the three major credit bureaus: Experian, TransUnion, and Equifax.


  1. Building Credit as a Student: If you’re new to credit, consider opening a student credit card or becoming an authorized user on a parent’s credit card. Make small purchases and consistently pay off the balance in full to establish a positive credit history.


  1. Be Patient and Persistent: Building credit takes time, so be patient with the process. Continue practicing responsible credit management habits, and over time, your credit score will improve.


Strategy 6: Take Advantage of Student Loan Tax Deductions and Credits


As a student loan borrower, you may be eligible for certain tax deductions and credits that can help alleviate the financial burden of your student loans. By understanding and utilizing these tax benefits, you can maximize your savings and reduce the overall cost of your student loans.


  1. Eligibility: The student loan interest deduction allows you to deduct up to $2,500 in student loan interest paid during the tax year. To qualify, you must meet certain income requirements and have incurred the interest on qualified student loans.


  1. Deduction Process: To claim the student loan interest deduction, you’ll need to file Form 1040 or 1040A and complete the relevant sections related to the deduction. Consult a tax professional or utilize tax software to ensure you accurately claim the deduction.


  1. Potential Savings: The student loan interest deduction can result in tax savings by reducing your taxable income. This deduction helps lower your overall tax liability, putting more money back in your pocket.


Education Tax Credits


  1. American Opportunity Credit: The American Opportunity Credit provides a tax credit of up to $2,500 per year for each eligible student. This credit is available for the first four years of post-secondary education and can cover expenses such as tuition, fees, and course materials.


  1. Lifetime Learning Credit: The Lifetime Learning Credit offers a tax credit of up to $2,000 per year for qualified education expenses. Unlike the American Opportunity Credit, this credit is available for an unlimited number of years and can be used for a broader range of educational pursuits.


  1. Eligibility and Requirements: To qualify for these education tax credits, you must meet specific eligibility criteria, including enrollment in an eligible educational institution and meeting income limitations. It’s essential to review the IRS guidelines or consult a tax professional for accurate information and guidance.


  1. Claiming the Credits: To claim the education tax credits, you’ll need to complete Form 8863 and include it with your tax return. Make sure to gather the necessary documentation, such as tuition statements and receipts, to support your claim.


Other Potential Tax Benefits


  1. Tuition and Fees Deduction: While this deduction expired at the end of 2020, it’s worth checking for any potential extensions or changes in tax laws. This deduction allows you to deduct qualified tuition and fees paid for higher education.


  1. State-Specific Tax Benefits: Some states offer their own tax incentives and benefits for student loan borrowers. Research the tax laws in your state to see if there are any additional deductions or credits available to you.


  1. Consult a Tax Professional: Tax laws can be complex and subject to change. It’s always a good idea to consult a tax professional or utilize tax software to ensure you maximize your tax benefits and accurately claim any deductions or credits related to your paying student loans early.


By taking advantage of student loan tax deductions and credits, you can reduce your overall tax liability and potentially save a significant amount of money. Be sure to stay informed about current tax laws and consult a tax professional to ensure you claim the appropriate deductions and credits for your specific situation.


Conclusion


Paying student loans early and building credit are crucial components of achieving financial stability as a student. By implementing the key strategies outlined in this article, you can take control of your financial journey. Lowering student loan payments and boosting your credit score are attainable goals with the right strategies and mindset. Patience, persistence, and proactive decision-making are the keys to conquering your paying student loans early, building credit, and paving the way to a brighter financial future.

Maximizing Your Benefits: The Interplay Between Health Insurance and Personal Accident Insurance

Today, we’re going to explore a topic that’s often overlooked but incredibly important: the interplay between health insurance and personal accident insurance. Now, I know what you’re thinking – “Isn’t insurance just insurance?” Well, not quite. Each type of insurance has its unique features, benefits, and, yes, even limitations. 


Understanding how these different types of insurance work together can help you maximize your benefits and ensure you’re covered in a wide range of scenarios. It’s like having a safety net under your safety net. Sounds pretty reassuring, right?


So, whether you’re new to the world of insurance or just looking to brush up on your knowledge, stick around because we will go over how health insurance and personal accident insurance can work together to give you the best possible protection. You can visit our website for more details: ” The Jordan insurance “.


Alright, let’s get started by understanding the basics. First up, is health insurance.

Understanding Health Insurance

Health insurance, as many of you might already know, is a type of insurance coverage that pays for medical and surgical expenses incurred by the insured.


There are different types of health insurance plans out there. You’ve got your individual health insurance plans, family floater plans, senior citizen health insurance plans, and even critical illness plans. Each of these is designed to cater to specific needs and circumstances. For instance, a family floater plan covers all the members of a family under a single policy, while a critical illness plan provides coverage against life-threatening diseases like cancer, heart attack, and stroke.


Now, here’s the thing about health insurance – while it’s incredibly helpful, it doesn’t cover everything. Most health insurance plans have exclusions, which are specific situations or conditions that the insurance company won’t cover. These can include things like cosmetic surgery, alternative therapies, and pre-existing conditions (at least for a certain period after you take out the policy). 


Also, health insurance typically covers expenses related to hospitalization and treatment. But what about the other financial implications of an accident or illness, like loss of income during recovery? That’s where personal accident insurance comes into play. But we’ll get to that in a bit.


In a nutshell, health insurance is a crucial part of your financial safety net, but it’s not the whole picture. To get complete coverage, you might need to consider other types of insurance as well – like personal accident insurance. 

Understanding Personal Accident Insurance

Personal accident insurance is a type of insurance that provides coverage in the event of death or disability caused by an accident. It’s like having a financial guardian angel that steps in when life throws a curveball your way.


There are different types of personal accident insurance plans, too. Some cover only accidental death, some cover both death and permanent total disability, and others offer comprehensive coverage that includes death, permanent total disability, and even temporary total disability.


Now, here’s where personal accident insurance really shines. Unlike health insurance, which typically covers medical expenses related to hospitalization and treatment, personal accident insurance can provide a lump sum benefit in case of accidental death or disability. This can be a lifesaver, especially if you’re the primary breadwinner in your family. 


Imagine you are involved in a car accident and suffer a serious injury that leaves you unable to work for several months. Your health insurance will likely cover your medical bills, but what about your lost income? That’s where personal accident insurance comes in. It can provide a payout to help cover your loss of income during your recovery period.


But just like health insurance, personal accident insurance has its limitations. It only covers accidents, so illnesses or health conditions are not included. Also, certain types of accidents may be excluded, such as those caused by extreme sports or illegal activities.


In essence, personal accident insurance is another piece of the puzzle in your financial protection plan. It complements your health insurance by covering areas that health insurance typically doesn’t. But how exactly do these two types of insurance work together? Let’s explore that next.


The Interplay Between Health Insurance and Personal Accident Insurance

Think of health insurance and personal accident insurance as two sides of the same coin. They’re different, yes, but they complement each other beautifully to provide a comprehensive safety net.


Health insurance steps in when you need medical attention, whether it’s due to an illness or an accident. It covers your hospital bills, medication costs, and other treatment expenses. But remember, it typically doesn’t cover loss of income during your recovery period.


That’s where personal accident insurance comes in. If you’re involved in an accident and can’t work for a while, personal accident insurance can provide a lump sum payout to help cover your lost income. It’s a financial buffer that helps you maintain your lifestyle and meet your financial obligations even when you’re unable to earn.


Let’s consider a real-life example. Say you’re an avid cyclist and you unfortunately have a serious fall during one of your rides. You break your leg and need surgery, followed by several months of physical therapy. Your health insurance would likely cover your medical expenses, including surgery and therapy. But what about your regular bills and expenses during your recovery period, especially if you’re unable to work?


That’s where your personal accident insurance would come into play. It could provide a payout to help you cover your living expenses while you’re out of work. So, in this scenario, having both health insurance and personal accident insurance car rental would give you a much more comprehensive safety net than having just one or the other.


In essence, health insurance and personal accident insurance work together to cover different aspects of the financial impact of an accident or illness. They’re like two pieces of a puzzle that fit together to give you a complete picture of protection. 


But knowing this, how can you maximize your benefits from these two types of insurance? 

Maximizing Your Benefits

The first step to maximizing your benefits is understanding your needs and risks. Are you in a high-risk profession? Do you have dependents who rely on your income? Do you have a history of certain health conditions? These are all factors that can influence what kind of coverage you need.


Once you’ve assessed your needs, you can start looking at different insurance plans. Don’t just look at the cost of the premiums – consider the coverage, the exclusions, the claim process, and the reputation of the insurance company. Remember, the cheapest plan isn’t always the best one.


  • When it comes to health insurance, consider plans that cover a wide range of medical services and have a broad network of hospitals. Also, look for plans that offer features like cashless hospitalization, which can make the claim process much smoother.


  • For personal accident insurance car rental, consider plans that offer comprehensive coverage, including accidental death, permanent total disability, and temporary total disability. Also, look for plans that offer additional benefits, like coverage for medical expenses related to the accident, and even education benefits for your children in case of your accidental death or disability.


  • Another key point is to review your insurance plans regularly. Your needs and circumstances can change over time, and your insurance coverage should reflect that. For instance, if you’ve recently started a family, you might want to increase your coverage to ensure your loved ones are protected.


  • Don’t hesitate to seek advice from insurance brokers or advisors. They can help you navigate the complex world of insurance and find the best plans for your needs. Just make sure they’re licensed and reputable.


Maximizing your benefits from health insurance and personal accident insurance car rental is all about understanding your needs, choosing the right plans, and regularly reviewing your coverage. It might seem daunting, but with a bit of research and planning, you can build a solid safety net that protects you and your loved ones.


Conclusions


Hopefully, by now, you have a better understanding of the health insurance and personal accident insurance car rental world, as we have just explored above. Remember that insurance isn’t just about protecting yourself from the financial impact of unexpected events – it’s also about peace of mind. Knowing that you have a comprehensive safety net can give you the confidence to live your life to the fullest, without worrying about “what ifs.”


Take time to review your current insurance plans. Do they provide the coverage you need? Are there gaps that need to be filled? Could you benefit from adding personal accident insurance car rental to your safety net? These are important questions to consider. Insurance might seem complicated, but it doesn’t have to be. With a bit of knowledge and planning, you can navigate the insurance landscape like a pro. And remember, you’re not alone in this journey. There are resources and professionals out there who can help.


I hope this blog post has been helpful and enlightening. And if you found this post useful, why not share it with your friends and family? You never know, it might just help someone make a more informed insurance decision.


Stay safe, stay insured, and remember – your safety net is only as strong as you make it. Until next time.