Free Music distribution

Introduction:

In a time when the internet and free music distribution services are becoming more and more influential, musicians may now showcase their skills to a global audience. This piece explores the world of free music distribution, looking at its benefits and the internet resources that let musicians from all over the world reach out to fans at a reasonable price.

The Rise of Free Music Distribution:

The days of depending solely on record labels for music exposure are long gone. Online platforms have been essential in opening up the music industry recently and empowering musicians to self-distribute their work. An innovative idea known as “free music distribution” releases musicians from the financial burden of creating and shipping physical copies, enabling them to share their works with a wider audience.

Benefits of Free Music Distribution:

  1. Global Reach: Being able to reach a worldwide audience is one of the most important benefits of free music distribution. Geographical restrictions are removed by digital platforms, which allow artists to interact with audiences worldwide.
  2. Cost-effectiveness: Upfront expenses were frequently high with traditional music distribution techniques. Conversely, systems for free music distribution provide affordable options that let musicians keep a larger portion of their profits.
  3. Independence and Control: By using free distribution channels, independent musicians may keep more creative control over their work. Without outside influence, musicians are free to make decisions about their creative direction and release dates that are in line with their vision.
  4. Real-Time Analytics: A lot of free distribution platforms use real-time analytics to give artists insightful information. With the use of this data, musicians may improve their understanding of their audience, hone their marketing tactics, and make well-informed choices to expand their reach.

Popular Free Music Distribution Platforms:

  1. DistroKid: For a set annual subscription, musicians may post an unlimited number of tracks to this platform, which is well-known for its affordability and ease of use. It also has features like YouTube Content ID and fast Spotify verification.
  2. TuneCore: Artists may distribute their music to major web platforms with TuneCore’s user-friendly interface. The site offers thorough sales and streaming information, and musicians keep all of their income.
  3. CD Baby: One of the first companies in the independent music distribution space, CD Baby provides a number of services, such as CD distribution (physical and digital) and artist licensing.
  4. Amuse: Amuse is a unique distribution platform that prioritizes mobile use, enabling musicians to effortlessly post and share their songs straight from their cellphones. Artists can choose to pay for more features, but distribution is free.

Tips for Successful Free Music Distribution:

  1. Quality counts: Before releasing your song, make sure it is of the highest caliber. In a congested digital arena, professional production values may help your work stand out.
  2. Optimize information: For your music to be found, precise and thorough information is essential. Add pertinent details like the release date, tone, and genre.
  3. Involve Your Audience: Use social media and other internet channels to establish a connection with your followers. Developing a devoted fan following may have a big impact on your music’s success.
  4. Remain Consistent: To stay current, put out new songs on a regular basis and take part in marketing campaigns. To establish and preserve a position in the digital music market, consistency is essential.

Conclusion:

The music industry has changed as a result of free music distribution, which now lets musicians follow their passions. Thanks to the affordability and ease of use of digital platforms, musicians may now reach a worldwide audience and launch lucrative careers on their own. Accepting free music distribution may be a game-changer for musicians trying to establish themselves in the digital era as things continue to change.

 

5 Tips For Drawing Better With The Base App

Drawing is one of the fundamental skills that every artist should possess. And with the advent of technology, it has become easier than ever to learn how to draw. In this article, we will share five tips for drawing better with the base app. These tips will help you get started with your drawing and make it easier for you to improve your skills over time.

Get a better idea of what you’re drawing

There are a few different ways to get a better idea of what you’re drawing. One way is to use the base app. The base app has a range of features that can help you improve your drawing skills, including a grid system and pre-made objects for you to practice with.


Another way is to use videos or tutorials. These can give you an overview of different techniques and help you complete specific tasks more efficiently. Finally, take some time to experiment with different mediums and styles yourself. This will give you a more in-depth understanding of how each one works and allow you to develop your unique style.

Fully understand your tools

  1. Fully understand your tools – before you start drawing, make sure you have a good understanding of the app you’re using. There are several different drawing tools available, and it can be helpful to know how each one works to get the most out of them.


  1. Experiment – once you’ve got a feel for the app, experiment with different techniques and see what works best for you. There’s no wrong way to draw, and as long as you’re confident in your work, nothing is stopping you from trying new things.


  1. Get creative – don’t be afraid to experiment with different art styles and use your imagination when drawing. Using bright colors or crazy shapes can help create unique pieces that stand out from the crowd.

Experiment with your drawing process

If you’re a beginner artist, one of the most important things you can do is experiment with your drawing process. By trying out different techniques, you can develop your style and improve your Drawing skills dramatically.


Here are four tips for improving your drawing process:


  1. Draw From Life


One of the best ways to improve your Drawing skills is to draw from life. By copying objects and people you see around you, you’ll learn how to accurately represent form and detail. This is especially important if you want to create realistic drawings.


  1. Practice Freehand Drawing


Another great way to improve your Drawing skills is by practicing freehand Drawing. By working without any guidelines or reference points, you can train your brain to create images on its own. Plus, this method gives you more freedom when it comes to expression and creativity.


  1. Use Reference Materials When Necessary


If you find it difficult to draw from life or freehand, use reference materials whenever possible. This includes magazines, online galleries, and even photos of real-life objects! By using these resources as a guide, you can improve your accuracy and precision while still creating original artwork.


  1. Take Art Classes If You Want To Further Develop YourDrawing Skills

Master the basics

If you’re new to the app and want to start drawing better, there are a few basics you need to know. The first is that the app has a wealth of tutorials and tips available on its website, so be sure to check them out if you’re having trouble getting started. The second is that the app offers an easy way to import your drawings from other apps. Just tap ‘Import’ in the top toolbar, select your file, and click ‘Open.’ Finally, it’s important to practice regularly. Drawing can be hard at first, but with enough practice, you’ll start seeing improvements!

Improve your skills

  1. Draw with a loose hand: The best way to improve your skills is by practicing with a loose hand. This means you should use more exaggerated and less precise movements. This will help you develop better control over your strokes.


  1. Take breaks: Drawing can be a demanding activity, so take regular breaks to allow your eyes and hands to rest. This will help you maintain your skills and keep the progress you make consistent.


  1. Use reference material: When you’re starting, it can be helpful to use reference material such as photographs or drawings to help guide your strokes. By looking at something that’s already been drawn, you’ll learn how to apply the same principles in your work.


  1. Experiment: Don’t be afraid to experiment with different techniques and approaches – this is how you’ll develop your unique style. As long as you stay consistent with the basic principles outlined in this article, experimentation will allow you to explore new territory without the risk of ruining your work

Conclusion

Thank you for reading our article on the base app. In it, we discussed 5 tips that can help you improve your drawing skills. Hopefully, these tips have helped you to develop a better understanding of the basic features of the base app CLICK HERE (Drawing Base) and how to use them to your advantage. If you have any questions or feedback about what we covered, please feel free to leave a comment below or contact us directly. We would love to hear from you!

Athena Perample Manual: Extravagance Life

The Athena Parample Manual is a guide to living extravagantly without actually spending a lot of money. Written by serial entrepreneur and bestselling author Derek Sivers, the book is a practical how-to for spending less while still having a great life. In this blog post, we will be discussing one of the key tenets of the Athena Perample Manual: living extravagantly without Spending A Lot of Money. We’ll provide you with tips on how to live large without breaking the bank, as well as some helpful examples from Derek Sivers himself. So if you want to live a life of luxury without breaking the bank, read on!

What is extravagance life?

Extravagance life is all about having the best of everything. Whether it’s spending money on expensive items, traveling to new places, or living extravagantly in one’s home, these are all examples of how people can enjoy life to its fullest. While some may see this as a waste of money, others may find that living this way is what makes them happy.


There is no wrong way to live an extravagant lifestyle and there are plenty of ways for anyone to find their version of happiness by indulging in the things that make them feel good. Whether it’s buying upscale clothes or taking luxury vacations, there are many ways to elevate one’s life and have a great time doing it.

What are the benefits of living extravagantly?

The benefits of extravagant life are many and varied. Some people enjoy the feeling of being able to do whatever they want, when they want, without worrying about whether it’s affordable or not. Others find that living a lavishly extravagant lifestyle allows them to escape reality for a while, and just have fun. Regardless of why someone wants to indulge in extravagance, there are plenty of ways to enjoy the benefits.


Some of the biggest benefits of an extravagant life include


1) Increased self-confidence. When you’re living large regularly, you start to feel more confident in yourself overall. You no longer have to worry about whether or not you can afford something, because you know that you can always afford it if you want to. This increased confidence can lead to empowerment and improved self-esteem.


2) More pleasure in life. When we live modestly, we often miss out on opportunities for happiness and pleasure in life. We may be able to afford the same things as others, but we won’t necessarily be enjoying them as much because we’ll be too focused on saving money instead of enjoying ourselves. Living extravagantly lets us indulge in our passions and hobbies without worrying about finances, which can lead to a lot more enjoyment in both our personal lives and our professional careers.


3) Improved mental health. Spending excessively on items that don’t matter (like vacations or nights out) might make us feel temporarily happy but will probably

How to start living extravagantly?

If you’re looking to start living extravagantly, there are a few things you need to do. The first step is to change your mindset and begin thinking about money in a new way. Once you’ve changed your attitude, it’s time to get started on actually living extravagantly. Here are some tips on how to do that:


  1. Start with small goals. Instead of aiming to spend $10,000 on vacations this year, set smaller goals like spending $500 on vacation clothes or spending $25 on luxury items every month. This way, you’ll feel more satisfaction when you reach your larger goal and won’t be tempted to go overboard.


  1. Prioritize pleasure over practicality. When it comes to spending money, focus on things that will make you happy rather than things that will help you save money in the long run. For example, if you love going out for dinner but hate cooking, treat yourself to a night out once a month instead of trying to cook at home all the time. Not only will this allow you to indulge in your favorite leisure activity without costing too much money, but it’ll also teach you how to cook something delicious and affordable regularly!


  1. Make use of tax incentives and loopholes. There are many ways that you can save money legally by making wise financial decisions – whether that’s by setting up a budget or taking advantage of tax breaks and loopholes available to individuals or businesses. Do your research

Things to buy for an extravagant lifestyle

If you’re looking for ways to up your extravagant lifestyle, here are a few things to buy:


-A luxurious car: A high-class car will show that you care about your appearance and status. Consider a Rolls-Royce or a Mercedes Benz.


-Luxury clothing: You don’t have to spend a fortune on clothes, but make sure they are of the highest quality. Look for designer brands like Saint Laurent or Christian Dior.


-Private island: If you can afford it, purchase a private island off the coast of some exotic locale. This will give you an escape from the everyday grind and allow you to live in luxury without having to worry about money.

How to make your home lavish

Everybody loves a lavish lifestyle, but it’s not always easy to maintain. Here are some tips on how to make your home great:


  1. Start with your interior design. A lavish home doesn’t just have to be flashy and over the top – it can also be comfortable and relaxing. Pay attention to the details, from the color of the walls to the type of wood used in furniture.


  1. Add beautiful pieces of art and objets d’art to round out the look. Whether you buy them or find them freebies at museums, they will add an extra layer of class and luxury to your home.


  1. Make use of luxurious materials like silk sheets and rugs, fur coats, and high-quality bedding. Not only will they make your room feel more comfortable, but they’ll also give it that added touch of luxury.


  1. Upgrade your dining area into a place of opulence by adding extravagant pieces like marble countertops and chandeliers. If you don’t have enough space for all of this material, consider using vintage objects as substitutes – they’ll give your dining area that old-world charm that everyone will love!


  1. Create a unique atmosphere in each room by selecting candles, plants, and other décor that complement the theme of that particular room. For example, if you have a romantic bedroom set up with candles in hearts and roses decals on the wall

Conclusion

In today’s fast-paced world, it is often difficult to find time for ourselves. Too often, we are pushed to the point where we feel like we have no choice but to cave and let our everyday lives take over. Athena Parample are become slaves to our hectic schedules and commitments, living life on auto-pilot instead of taking the time for ourselves that we so deeply crave. If this sounds familiar, it might be time for you to reconsider your approach to life. You don’t have to live a life of extravagance to enjoy yourself; in fact, sometimes embracing simplicity can be just as rewarding. When you focus on taking care of yourself and doing what makes you happy, you will find that life becomes much more extravagant than you ever could have imagined.

Athena Perample: A Pioneering Woman In American Business And Politics

Athena Perample is an American businesswoman, entrepreneur, and political pioneer. She is one of the renowned figures who have made a name for themselves in the world of business and politics. During her distinguished career, she has become one of the most influential women in American history. In this blog post, we’ll take a look at Anthena Perample journey from starting as a small business owner to becoming a powerful political figure in the United States. We’ll explore her career highlights and how she became an inspiration for generations to come.

Early Life and Career

Athena Perample was born in Boston, Massachusetts to a wealthy family. She was educated at private schools and then attended college at Smith College. After college, she worked for a short time as a secretary before marrying her husband, John Preamble. The couple had three children together.

In the early 1900s, Athena became involved in the women’s suffrage movement. She was an active member of the National American Woman Suffrage Association and helped to organize several large suffrage rallies. She also spoke out against child labor and working conditions for women.

In 1912, Athena ran for the US Senate as a suffrage candidate. Although she lost the election, she gained national attention for her campaign. After her Senate run, Athena continued to work for the women’s suffrage movement and also became involved in the business. In 1916, she co-founded the National Women’s Party with Alice Paul.

The National Women’s Party was dedicated to securing equal rights for women through amendments to the US Constitution. Athena served as the organization’s first president and worked tirelessly to promote their cause. In 1920, she helped to ratify the Nineteenth Amendment which granted women the right to vote nationwide.

After the ratification of the Nineteenth Amendment, Athena shifted her focus to business endeavors. She served on the boards of several corporations and was one of the first female corporate directors in America. She also started her own company which manufactured beauty products for women.

Throughout her life,

Athena Perample in Business

In business, Athena Perample was a true pioneer. She was one of the first women to start her own business, and she quickly made a name for herself in the male-dominated world of American business. Her business success led her to politics, where she became one of the most important women in the early years of the United States.

Perample’s story begins in 1792 when she started her millinery shop in Philadelphia. Her shop quickly became successful, and she soon began to expand her business. In 1796, she opened a second shop in New York City, and by 1800 she had shops in Boston and Baltimore as well. Her business success led her to become involved in politics, and she ran for Congress in 1804. She lost that election, but she continued to be active in politics, serving on several important committees.

In 1809, Perample was appointed by President James Madison to be the Collector of Customs for the Port of Philadelphia. This was a very important position, and she served with distinction for many years. In 1817, she was appointed by President Monroe to be one of the commissioners responsible for negotiating a treaty with Great Britain. This treaty would eventually lead to the end of the War of 1812.

Perample’s success in business and politics made her one of the most respected women in America. She was an important role model for other women who wanted to enter into business and politics. She paved the way

Athena Perample in Politics

In the early days of the United States, women were not allowed to participate in politics. This all changed with the ratification of the 19th Amendment in 1920, which gave women the right to vote. Athena Perample was one of the first women to take advantage of this new right, and she quickly became a leading voice in American politics.

Preamble was born in 1868 in New York City. She was a bright student, and she went on to study at Vassar College and Columbia University. After graduation, she began working as a teacher. She soon became interested in politics, and she started working for various political campaigns. In 1904, she ran for the New York State Assembly, but she was defeated.

Undeterred by this setback, Perample continued to work for progressive causes. In 1912, she helped organize the Women’s Suffrage Party in New York City. The following year, she worked on Woodrow Wilson’s presidential campaign. When Wilson was elected, Perample was appointed as his secretary.

In this role, Perample had a front-row seat to history as Wilson navigated through some of the most challenging moments of his presidency, including World War I and the ratifying of the 19th Amendment. After Wilson died in 1924, Perample remained active in politics; she served as a delegate to the Democratic National Convention several times and even ran for Congress in 1930 (although she was unsuccessful).

Later life and legacy

In her later years, Athena Perample continued to be a pioneer in both business and politics. In the business world, she was one of the first female executives at a major corporation. In politics, she was one of the first women to run for office in her state.

Preamble retired from her corporate job in the early 1980s. She then decided to enter politics, and in 1984 she ran for the U.S. Senate from her home state of Pennsylvania. Although she lost the election, she was proud to have been one of the first women to run for Senate in Pennsylvania.

After she failed her Senate bid, Perample remained active in politics and served on several commissions and boards. She also continued to be a champion for women in business and worked to mentor young female entrepreneurs.

Preamble passed away in 2001 at the age of 82. She left behind a legacy as a trailblazer in both business and politics. Her example continues to inspire women who are looking to break barriers and make their mark on the world.

Conclusion

Athena Perample is undoubtedly an inspiring woman to look up to, and her accomplishments in both business and politics prove that she was a true pioneer. Her life serves as a reminder of the progress women can make when they are empowered, determined, and focused on their goals. Athena’s legacy continues to inspire millions of people today who learn from her example and strive for success in whatever fields they choose.

How to Install a Shower Screen

Installing a shower screen is becoming increasingly popular in modern homes. Not only can it make a bathroom look more aesthetically pleasing, but it also adds an extra layer of privacy and protection from water spills that can occur when showering. This article will explain the necessary steps for the successful installation of a shower screen.

Tools Needed

Installing a shower screen requires the right tools to make sure that it is installed properly and securely. To start, you’ll need a drill with a masonry bit for drilling into the tile wall. You will also need two adjustable wrenches or spanner sets for connecting the pieces of the frame together.

You’ll need some sealant to ensure that the frame is properly sealed and waterproofed. To finish off, you’ll require a screwdriver set to attach screws in order to secure the frame against the wall. Depending on your installation project, you may require extra silicone sealant or adhesive backing strips for further waterproofing solutions.

It’s important to have all of these supplies on hand prior to starting your installation process as they are essential for making sure that your shower screen is secured and sealed correctly in place.

Removing Old Screen

Removing old screens from the shower can be difficult and require extra attention to detail. Unscrew the hinge pin with a screwdriver, and then support the glass panel as you move it out of its frame. If adhesive tape was used to secure the old screen, use a heat gun or hairdryer to loosen it before attempting to pry it away from the wall. Take care not to let any sharp edges or pieces of glass come into contact with your skin. For added safety, wear protective gloves while working on your shower glass.

It is also important that you properly dispose of any broken pieces of glass safely and carefully. Place them in a sealed container before taking them out of your home for disposal at an appropriate waste facility.

Assembling New Screen

Assembling the new screen requires gathering the necessary tools, preparing the shower area, measuring, cutting and then finally attaching the components.

Before beginning the assembly process it is important to have all tools on hand such as a screwdriver, drill, screws and washers. It is also beneficial to lay out all parts of the shower screen before getting started to make sure no pieces are missing. Additionally take measurements of both inside and outside dimensions of your existing shower so that you can purchase exactly what you need for your replacement screen.

Once all measurements are taken and tools gathered its time to begin assembling!

Securing New Screen

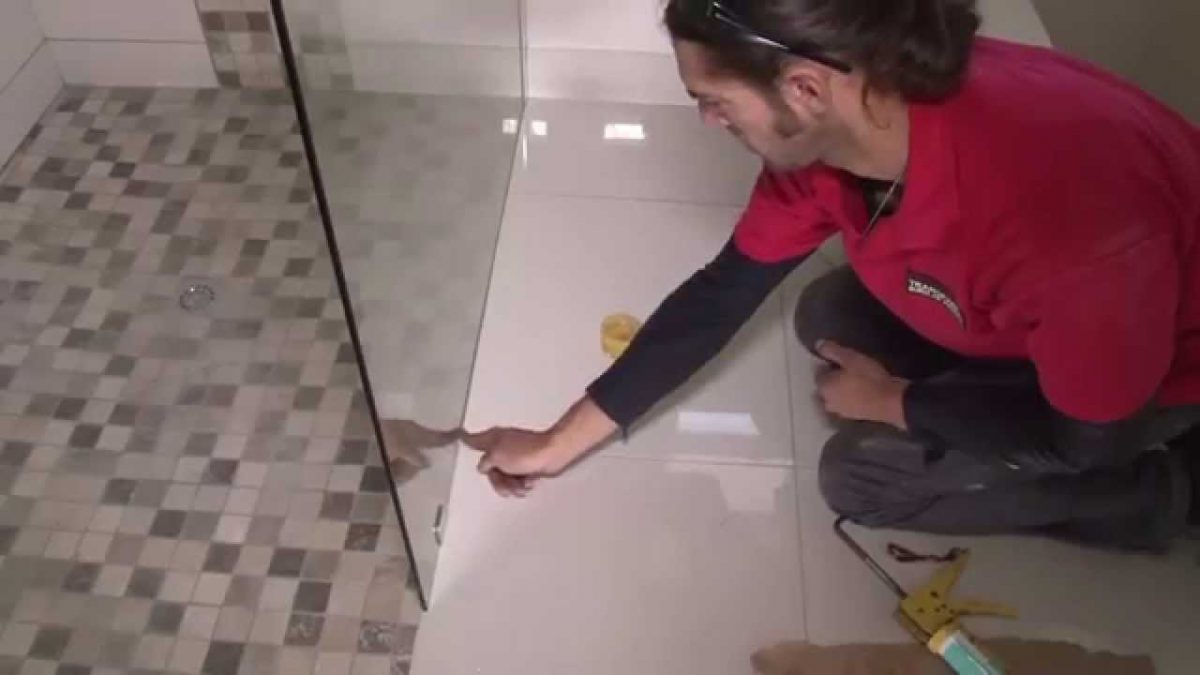
Securing the screen is essential to ensure it doesn’t come loose during use. Check the wall and floor around the area where the shower screen will be installed. Make sure that it’s flat and free of cracks or gaps that could compromise the stability and security of your screen.

Then, measure twice before cutting any holes in walls or tiles to install your new shower screen. Use a level or straight edge to confirm your measurements are accurate and use a power drill with masonry bit to create pilot holes.

Finishing Touches

Once the shower screen is installed, there are a few finishing touches that should be completed to ensure it looks its best.

First of all, make sure all joints and connections have been caulked or grouted for a smooth finish and to prevent water leakage. Another important step is to check the seals around the edges of the shower screen door; if they are worn out or cracked they should be replaced in order to provide an effective barrier against water escape.

Finally, it’s time to give your shower screen a final clean with glass cleaner before enjoying your newly-installed shower enclosure. With these simple steps you can be confident that your new shower screen will look great and last for years!

Conclusion:

Although installing a shower screen may seem daunting at first glance, it is actually quite simple with the right resources. By following these steps outlined in this article, you can confidently tackle this DIY project without any trouble or stress. With some preparation and an understanding of basic plumbing principles, anyone has the ability to install their own shower screen safely and successfully.


How to Clean Shower Screen with Baking Soda

Keeping your shower screen sparkling and clean can be a time consuming task, but with the right technique it doesn’t have to be a chore. Baking soda is an effective and natural cleaning product that can help you restore your shower screen to its original shine. In this article, we will explore how to use baking soda to get your shower screen looking brand new. We will walk through the necessary steps of preparing the area, creating an effective solution, and applying it to the glass surface.

Step 1: Gather Materials

It’s important to have the right materials before beginning any cleaning project, so the first step in cleaning a shower screen with baking soda is to gather your supplies. You’ll need baking soda, white vinegar, a clean cloth or sponge and some warm water.

Baking soda acts as both an abrasive cleaner and an odor neutralizer while white vinegar helps remove dirt and hard water spots without damaging surfaces. Having these items on hand will ensure you can easily tackle any dirt or grime that builds up on your shower screen.

When using baking soda for cleaning it’s important to wear protective gloves in order to protect your hands from irritation. Additionally, wearing goggles is recommended when dealing with products like white vinegar which can be potentially hazardous if it gets into contact with eyes. Once you have all of the necessary materials, you’re ready to begin cleaning!

Step 2: Prepare Shower Screen

Preparing a shower screen for cleaning is an important step, as it ensures that the screen is clean and free from dirt and debris.

Begin by removing the excess soap scum with a microfiber cloth or soft scrub brush. If necessary, use a mild detergent to help break up stubborn scum. Additionally, use a razor blade to scrape away any tough spots. For best results, wear protective gloves while using the razor blade.

Fill your sink with warm water and add two tablespoons of baking soda. Submerge the shower screen in this solution for 15-20 minutes before rinsing it off with warm water. This will loosen any remaining dirt and grime on the surface of the shower screen so that it can be more easily removed during the cleaning process.

Step 3: Apply Baking Soda Paste

Once you have removed any dirt and debris from the shower screen, it is time to apply a baking soda paste. To make the paste, mix together four parts of baking soda with one part of water in a bowl. Stir together until it forms a thick paste. Using an old rag, dip into the mixture and then rub this over the surface of your shower screen.

Make sure to cover all areas evenly. Allow the baking soda paste to sit on your shower screen for 15-20 minutes before washing off with warm water. This will help lift off any residual dirt or grime that may still be left behind from your earlier cleaning steps. After rinsing, dry off your shower screen with a soft cloth to prevent water spots from forming on its surface.

Step 4: Leave for 30 minutes

After spraying the screen liberally with a mixture of water and baking soda, it’s time to leave it alone. Let the solution sit on the screen for 30 minutes to allow it to take effect. During this time, scrubbing or wiping is not recommended as this will reduce the effectiveness of the cleaner. During this waiting period, focus can be placed on cleaning other parts of the bathroom or taking a break until returning to finish off.

Step 5: Scrub and Rinse

After allowing the baking soda mixture to sit for 10 minutes, it’s time to scrub the shower screen. Fill a bucket with hot water and use a sponge or soft cloth in circular motions to scrub away any remaining dirt and grime. Focus on high-traffic areas like around door handles and in corners where mold and mildew tend to accumulate.

When finished, empty the bucket of dirty water before refilling it with clean, warm water. Once again soak a sponge or cloth in this water and use it to rinse off all of the baking soda residue from the shower screen surface. Finish by wiping down the entire surface with a dry microfiber cloth for an extra shine.

Step 6: Repeat if Necessary

Repeat if Necessary may be the most important step of all, as it ensures that you have completely removed all dirt, grime and soap scum from your shower screen. If your cleaning efforts don’t seem to be working the first time around, simply repeat steps 1-5. This process is labor intensive and requires patience, but it will ensure a sparkling shower screen in no time.

It’s important to note that some soap scum and hard water stains are more stubborn than others. If after repeating steps 1-5 multiple times your shower screen still isn’t as clean as you would like it to be, consider using an additional cleaning product designed for tougher stains such as Lime Away or CLR. You can also try scrubbing with a nylon brush in order to loosen up difficult spots before applying baking soda paste again.

Conclusion:

Cleaning a shower screen with baking soda is an effective and straightforward way to keep surfaces free of grime and rust. Not only does it require minimal effort, but it also provides an affordable solution for those with a tight budget. With the right technique and some patience, anyone can make their shower screens look like new again without breaking the bank.


How to clean shower screen limescale

Cleaning shower screens is a tricky job that can be easily made even harder if limescale buildup has occurred over time. It can be difficult to remove, but it is possible with the right tools and techniques. In this article, we will discuss how to effectively clean shower screen limescale and restore your shower screens to their original shine.

Causes of Limescale

Limescale is the white, chalky buildup that can accumulate on shower screens and other bathroom fixtures. It is caused by a combination of hard water and high temperatures. Hard water contains higher levels of calcium, magnesium, and other minerals than soft water. When these minerals come into contact with surfaces in your bathroom, they start to form deposits known as limescale.

The hotter the temperature of the water, the faster this scale will form. This is especially true if you live in an area with hard water or if you use hot showers regularly. Other factors that can contribute to limescale formation include having an older plumbing system or using a lot of toiletries that contain soap or detergent. These substances often coat surfaces with a thin film that attracts mineral particles from hard water, resulting in limescale accumulation over time.

Tools Needed

When it comes to cleaning shower screen limescale, there are certain tools that you’ll need in order to do the job properly and effectively. You’ll need a damp cloth or sponge and some mild detergent. This will help to remove excess dirt and debris from the surface of your shower screen, before tackling any limescale build-up.

Additionally, it’s important that you have an abrasive scrubbing pad on hand as well. This will help you to really get into those hard-to-reach corners and crevices where limescale can accumulate over time. If the build up is particularly severe, then it may be worth investing in a specialist limescale remover too. Make sure you always wear protective gloves when cleaning with chemical products – safety first!

Step-by-Step Guide

This step by step guide will provide you with the tools and knowledge to effectively clean limescale off of your shower screen. Limescale is a mineral deposit that builds up in showers over time, resulting in an unsightly and difficult-to-remove film on the glass. By following these simple steps, you can remove limescale quickly and easily.

Begin by gathering some supplies: a sponge or non-abrasive cloth, white vinegar, a bucket or container for mixing the vinegar solution, rubber gloves (optional), and an old toothbrush for scrubbing tough spots. Fill your bucket or container with equal parts white vinegar and warm water – this will create your cleaning solution.

Once it’s mixed together, submerge your sponge into the solution and begin scrubbing away at any visible limescale on your shower screen. Use the toothbrush to scrub any particularly tough spots. Cleaning your shower screen is an easy and simple way to ensure that you’re getting the best out of your shower, and it only takes a few minutes. Plus, it s also good for your water bill!

Natural Solutions

Natural solutions are a great way to clean shower screens of limescale. Baking soda and vinegar is one of the most popular natural remedies for limescale. To use this method, combine equal parts baking soda and white vinegar in a bowl and stir until they form a paste. Apply the paste directly onto the shower screen with a soft cloth or sponge and let it sit for 30 minutes. After 30 minutes, wipe away any remaining residue with a damp cloth.

Another effective natural remedy for cleaning limescale from shower screens is lemon juice. Squeeze fresh lemon juice onto the affected area and let sit for 15 minutes before wiping away any residue with a damp cloth. Lemon juice’s acidity helps to break down hard water deposits on glass surfaces without damaging them or leaving behind streaks or smudges as harsh commercial products can do sometimes.

Chemical Solutions

Chemical solutions are one of the most effective ways to remove limescale from shower screens. When using chemical solutions, it is important to use them with caution and follow the manufacturer’s directions for safety.

One popular chemical solution for removing limescale is a citric acid cleaner. Citric acid cleaners work by breaking down the bonds that hold together the scale particles, making it much easier to wipe away.

To use a citric acid cleaner, simply spray it on the shower screen and leave it on for 10-20 minutes before wiping off with a damp cloth or sponge. It is also important to wear protective gloves when handling these products, as they can be corrosive if not handled properly.

Conclusion:

Cleaning shower screen limescale is not a difficult task. With a few simple steps outlined in the article, it can be achieved quickly and easily. The results are worth the effort because once complete, your shower screen will be gleaming and free of limescale deposits.


How to Clean Shower Screen Naturally

A clean shower screen is the key to a spotless shower that looks, feels and smells fresh. It can be difficult to know how to clean a shower screen naturally without the use of harsh chemicals and toxins. Fortunately, there are several natural methods you can use to keep your shower screen looking its best.

In this article, we will look at how you can use simple household items such as baking soda, white vinegar and lemon juice to effectively clean your shower screen. We’ll discuss each method in detail so that you can easily find the one that works best for you.

Supplies Needed: Natural Ingredients

When it comes to cleaning your shower screen naturally, there are a few supplies and natural ingredients that you will need. Vinegar is essential. It is an amazing natural cleaner that can be used to remove soap scum from the glass surface of your shower screen. You will also need baking soda and lemon juice which are both great at cutting through grease and grime on the surface of your shower screen.

Other items you may want to include in your natural cleaning kit are rubbing alcohol and essential oils such as tea tree oil or eucalyptus oil. These two ingredients help to disinfect the surfaces while leaving behind a pleasant scent. You can also use white distilled vinegar or apple cider vinegar for even more natural cleaning power. If you want an extra boost in shine, try using some olive oil after you have completed the regular cleaning process.

Step 1: Preparing the Solution

The first step in cleaning a shower screen is preparing the cleaning solution. This will help to loosen grime and dirt from the surface of the screen, making it easier to clean. A natural solution suitable for cleaning a shower screen can be made using white vinegar and hot water.

Vinegar contains acetic acid, which is a strong disinfectant that effectively kills bacteria, mold and mildew. Start by mixing four parts of hot water with one part of white vinegar in a spray bottle or bowl. For added effectiveness, you can add ten drops of tea tree oil to the solution before use. Tea tree oil has antiseptic properties that help kill bacteria as well as imparting a pleasant smell to the mixture. Once your cleaning solution is prepared, you are ready to move.

Step 2: Scrubbing the Screen

First, create a paste of baking soda and water. Mix enough baking soda with water to make a thick paste that will stay on the surface of the shower screen. Apply this mixture to any areas that are particularly dirty or stained using a microfiber cloth or soft scrub brush.

Let the paste sit for 15 minutes before beginning to scrub gently in small circles. This will help break down dirt, grime and soap scum that has built up over time. Once you’re satisfied with your progress, rinse away any remaining residue with warm water and allow it to dry completely before moving onto Step 3: Buffing and Polishing.

Step 3: Rinsing and Drying

After scrubbing the surface with a natural cleaner, it’s important to thoroughly rinse off the soap with clean water. If a spray bottle is available, this can be used to get into hard-to-reach areas. For best results, use lukewarm water and wipe down each section of the shower screen until you are sure that all the soapy residue has been removed.

Once done, use an absorbent cloth or squeegee to dry off any excess moisture from the screen’s surface. Make sure to pay extra attention when drying around joints and hinges as any remaining moisture could lead to mould growth over time. Drying should take no more than 5 minutes; once complete your shower screen will sparkle like new!

Tips for Maintenance

Regular maintenance is an important part of keeping any shower screen clean and in good condition.

After each use, wipe down the glass with a microfiber cloth dampened with water to remove soap residue before it can build up. This will also prevent hard-water spots from forming on the glass surface. For tougher stains, a mild detergent mixed into the water can be used for extra cleaning power.

Periodically apply a store-bought cleaner specifically designed for shower screens. Most cleaners come in an easy spray bottle that can be sprayed directly onto the glass and wiped off with a microfiber cloth or sponge.

Benefits of Shower Screen Cleaning

Regularly cleaning your shower screen is important for keeping it looking sparkling and preventing the build-up of mould, mildew and other nasty deposits. Fortunately, there are plenty of natural cleaning solutions that can be used to get the job done without having to resort to harsh chemicals. Not only can they effectively clean off dirt and grime, but they also have a number of additional benefits.

One such benefit is that natural cleaners are much gentler on the environment than traditional chemical products. This means that you don’t need to worry about toxins entering your water system or polluting the air when you use them in your bathroom. Natural cleaners also tend to be much cheaper than their chemical counterparts, making them an economical choice for anyone who wants to keep their shower screen sparkling without breaking the bank.

Conclusion

Cleaning a shower screen naturally isn’t difficult and can be done at home with everyday items. With just white vinegar, baking soda, and lemon juice, you can clean your shower screen of soap residue and limescale without having to use harsh chemicals.

It’s important to remember to keep the cleaning solutions on the glass for several minutes before wiping them off, so that they have enough time to work their magic. Regular cleaning with natural ingredients will help keep your shower screen looking like new and help prevent future soap buildup. Try out these tips next time you need to give your shower screen a good scrubbing Read more 

Chiller van, Chiller van rental in Dubai

Chiller Van offers a distinctive service. We transport your perishable goods with the highest care from their point of origin to you, our client. No matter the distance or location, our employees will ensure that your things stay fresh since they have received extensive training in cold chain management. The most recent technology is installed in our top-notch refrigerated trucks to guarantee that your products arrive in the condition you anticipate.

Chiller Van is pleased to offer dependable, high-quality service for all of your cold chain requirements. Any work, no matter how big or little, may be handled by our team of skilled specialists. We promise to deliver your items with the highest care and security while doing so swiftly and effectively. If you have any questions, our team is here to help you out and provide you the best service they can.

Since 1999, the family-run business Chiller Van has offered reliable service. Our goal is to provide trustworthy and expert service in the areas of frozen food storage and transportation. We take pleasure in our dedication to our consumers as a neighborhood business. We aim to meet or exceed customer expectations on every work we do since we recognise that client pleasure is crucial for business.


A renowned and esteemed service for moving temperature-sensitive items is Chiller Van. We are aware of the particular demands of each of our clients and meet those needs. We utilize the most recent technologies in insulation, temperature control, tracking, and data analysis to guarantee the quality of our service. In an effort to provide our clients the greatest experience possible, we make sure that their products are delivered promptly and safely.

At Chiller Van, we recognise how critical it is to maintain the proper temperature for your goods and products. To fulfill your demands, we provide a range of refrigeration services, such as on-site storage options and chilled van deliveries. Our vans are built to be effective and efficient, transporting your goods while maintaining the proper temperature and protecting them from any potentially damaging outside impacts. We get that you want to make sure that chilled things will arrive at their destination in the best possible shape.

The organization offers a Chiller Van service.

We take great pride in providing upscale Chiller Van service. When it comes to temperature-sensitive items, we offer the quickest, most dependable delivery. Our vehicles are outfitted with cutting-edge technologies and technology that guarantee that items maintain their predetermined temperatures throughout the delivery procedure. Additionally, we have a skilled team of drivers that are trained to manage every part of delivery, guaranteeing that the items arrive on schedule and in perfect condition.

A complete Chiller Van for Rent in Dubai service is offered by our business. From tiny vans to big trucks, we have a variety of vehicles to meet all of your cold storage needs. To ensure optimal safety for your goods, our vans are outfitted with the newest temperature control and monitoring technology. Your items will arrive at their destination in pristine shape thanks to the training and expertise of our crew.

In addition to chiller van services, our firm, Gulf Cold Transport Logistics, offers a wide range of services for businesses. We make sure that our chiller vans can handle various kinds of things since we recognize that different businesses may have varied needs for their transportation needs. Modern temperature control systems in our vans ensure that temperature-sensitive cargo is always maintained within the correct range. Additionally, we make every effort to provide the most efficient, timely, and safe deliveries possible for our clients.

Our business offers a service called Chiller Van that is intended to assist keep your items’ integrity throughout delivery. Our aim is to guarantee that your belongings are delivered in the same superb condition as they were in when they were picked up. In order to guarantee that your goods maintain the proper temperature during the route, we have specialist vans outfitted with the most recent cooling and monitoring equipment. In order to ensure that everything is operating properly and that your items are secure, our team of professionals frequently checks the trucks.

Chiller Van services are a special product that [business name] offers. The purpose of Chiller Van services is to keep goods chilled while being transported. The constant maintenance of ideal temperatures by our Chiller Vans guarantees that goods are delivered in their original condition. Medical equipment, food, and other perishables are perfectly suited for transportation in chiller vans.


Best Gifts Cap Online in USA

No matter what the occasion, finding the perfect gift can be a challenge. If you’re looking for a gift that’s unique, personal, and sure to be appreciated, look no further than Best Gifts Cap Online in USA. Best Gifts Cap Online in USA offers a wide selection of custom-made gifts, ranging from baseball caps and t-shirts to coffee mugs and keychains. All of their products are made with high-quality materials and attention to detail, so you can rest assured that your gift will be loved and used for years to come. Whether you’re shopping for a birthday, holiday, or just because, Best Gifts Cap Online in USA has something for everyone. So take a look and see for yourself why they’re the best place to find gifts online!

Click the website at the link: link here

Custom Caps

At Capbeast, we pride ourselves in being able to offer our customers the ability to create custom caps that are truly one-of-a-kind. Whether you’re looking for a unique gift for a friend or loved one, or you simply want a cap that no one else has, our team can help you design and create a custom cap that is perfect for any occasion.


Our custom caps are made from high-quality materials and construction, meaning they will last for years to come. We also use state-of-the-art printing techniques to ensure that your design comes out looking exactly how you envisioned it.


If you’re not sure where to start, our team of designers can help you create a custom cap that is perfect for any event or occasion. We can also work with you to incorporate any logos or text into your design. Simply contact us today and let us know what you have in mind – we’ll take care of the rest!

Embroidered Hats

Embroidered hats make for great gifts because they can be personalized with any message or design. They’re also a practical gift that can be worn all year round.


There are a few things to keep in mind when choosing an embroidered hat as a gift. First, you’ll need to decide on the style of hat. There are baseball caps, beanies, fedoras, and more. Once you’ve selected the style, you’ll need to choose the right size. It’s important to get measurements before ordering an embroidered hat so that it fits perfectly.


Once you’ve decided on the style and size of the hat, it’s time to select the design or message you want embroidered onto it. This is where you can really get creative and personalize the gift. You can choose anything from a simple monogram to a detailed design. If you’re not sure what to choose, there are plenty of online resources that can help you find the perfect design.


Once you’ve selected the design, simply send it off to be embroidered onto the hat. Most stores that offer this service will have a turnaround time of 1-2 weeks. And that’s it! You’ve now got a uniquely personal and practical gift that your loved one is sure to appreciate.

Cheap Woodland Camo Hats

In USA, one of the most popular and best gifts to give someone is a woodland camo hat. They are very affordable, and you can find them at many different stores. You can also find them online, and they make a great gift for anyone who loves the outdoors.

Cheap Snapback Hats

There are many benefits to wearing a snapback hat. They are stylish, comfortable, and can be easily adjusted to fit any head size. Snapback hats are also relatively inexpensive, which makes them a great gift option for those on a budget.


When it comes to finding cheap snapback hats, the best place to start is online. There are a number of online retailers that specialize in selling affordable snapback hats. A quick search will reveal a variety of options, so be sure to take the time to compare prices and find the best deal.


Once you’ve found a few potential options, it’s time to start shopping around. Be sure to read reviews and compare customer feedback before making your final purchase. This will help ensure that you’re getting a quality product at a fair price.


If you’re looking for the perfect gift for someone who loves snapback hats, then cheap snapback hats are definitely worth considering. With a little bit of research, you should be able to find a great deal on a quality hat that will last for years to come.

Contact:

Email:  support@holatshirt.com

Address: 18054 Silver Leaf, Flint, Tx, 75762 US

Phone: +1(903)708-3575 (9am – 5pm EST, Monday – Friday)

Website: https://holatshirt.com/