How to Delete the Recycle Bin from Windows 10 Desktop?

Some people do not find the Recycle Bin icon useful on their desktop. If you want to make your desktop less cluttered, then you can remove the Recycle Bin. In this blog, we will discuss the process of deleting the Recycle Bin from the Windows 10 desktop.

Technology

Delete Recycle Bin Via the Icon Settings

If you want to delete Recycle Bin via the icon settings, then you need to follow the instructions given below.

  • First of all, you have to press the Windows key on the keyboard.
  • Then you should select the Settings icon.
  • You should choose the Personalization option.
  • Navigate to the left-hand side menu & select the Themes option.
  • Move down the Themes section & select the Desktop Icon Settings link.
  • Later, you have to untick the box of Recycle Bin, when the Desktop Icon Settings screen pops-up.
  • Select the Apply option.
  • To confirm, select the OK button.

Delete Recycle Bin through Show Desktop Icons

You can also delete Recycle Bin through show desktop icons option. Follow the instructions given below.

  • Get started by going to the desktop & right-click on your desktop’s screen.
  • Navigate to the drop-down menu & select “View” option.
  • When the side-menu will open, untick the “Show Desktop Icons” option.

Pin the Recycle Bin to the Start Menu

If you want to pin the Recycle Bin to the Start menu, then you need to follow the two methods given below.

Drag & Drop:

  • To get started, select the Recycle Bin on the desktop.
  • While left-clicking the mouse, move the Recycle Bin’s icon to the start symbol.
  • Leave the Recycle Bin icon above the Start menu icon.

Right Click:

  • Navigate to the desktop & select the Recycle Bin, right-click on it.
  • Then you should go to the drop-down menu & select the Start menu option.

If you would like to unpin the Recycle Bin

  • You have to select the Recycle Bin & right-click on it.
  • Now, go to the drop-down menu & select the “Unpin from the Start Menu” option.

Pin the Recycle Bin to File Explorer

You need to pin the Recycle Bin to File Explorer. Follow the instructions given below.

  • First & foremost, select the Recycle Bin on the desktop.
  • Then you should press the left button of the mouse & move the Recycle Bin icon to the Taskbar.
  • Later, you have to move above the File Explorer icon till you view the “Pin to the File Explorer” tool.
  • Now, place the Recycle Bin icon above the File Explorer icon.

Locate the Recycle Bin

If you want to locate the Recycle Bin, then you need to follow the two methods given below.

  • To begin with, go to the Taskbar & select the File Explorer.
  • Then you should click on the This PC.
  • You should navigate to the address bar & select the little downward arrow.
  • You will see a drop-down menu.
  • Now, you have to select Recycle Bin to launch it.

Rosy Williams is a creative person who has been writing blogs and articles about cybersecurity. She writes about the latest updates regarding mcafee.com/activate and how it can improve the work experience of users. Her articles have been published in many popular e-magazines, blogs, and websites.

Source – Delete the Recycle Bin from Windows 10 Desktop

Is McAfee Still Worth It in 2019?

When it comes to talking about the best antiviruses in the market, the name that comes to mind is McAfee. As of 2019, the competition in the market is on the peak. But, McAfee still has its name in one of the best antiviruses in the world. There are millions of happy customers who only trust McAfee.

Mcafee

McAfee offers incredible protection to your devices. These days there are uncountable internet threats which are capable of destroying your bank balance over a night. McAfee Internet Security protects you against these kinds of risks. It not only keeps you safe while surfing the internet but also against local viruses and malware, which can enter in your device via pen drives and SD cards.

Why Should You Choose McAfee to Protect Your Device?

Features

The most noticeable feature that we want in a good antivirus is the ability to detect and kill viruses. McAfee has a smart virus detection feature which not only kills viruses but also scans for suspicious activities in your device. If a program is trying to access and steal information from your device, then it can prevent such an application from doing that.

According to a test, McAfee is capable of killing most of the “trojans” which are considered as one of the most dangerous viruses ever known. McAfee has also shown excellent results in the EICAR virus test. EICAR stands for “European Institute of Computer Anti-Virus Research.” The EICAR virus test is so hard that many of the antiviruses failed to complete it. So that means McAfee is one of the successful antiviruses in the world and protects against most of the dangers.

McAfee has three attractive products:

  • McAfee Total Protection
  • McAfee Internet Security
  • McAfee AntiVirus Plus

So, you can choose McAfee according to your requirements. But if you are someone who does too many online transactions and uses online banking, then you should go for the McAfee Internet Security.

McAfee got Attractive Pricing

McAfee is one of the most affordable antiviruses, and it won’t ruin your wallet when you need to renew your subscription. If you want an affordable and highly secure antivirus, then McAfee should be your choice. McAfee Total Protection comes in excellent pricing, which can be used in 5 devices. McAfee claims to return your money if it fails in removing viruses. With the Total Protection, you will also get free “Parental Controls” feature that will help you to keep your child safe from any threat or sensitive content.   Moreover, if you only want the “McAfee Internet Security” for only one device, then the product will be extremely affordable.

Rosy Williams is a creative person who has been writing blogs and articles about cybersecurity. She writes about the latest updates regarding mcafee.com/activate and how it can improve the work experience of users. Her articles have been published in many popular e-magazines, blogs, and websites.
Source – McAfee Still Worth It in 2019

How to Reinstall McAfee After Formatting Your Device?

Were you using McAfee antivirus before formatting your PC or Mac? If yes, then you probably want to reinstall it on your device. Have you replaced your hard drive and want to get the McAfee and your subscription back again? If yes, then we are here to help.

How to Reinstall McAfee After Formatting Your Device

Whatever the issue is, you can easily install a new copy of your McAfee antivirus and continue the subscription on your formatted device. Reinstalling McAfee in your device is very important because if you don’t do that, then your device can remain unprotected. This article will give you step by step guide to reinstall McAfee antivirus on your device. Let’s dive in.

How to Uninstall McAfee from your Device?

  1. Hit the Start key on your keyboard.
  2. Now navigate to the Control Panel.
  3. Then head to Programs and Features.
  4. Choose McAfee and click on Uninstall and see the on-screen instructions to complete the process.

How to Reinstall McAfee Without Paying a Single Penny?

If you have previously subscribed to a McAfee plan then uninstalled it due to a reason then you can activate the new copy of McAfee with the same account. You won’t need to repurchase a new plan just make sure that you have the McAfee account ID and password.

If you got an unused McAfee license, then you can easily use this license to activate your McAfee antivirus in any device. No matter if you uninstalled it or formatted you whole PC, you can activate your antivirus without buying a new plan.

Here’s how to Reinstall McAfee antivirus to your Mac or PC:

1. Open the “home.mcafee.com” link on the device in which you want to activate the antivirus.

2. Go to My Accounts and then navigate to “Sign In.”

3. Enter your McAfee Email address and password.

4. Hit the “Log In” button.

5. Now navigate to “My Account” again.

6. Head to “Subscription.”

7. Now tap on the “Add Device” option which is located to the “McAfee subscription.”

8. Now choose the “Device Type.”

9. Hit the Download button.

10. Choose the McAfee product.

11. Hit the Download button once more.

12. Now read the McAfee License Agreement carefully and then accept it.

13. After that, note down the serial number in a safe place because you will need it later.

14. Then press Download.

15. Run the installation Setup file located on the Downloads folder.

16. Follow the On-screen instructions to complete the installation.

This is how you can continue you previously purchased plan in a formatted computer.

Rosy Williams is a creative person who has been writing blogs and articles about cybersecurity. She writes about the latest updates regarding mcafee.com/activate and how it can improve the work experience of users. Her articles have been published in many popular e-magazines, blogs, and websites.

Source – Reinstall McAfee After Formatting Your Device

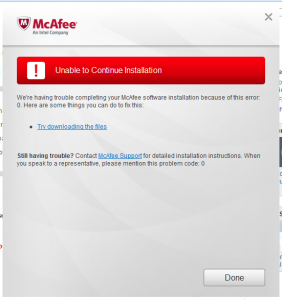
How to Fix McAfee Error Code (x5485): Unable to Continue Installation

Installing McAfee to protect your system from threats like malware and virus is a good idea. Although you may face some issues when doing so. Usually installing and activating McAfee is reasonably straightforward, but technology becomes tricky sometimes. There is no concrete evidence as to what it does, but you can face a number of error codes while installing McAfee antivirus on your PC.

McAfee Error

McAfee is one of the best antivirus software available on the market. It protects your system from getting infected with viruses and malware. You can download the setup from the official website. You would need a product activation code to install McAfee antivirus.

McAfee Error Code (x5485): Unable to Continue Installation

Here are ways you can fix the issue.

Fix 1: Launch the McPreInstall Tool

Running McPreInstall is a good idea when you encounter error x5485 while trying to install McAfee antivirus. The tool will delete temp files along with cookies from your system which may be interfering with the installation. Here is how you can launch it:

  1. You need to download the McPreInstall application.
  2. Locate the downloaded file and double-click on it. The file is usually found in the Download folder under My Computer tab.
  3. Tap Yes for the application to launch.
  4. Press Start on the next window and wait until the tool scans your system.
  5. After the scan is done, there will be a green option saying Ready for Installation available on the
  6. Try installing the antivirus again and see if it works.

If the issue still pertains, then move on to the next step.

Fix 2: Scan and troubleshoot

If you still cannot install the McAfee antivirus, then it would be a good idea to use MVT for scanning the system and checking the issue.

  1. Visit www.mcafee.com/activate and Log In on your McAfee account.
  2. Open Troubleshoot and Repair page.
  3. Tap on Download and Run icon to start the procedure.
  4. Press Save File when a pop-up appears.
  5. After the download finishes, double click on mvt.exe which will launch the MVT.
  6. Tap Yes to allow the setup to make changes in the system.
  7. Follow the present instructions to finish the installation process.
  8. After you have finished the installation, the McAfee Virtual Technician will scan the system to locate the issue.

If the issue still pertains, then move on to the next step.

Fix 3: Launch Removal Utility

If the previous steps did not fix the issue, then you can try the Removal tool. You would have to re-download the setup after running the Removal tool. Here is how:

  1. You have to download the Removal tool first.
  2. Locate the downloaded file and double-click on it.
  3. Tap on Restart the system whenever it shows up on the screen.
  4. Download the McAfee again and try to install it.

Move on to the step if the issue remains.

Fix 4: Fix DNS( Domain Name System) Error

You would not be able to install McAfee if your Domain Name System is slow. You need to switch your network to a public server.

  1. Locate and run the Control Panel.
  2. Choose Network and Internet.
  3. Tap on Network and Sharing Center to review adapter settings.
  4. On the left column, tap on Change adapter settings.
  5. Double-click on your Internet provider to open the Status.
  6. Choose Properties from the lower-left corner.
  7. Tap on Internet Protocol Version 4 (TCP/IPv4) and choose Properties.
  8. Check the radio icon in front of Use the following DNS server address.
  9. Note down your alternate and preferred DNS server in the particular space.
  10. Google Public DNS address: 8.8.8.8 and 8.8.4.4
  11. Open DNS address: 208.67.222.222 and 208.67.220.220
  12. Press OK when you are done.

Hopefully, one of the steps will fix the error for you.

Rosy Williams is a creative person who has been writing blogs and articles about cybersecurity. She writes about the latest updates regarding mcafee.com/activate and how it can improve the work experience of users. Her articles have been published in many popular e-magazines, blogs, and websites.

Source – Fix McAfee Error Code (x5485): Unable to Continue Installation

How to Download and Install McAfee Mobile Security on iOS and Android

Want to set up McAfee Mobile Security on your smartphone? If yes, then you have landed on the right place.

These days, internet theft and hacking are on the peak. It is hard to find a reliable antivirus to protect your mobile. McAfee has maintained its name in the market of best antivirus software. It has over 10 millions of users in the Google Play Store, that means you can trust McAfee.

iOS

So what are you waiting for? Let’s get started.

Installing McAfee to Your Android Device

We have to download the McAfee from the Google Play Store. So follow the steps given below:

  1. Head to your Google Play Store.
  2. Then search for the “McAfee” on the search bar.
  3. Select the “McAfee Mobile Security” from the results.
  4. Now press the “Install” button.
  5. Wait till the installation completes.
  6. Once the installation completes:
    1. Open the App.
    1. Now tap “Find Device or back up.”
    1. Enter your Email address to register with your McAfee account.
    1. Hit Next.
  7. Here you have to do the following things:
    1. Create account
    1. Create the 6-digit long pin.
  8. Now navigate to the Main Menu of the app.
  9. Click on the orange color ring that has the number which displays on the top of the app.
  10. Now tap “Set your security question,” and after that, provide the 6-digit pin that we created in our previous steps.
  11. Provide two questions of your choice and then also enter the relevant answers of both. Hit the Save button.
  12. After that, click on the “Activate uninstall protection.”
  13. Hit the Activate button and then press on the Finish button.

How to Download and Install McAfee for iOS devices?

McAfee is currently free for iPhone and iPad so no need to buy the subscription. Here’s how to do it:

  1. Go to the App Store.
  2. In the search bar, type McAfee and then search for it.
  3. Select the McAfee Mobile Security from the given apps in the result.
  4. Hit the “Install” button.
  5. After it installed on your device open it.
  6. Tap “Create an account” option if you don’t have one. But if you have an account on McAfee then choose the Log In option on the startup screen.
  7. Follow the on-screen instructions to complete the process.

Enjoy your free antivirus program on your iOS devices.

Rosy Williams is a creative person who has been writing blogs and articles about cybersecurity. She writes about the latest updates regarding mcafee.com/activate and how it can improve the work experience of users. Her articles have been published in many popular e-magazines, blogs, and websites.

Source – Download and Install McAfee Mobile Security on iOS and Android

How To Disable McAfee on Windows?

With the help of this blog, you shall be able to get to know the method of temporarily disabling McAfee Security Centre on Windows. It is worth noting a fact that turning off McAfee shall not take it out of the device. Always remember that if by chance McAfee is the only antivirus software, disabling it off shall only make your device unsafe.

Technology

FOR WINDOWS USERS

  1. Firstly, go to Start.
  2. Then, press the symbol of Windows. It shall be located towards the left corner of the display.

Note: Alternatively, you can press the Windows key on the keyboard.

  • Next, write mcafee into start.
  • After that, press on ‘McAfee TotalProtection’. This will make you go to McAfee.
  • Then, press the PC Security tab. It shall be towards the upper left-hand side corner of the McAfee
  • Next, press on Real-Time Scanning. Observe that the given tab is going to be at the left-hand section of the McAfee
  • After that, press on ‘Turn Off.’ It shall be towards the upper right-hand section of the Real-Time Scanning display screen.
  • Then, choose a time limit and press on Turn off.
  • Note that if you wish to turn off McAfee till you manually enable it, then you should press on Never.
  • For exiting this window, first, you need to disable Real-Time Scanning.
  • Next, press the Firewall tab. It shall be below the Real-Time Scanning tab towards the left-hand section of the
  • Then, press the Turn Off. It shall be towards the upper right-hand section of the page.
  • After that, choose a time limit.
  • Next, press on ‘Turn Off.’ This shall turn off the McAfee Firewall till the time limit gets over.
  • Then, close the Firewall Press X. It shall be towards the upper right side corner of the Firewall
  • After that, press the Automatic updates. It shall be below Firewall on the left-hand side of the display.
  • Next, press on Turn Off. This option shall be towards the top right-hand side corner Automatic Updates page.
  • Then, you need to Exit the ‘Automatic Updates’ display screen.
  • You need to press on the Scheduled scans.
  • After that, press on Turn Off. This option shall be at the right corner. Note that each of the McAfee’s services are turned off.
  • Next, remove  McAfee from your device. If nothing works, then you can turn off McAfee by uninstalling it.

Source – How To Disable McAfee on Windows

How to Install McAfee Mobile Security on Android Device?

When someone asks for the best antivirus software, then the first thing comes in our mind is “McAfee.” It is considered as one of the best antivirus around the globe. McAfee provides features that help you stay protected. It is the best solution to keep your devices safe from malware and viruses. It can scan your hard drive, memory card, internal memory, and other locations for the viruses. It also protects against internet thefts to keep your internet banking and online transactions safe.

How to Install McAfee Mobile Security on Android Device

If you want to install McAfee mobile security on Android device, you need to follow the instructions given below.

  • First of all, launch your Android device.
  • After that, you should open the Google Play Store.
  • Then go to the search bar on your device.
  • Thereafter, you should input McAfee into the search bar.
  • Later, tap on McAfee Mobile Security from the results.
  • Now, tap on Install option.
  • Once the installation process has done, you should launch the McAfee Mobile Security app.
  • Then navigate to the found device or back up.
  • You have to input the email ID for finishing your registration procedure with McAfee.
  • Now, tap on Next button.
  • After that, you should make your McAfee account on your Android device.
  • Then you should make six digits strong password.
  • Navigate to the McAfee dashboard.
  • Thereafter tap on the orange circle on the upper right-hand side.
  • Then you should select the security question.
  • Enter your password.
  • You have to select two questions and give their answers.
  • Now, tap on Save button.
  • After that, tap on “Activate uninstall protection.”
  • Then tap Activation button.
  • Tap on Finish.

You can also install McAfee Mobile Security without Google Play Store on your Android device. Here are the instructions given below.

  • Get started by navigating to the Settings on your Android device.
  • After that, tap on Security.
  • Then tap on Unknown Sources.
  • Open your preferred browser and go to the search bar.
  • Enter the mobile version of McAfee Mobile Security into the search bar.
  • Your device will be detected automatically.
  • Navigate to “Don’t have an app store on your device?” get the application here.
  • Then, it will start the downloading process.
  • After downloading, tap on Installation.
  • Once installation process will be done, open the McAfee Mobile Security app.
  • Navigate to Find Device or back up.
  • Input your email ID from which you would like to register the McAfee.
  • Tap on Next button.
  • Make an account.
  • You have to make 6 digit strong password.
  • Go to the McAfee’s dashboard.
  • Tap on the orange circle in the upper right-hand side.
  • Choose security reasons.
  • Tap on “Activate Uninstall Protection.”
  • Then tap on Activate button.
  • Tap on Finish button.

By following the instructions mentioned in the blog, you will be successfully able to install McAfee mobile security on your Android device.

Source – How to Install McAfee Mobile Security on Android Device

Steps to Create Mcafee Accounts through www.mcafee.com/activate

Activate McAfee product through mcafee.com/activate on windows PC, mobile devices and MAC etc. User need to purchase the MacAfee activation key from retail shop or online to use MacAfee secureanywhere.

McAfee Support 4

McAfee Antivirus is most used security antivirus to protect the devices from the malware, firewall programs, web, and email. Some of the latest versions of McAfee Antivirus software are also designed to improve your PCs speed and performance along with other utilities like Shredder and Quick Cleaner.
Steps to Create Mcafee Accounts through www.mcafee.com/activate

Open your web browser and visit mcafee.com/activate from your device in which you want to install the webroot antivirus. Click on My Account and sign in button. Enter the credentials like email address and password which you set during the time of registration. If user don’t have the mcafee activate account, then they need to create one to activate mcafee. For this, select Are you new user? Sign up now. Must follow the instruction to create the mcafee activate account.
How to Install Mcafee Activate on Device via mcafee.com/activate?

Mcafee antivirus software provides optimal security for the devices. User can choose to add mcafee to different devices with a single subscription purchase. This features can helps to secure file on different devices also and protect you web activity. If user scan a file on their device and it turns out to be malware or contains viruses on other device, you will get notification. There are different type of options available to protect devices using browser protection, firewalls, child protection and device protection. You will get regularly updates to protect your device from the latest security threats on different devices. Follow the below mentioned steps on your second computer, to install Mcafee Activate.
Go to the web browser and type mcafee.com/activate
On the upper right corner you find my account section.
Click on my account.
Log in your account by providing the valid credentials like email address and password.
Click on sign in.
Now, you can able to see the list of your currently using mcafee security product.
In the Download/Install column, next to product you want to install.
Now, click download.
Read the McAfee End User License Agreement (EULA) and, if you agree to the terms and conditions, click I Agree.
Press the download button to start downloading or installing process.
When prompted to download the file – Security Warning for DMSetup.exe, click Run.
When prompted with the Internet Explorer security warning, click Run again.
You will be redirected to McAfee Security Center
From the list select the product you want to download and install.
If user want to customize the product list, then they can easily do it.
Click on customize and then click to next button.
It will starts downloading the software. As the process is completed click next
When the installation is completed click Finish.

Features of McAfee Antivirus

In case of the theft, the software remotely lock the device and delete all your personal data.
You can protect as many devices as user want by using MacAfee antivirus plus with only subscription.
No CD needed to access the security system by using simple code.
It have the feature called advanced anti-spam that helps to avoid anti-spam mails used as phishing technique.
Improved and upgraded ad blocker that blocks pop-up from reappearing on your device.
Through Simple Security Management user can check system’s security status anytime.

How to Use Your McAfee Activation Key?

Nowadays, cybercrime’s growth is increasing day by day, and you need a trusted antivirus. So, McAfee offers you great virus removal features that prevent you from malware, system crash, online threats, and data protection. Here are the steps for activating McAfee product key online and offline both.

McAfee Support 4

PURCHASE A MCAFEE ACTIVATION KEY ONLINE

If you want to purchase a McAfee activation key from online, you need to follow the instructions given below.

  • First of all, you have to visit the “www.mcafee.com/activate” in your preferred web browser.
  • After that, you should make your account.
  • Then you have to choose between Consumer or Business option.
  • Thereafter, you should click on Products and Services in the upper menu of the screen.
  • Later, go down and locate a plan and item you would like to purchase.
  • Then click on the Buy now.
  • Now, review the page.
  • After that, you have to input your billing information & finish the payment process.
  • Once billing procedure has done, you will get a McAfee activation key on your email ID which you are using to make McAfee account.
  • Go to the new tab and sign in to your account.
  • Then you should redeem the activation product key of McAfee.
  • Now, your McAfee account will activate.

ACTIVATE MCAFEE PRODUCT KEY OFFLINE

You can activate the McAfee product key through the retail card. Here are the instructions given below.

  • First you have to buy a retail card.
  • Now, you should open the retail card and redeem the McAfee activate product key.
  • After that, you can see 25 digit product key with the link beneath it.

DOWNLOAD MCAFEETHROUGH WWW.MCAFEE.COM/ACTIVATE WEBSITE

  • Get started by going to McAfee.com/activate page.
  • After that, you will notice the product key activation key page.
  • Then you have to input your 25 digit activation code and click on submit.
  • Later, you should sign in to your McAfee account.
  • Now, go to your profile and click on Download the software.

INSTALLING MCAFEE ON COMPUTER

  • To get started, click on the McAfee downloaded file.
  • After that, you should go through the installation process.
  • Now, you have to go with the on-screen instructions and finish the installation process on your computer.

ACTIVATING MCAFEE ON COMPUTER

  • First of all, you have to double click on the McAfee interface to open it.
  • After that, go to the home page and click on Activate or Buy option.
  • Then you should log in or create an account.
  • You can follow the subscription instructions in the article to purchase a plan.
  • Later, you have to enter the activation code.
  • Now, you have activated the antivirus perfectly.

RENEWING SUBSCRIPTION OF MCAFEE

  • To begin with sign in to the “mcafee.com/login account.
  • Go to the McAfee My account page.
  • Then, you should select “Subscriptions.”
  • Later, go to All expired section and click on “View All.”
  • Now, choose the plan you would like to renew and finish the on-screen procedure.

INSTRUCTIONS TO UNINSTALL MCAFEE ACTIVATE FROM PC

  • Click on Settings.
  • Choose System.
  • Select Apps and features.
  • Go to the list and choose McAfee to activate.
  • Later, you should click on Uninstall McAfee.
  • Now, click OK to confirm.

By following the instructions mentioned in the blog, you will be successfully able to use McAfee activation key.

Source – How to Use Your McAfee Activation Key

How to Set Up Restrictions and Parental Controls on iPhone and iPad?

Do you have kids in your household? If the answer is yes, then you must be aware of how important it is to restrict and control their device usage. If you have an iOS device, then you can set restrictions and customize parental control. Read on and learn how to do so.
iPhone

Rating Region for Restrictions

If you want to select the rating region for restrictions on iOS, you need to follow the instructions given below.

  • First of all, you should open Settings on your iPhone and iPad.
  • After that, you have to tap on Screen Time option.
  • Then, you should tap on “Content and Privacy Restrictions.”
  • Thereafter, you have to tap on “Content Restrictions.”
  • Later, you should tap on “Ratings For.”
  • Now, select the region or the country.

Block Certain Content by Ratings with Restrictions

You can block certain content using the ratings with restrictions on iOS. Here are the instructions given below.

  • Get started by opening the Settings app on your iPhone and iPad.
  • After that, you should tap on Screen Time.
  • Thereafter, you have to tap on “Content and Privacy Restrictions.”
  • Then, you should tap on “Content Restrictions.”
  • Later, you should select each content type beneath the Allowed Content field. Your options include, Podcasts, News, Movies, Music, TV Series, and Applications.
  • Now, tap on the rating you want to permit on your iPhone and iPad.

Hiding Movies in Cloud

If you want to hide films in the cloud on the iPhone and iPad, you need to follow the instructions given below.

  • To get started, open Settings on your iPhone and iPad.
  • After that, you should tap on Screen Time.
  • Then you have to tap on “Content and Privacy Restrictions.”
  • Thereafter, you should tap on “Content Restrictions.”
  • Later tap on Movies.
  • Now, you have to tap on “Show movies in the cloud On/Off Switch.”

Hiding TV Shows in the Cloud

You can hide TV series in the cloud on iOS. Here are the instructions given below.

  • To begin with, go to the Settings on your iPhone and iPad.
  • After that, you should tap on Screen Time.
  • Then you have to tap on “Content and Privacy Restrictions’.
  • Thereafter, you should tap on “Content Restrictions.”
  • Later, you have to tap on TV Shows.
  • Now, tap on the Show TV shows in the Cloud ON/Off Switch.

Block Multiplayer Games from Game Center

For blocking multiplayer games from your iOS device, you need to follow the instructions given below.

  • First, you have to open the Settings app on your iPad and iPhone.
  • After that, you should tap on Screen Time.
  • Then, you have to select “Content and Privacy Restrictions.”
  • Thereafter, you should tap on “Content Restrictions.”
  • Later, tap on Multiplayer Games.
  • Tap on “Don’t Allow.”

Block Adding Friends from Game Center

You can block adding people from the game center on iOS. Here are the instructions given below.

  • Get started by open Settings app on your iPad and iPhone.
  • After that, you should tap on Screen Time.
  • Then you have to tap on “Content and Privacy Restrictions.”
  • Thereafter, you should tap on Content Restrictions.
  • Tap on Don’t Allow.

Block Screen Recording

If you want to disable screen recording on iOS, you need to follow the instructions given below.

  • To get started by open Settings app on your iPad and iPhone.
  • After that, you should Screen Time.
  • Then, you should tap on “Content and Privacy Restrictions.”
  • Thereafter, you have to tap on Content Restrictions.
  • Later, you should tap Screen Recording.
  • Tap on Don’t Allow.

By following the instructions mentioned in the blog, you will be successfully able to use restrictions and parental control on the iPhone and iPad.

Source – How to Set Up Restrictions and Parental Controls on iPhone and iPad