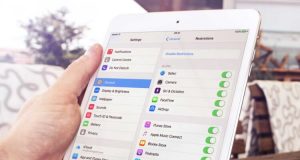
Do you have kids in your household? If the answer is yes, then you must be aware of how important it is to restrict and control their device usage. If you have an iOS device, then you can set restrictions and customize parental control. Read on and learn how to do so.

Rating Region for Restrictions
If you want to select the rating region for restrictions on iOS, you need to follow the instructions given below.
- First of all, you should open Settings on your iPhone and iPad.
- After that, you have to tap on Screen Time option.
- Then, you should tap on “Content and Privacy Restrictions.”
- Thereafter, you have to tap on “Content Restrictions.”
- Later, you should tap on “Ratings For.”
- Now, select the region or the country.
Block Certain Content by Ratings with Restrictions
You can block certain content using the ratings with restrictions on iOS. Here are the instructions given below.
- Get started by opening the Settings app on your iPhone and iPad.
- After that, you should tap on Screen Time.
- Thereafter, you have to tap on “Content and Privacy Restrictions.”
- Then, you should tap on “Content Restrictions.”
- Later, you should select each content type beneath the Allowed Content field. Your options include, Podcasts, News, Movies, Music, TV Series, and Applications.
- Now, tap on the rating you want to permit on your iPhone and iPad.
Hiding Movies in Cloud
If you want to hide films in the cloud on the iPhone and iPad, you need to follow the instructions given below.
- To get started, open Settings on your iPhone and iPad.
- After that, you should tap on Screen Time.
- Then you have to tap on “Content and Privacy Restrictions.”
- Thereafter, you should tap on “Content Restrictions.”
- Later tap on Movies.
- Now, you have to tap on “Show movies in the cloud On/Off Switch.”
Hiding TV Shows in the Cloud
You can hide TV series in the cloud on iOS. Here are the instructions given below.
- To begin with, go to the Settings on your iPhone and iPad.
- After that, you should tap on Screen Time.
- Then you have to tap on “Content and Privacy Restrictions’.
- Thereafter, you should tap on “Content Restrictions.”
- Later, you have to tap on TV Shows.
- Now, tap on the Show TV shows in the Cloud ON/Off Switch.
Block Multiplayer Games from Game Center
For blocking multiplayer games from your iOS device, you need to follow the instructions given below.
- First, you have to open the Settings app on your iPad and iPhone.
- After that, you should tap on Screen Time.
- Then, you have to select “Content and Privacy Restrictions.”
- Thereafter, you should tap on “Content Restrictions.”
- Later, tap on Multiplayer Games.
- Tap on “Don’t Allow.”
Block Adding Friends from Game Center
You can block adding people from the game center on iOS. Here are the instructions given below.
- Get started by open Settings app on your iPad and iPhone.
- After that, you should tap on Screen Time.
- Then you have to tap on “Content and Privacy Restrictions.”
- Thereafter, you should tap on Content Restrictions.
- Tap on Don’t Allow.
Block Screen Recording
If you want to disable screen recording on iOS, you need to follow the instructions given below.
- To get started by open Settings app on your iPad and iPhone.
- After that, you should Screen Time.
- Then, you should tap on “Content and Privacy Restrictions.”
- Thereafter, you have to tap on Content Restrictions.
- Later, you should tap Screen Recording.
- Tap on Don’t Allow.
By following the instructions mentioned in the blog, you will be successfully able to use restrictions and parental control on the iPhone and iPad.
Source – How to Set Up Restrictions and Parental Controls on iPhone and iPad
