How to Tweak the iPhone’s, Multitouch Gestures, Visuals, and Sounds to Liking?

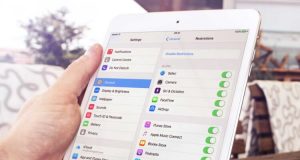
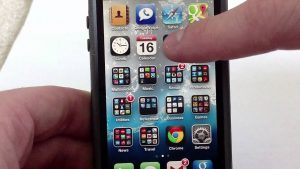
iPhone is among the most versatile iOS devices as it allows you an abundance of personalization options. If you want to try to personalize your iPhone but don’t how to adjust visual appearance, sound, and gestures, then here are some instructions to learn about these things.

Visuals Tweaks:

Decrease or Increase the Font Size

  1. Go to the Settings app on the device
  2. Then, you should choose the Accessibility option.
  3. Thereafter tap on the Display & Text Size option.
  4. You have to reach the ‘Larger Text’ option and select it.
  5. Later, move the slider to increase the text size.
  6. Now, move the toggle of “Larger Accessibility Sizes’ if you want to bigger text size.

Change Text Buttons into Real Buttons

  1. Navigate to the Settings application on the device.
  2. Thereafter, select the Accessibility option.
  3. You should pick the ‘Display and Text Size’ option.
  4. Now, move the “Button Shapes” toggle to the “On” position.

Less the White Point

  1. Invoke the Settings application on the iOS device.
  2. Thereafter choose the general button.
  3. Reach the Accessibility option and tap on it.
  4. Select the ‘Display and Text Size’ option.
  5. Finally, move the “Reduce White Point” toggle to enable it.

Disable Parallax and Application Zooms

  1. Reach the Settings app on the device.
  2. Afterward, choose the General button.
  3. Select the Accessibility option.
  4. Go to the Motion option.
  5. Now, move the ‘Reduce Motion’ toggle to enable it.

Disable Lower-Case Keyboard

  1. Invoke the Settings application on the device.
  2. Thereafter, select the Accessibility option.
  3. Afterward, pick the Keyboard option.
  4. Finally, move the “Show Lower Keys” toggle to disable it.

Turn on the Character Preview

  1. Go to the Settings app and launch it.
  2. Afterward, select the General button.
  3. Then tap on the Keyboard option.
  4. Finally, move the “Character Preview” toggle to enable it.

Touch-based Tweaks:

Disable the Reachability

  1. Invoke the Settings application on the device.
  2. Then choose the Accessibility option.
  3. Go to the Touch option.
  4. Now, move the “Reachability” toggle to disable it.

Prevent Manual Trigger Apple Pay

  1. Navigate to the Settings on the iOS device.
  2. Thereafter select the Wallet & Apple Pay option.
  3. Finally, move the “Double-Click Side Button” toggle to disable it.

Turn Off the ‘Shake to Undo’

  1. Invoke the Settings application on the device.
  2. Select the Accessibility option.
  3. Then choose the Touch option
  4. Later, pick the ‘Shake to Undo’ option and move the toggle to disable it.

Disable the Split keyboard

  1. Invoke the Settings app.
  2. Select the General option.
  3. Tap on the Keyboards button.
  4. Now, switch the ‘Split Keyboard’ toggle to disable it.

Turn off the Split View & Slide Over 

  1. Select the Settings app on the device.
  2. After that, choose the ‘Home Screen and Dock’ option.
  3. Reach the Multitasking option and select it
  4. Now, move the “Allow Multiple Apps” toggle to disable it.

Stay Picture in Picture via Activating Itself

  1. Reach the Settings app on the device.
  2. Thereafter, choose the ‘Home Screen & Dock’ option.
  3. Then pick the Multitasking.
  4. Now, move the ‘Picture in Picture’ toggle to enable it.

Disable the Multitasking Gestures

  1. Launch the Settings app on the device.
  2. After that, choose the ‘Home Screen & Dock’ option.
  3. You should pick the Multitasking option.
  4. Now, move the ‘Gestures’ toggle to disable it.

Erase Control Center via Applications

  1. Open the Settings on the device.
  2. Thereafter choose the Control Center.
  3. Now, move the ‘Access Within Apps’ toggle to disable it.

Turn off Control Center 

  1. Invoke the Settings app on the device.
  2. Thereafter, choose the ‘Face ID & Passcode’ or ‘Touch ID & Passcode’ according to the method of biometric authentication of device.
  3. Insert the passcode.
  4. Finally, move the Control Panel toggle to enable it beneath the ‘Allow Access When Locked.’

Audio & Detail Tweaks:

Stop Keyboard Clicks and Lock Sounds 

  1. Invoke the Settings app on the device.
  2. Thereafter, select the ‘Sounds and Haptics’ option.
  3. Now, toggle Lock Sound and keyboard Clicks to enable or disable it.

Modify the Maps Navigation Volume

  1. Invoke the Settings application on the device.
  2. Go to the Maps.
  3. Choose the Driving and Navigation option.
  4. Finally, choose an option below the Navigation Voice Volume: Low Volume, No Voice, loud Volume, or Normal Volume.

Disable Siri

  1. Invoke the Settings app.
  2. Go to the ‘Siri and Search.’
  3. Now, move the ‘Listen for “Hey Siri” to turn it off.

Disable Siri Suggestions

  1. You should drag the right side of the screen to reach the Today View.
  2. Thereafter drag upward pick the Edit option.
  3. Choose the minus button beside the Siri App Suggestions.
  4. Tap on the Remove button.

Prevent the Calls from going towards the Bluetooth

  1. Invoke the Settings app.
  2. After that, select the Accessibility option.
  3. Tap on the Touch option.
  4. Go down and choose the Call Audio Routing option.
  5. Finally, select the Speaker or Bluetooth Headset option.

 Linnea Williams is a creative person who has been writing blogs and articles about cybersecurity. She writes about the latest updates regarding office setup and how it can improve the work experience of users. Her articles have been published in many popular e-magazines, blogs, and office.com/setp.

Hidden Apple Map Features You Can Use on iPhone

You may launch the Apple maps daily to confirm traffic, find a new cafe, locate for the nearest gas station, however, all these tasks are scratch all that updated version of it can do. For instance, there is a feature that allows taking the flyover tour of the place, which is beneficial if you are thinking about the visitor route. If you are setting up the route on Mac, then you can send it to the iPhone. If you want to keep the navigation activities to yourself, then you need to switch off the location history. If you want to know about the features, then post might be useful for you.

Apple

Share Maps Direction From Mac to iPhone

If you are using the Maps app to plan a trip on Mac, then you can share the directions to the iPhone as you start the trip. Remember to sign in to the iCloud account via the same Apple ID on both the device.

If you wish to share maps direction from Mac to iPhone, then pursue the given instructions:

  1. Tap on the Directions in Maps app on Mac.
  2. Insert the starting and end
  3. Press the Share option appears as a square with an arrow situated in the toolbar of the Maps app.
  4. Choose the device at the top.
  5. Then you will get the notification on iPhone that you may have to click to launch the directions on the device.

Navigate to 3d Mode in Apple Maps

As you launch Apple maps, it may display in 2D mode by default. Though you may modify to the 3D mode by situating 2 fingers on the screen then moving in up direction. The acts in satellite as well as transit map views. You can view the complete panorama by zoom in, also hold 1 finger on-screen as other finger drags over the device screen.

Take Flyover Tour

As you locate for the city in Apple maps like Miami or New York, you have the choice to go to the Flyover mode. This allows you to view city from the sky and then zoom in close to buildings. This might help analyze distance among seeing different routes or landmarks. To apply it, locate the city that you are going to and then choose Flyover. You can zoom out or in all the buildings like Statue of liberty by squeezing the screen.

Remove Location History

If you have not logged the locations, then you can be lucky as you may remove the places that you visit mostly and don’t allow Apple to store that As it is important to give priorities to privacy when it about technology.

If you want to remove location history, then abide by the given instructions:

  1. Navigate to the Privacy in the Settings app.
  2. Click on the Location Services.
  3. Press the System Services option by scrolling down.
  4. Scroll and then click on the Significant Locations option.
  5. Then insert the passcode, Touch ID, or the Face ID to move forward. Now the area you have gone is visible to you, also how long it took and how many times you visited.
  6. Click on the Clear History option by scrolling to the bottom of the list to remove the history.
  7. This will not disable maps from sorting the place in the future, although you need to move forward and switch off the Significant locations option at the top.

Switch off the Voice of Siri While Navigating

If you are listening or singing together with the favorite music when on a trip, then you sure don’t want any interrupt like 2.5 miles, take away out the road. It can sometimes be annoying. However, you can switch off voice when using Maps.

If you want to switch off the voice of Siri while navigating, then you can follow the provided steps:

  1. Launch the Settings app.
  2. Click on the Maps.
  3. Select the Driving and Navigation option by scrolling down.
  4. Tap on the No Voice option below the Navigation Voice Volume menu.
  5. Now, as you are on your road trip, you won’t hear the navigation guides of Siri.

You can pause the podcast or book that you are listening to when Siri is prompting directions.

  1. Navigate to the Settings.
  2. Click on the Maps.
  3. Select the Driving and Navigation option.
  4. Switch on the toggle of the Pause Spoken Audio option.

Jay Cross is a trained McAfee.com/activate expert who works with the development team with feedback from customers to make it to expectations. He lives in New York and In addition to his work, he also writes for his personal blog.

Source –  Hidden Apple Map Features

Best Cloud Storage Apps for iPhone

If you are using an iPhone and facing the problem of storage, then you may feel better knowing that the issue is a common one. This storage problem could even affect your productivity in businesses and to have proper cloud storage is always essential if you’re going to give a back up to all your crucial online documents, including videos and photos. The market is flooded with several cloud storage devices, and to choose the right one is necessary. Some useful and essential storage apps which you can consider are the following:-

iPhone

1.Google Drive

Google drive could be the best choice as it allows you almost everything to store, such as photos, docs, sheets, and presentations. It gives storage of 15 GB without charging even a penny along with providing unlimited storage up to 16 megapixels for photos. It is very reliable when it comes to creating docs and presentations and saving them for later use. Google Photos app provided by Google drive is one of the world’s best app to store your precious memories in the form of photos, and that could be countless.

2. OneDrive

One Drive works similarly in a way Just as Google Drive by allowing you to store almost everything and comes preinstalled on the devices of Windows10. If you are preferring PC and want all your online information to be in sync with the PC you are using, then OneDrive is the best option. It is a free storage device that allows you to store your online information, helps in sharing them with other people and in syncing your files with other internet devices. You often get notifications instantly if someone tries to do any edits in your documents.

3.Box

Box provides 10GB of free storage along with helping you to protect your files and finding them easily integrating with different apps available online. If you are in search of some other spot other than your email address, then Box is the excellent choice where you can collaborate on your files also. This online storage is the best platform for those who often need to share the data with team members and so to manage the data to be shared with external teams is very much accessible here. It becomes easy to access essential files that you have to share with other team members after storing them here on Box.

4.SugarSync

If you are not interested in getting your data shared with others which are attached to your emails, then SugarSync would be an excellent choice for you. It enables you not only in streaming videos without downloading them but also helpful in sharing your files privately. This online storage facility is useful if you want to sync all your data across a variety of internet devices continuously. SugarSync is the best one when it comes to providing security and safety to your online information along with providing online back up to your files without interfering in your productivity.

5.Mega

Mega is very much active when it comes to ensuring high security and privacy with end to end encryption to your online information or files along with providing facility to save and share them. This storage facility is available on all internet devices and provides up to 50GB of free storage. You can sync and upload the photos and videos along with collaborating with a team on the files shared through this storage device. However, due to the high security provided by this storage device to your online information, it becomes difficult for you to reset your password even though Mega has many exciting features worth to use.

6.Dropbox

Dropbox is widely used by people all over the world as it has many features making it an excellent platform for storing online information. It can not only sync your files across other online devices but also able to recover the data you have already deleted. It is not only available for Windows and Macintosh but also iPhone and androids. Dropbox provides 2GB free storage along with enabling the users to save files and adding new folders. This storage facility uses an advanced encryption system to protect your data and other online information.

Jay Cross is a trained office.com/setup expert who works with the development team with feedback from customers to make it to expectations. He lives in New York and In addition to his work, he also writes for his personal blog.

Source –   Best Cloud Storage Apps for iPhone

How to Set Up Restrictions and Parental Controls on iPhone and iPad?

Do you have kids in your household? If the answer is yes, then you must be aware of how important it is to restrict and control their device usage. If you have an iOS device, then you can set restrictions and customize parental control. Read on and learn how to do so.
iPhone

Rating Region for Restrictions

If you want to select the rating region for restrictions on iOS, you need to follow the instructions given below.

  • First of all, you should open Settings on your iPhone and iPad.
  • After that, you have to tap on Screen Time option.
  • Then, you should tap on “Content and Privacy Restrictions.”
  • Thereafter, you have to tap on “Content Restrictions.”
  • Later, you should tap on “Ratings For.”
  • Now, select the region or the country.

Block Certain Content by Ratings with Restrictions

You can block certain content using the ratings with restrictions on iOS. Here are the instructions given below.

  • Get started by opening the Settings app on your iPhone and iPad.
  • After that, you should tap on Screen Time.
  • Thereafter, you have to tap on “Content and Privacy Restrictions.”
  • Then, you should tap on “Content Restrictions.”
  • Later, you should select each content type beneath the Allowed Content field. Your options include, Podcasts, News, Movies, Music, TV Series, and Applications.
  • Now, tap on the rating you want to permit on your iPhone and iPad.

Hiding Movies in Cloud

If you want to hide films in the cloud on the iPhone and iPad, you need to follow the instructions given below.

  • To get started, open Settings on your iPhone and iPad.
  • After that, you should tap on Screen Time.
  • Then you have to tap on “Content and Privacy Restrictions.”
  • Thereafter, you should tap on “Content Restrictions.”
  • Later tap on Movies.
  • Now, you have to tap on “Show movies in the cloud On/Off Switch.”

Hiding TV Shows in the Cloud

You can hide TV series in the cloud on iOS. Here are the instructions given below.

  • To begin with, go to the Settings on your iPhone and iPad.
  • After that, you should tap on Screen Time.
  • Then you have to tap on “Content and Privacy Restrictions’.
  • Thereafter, you should tap on “Content Restrictions.”
  • Later, you have to tap on TV Shows.
  • Now, tap on the Show TV shows in the Cloud ON/Off Switch.

Block Multiplayer Games from Game Center

For blocking multiplayer games from your iOS device, you need to follow the instructions given below.

  • First, you have to open the Settings app on your iPad and iPhone.
  • After that, you should tap on Screen Time.
  • Then, you have to select “Content and Privacy Restrictions.”
  • Thereafter, you should tap on “Content Restrictions.”
  • Later, tap on Multiplayer Games.
  • Tap on “Don’t Allow.”

Block Adding Friends from Game Center

You can block adding people from the game center on iOS. Here are the instructions given below.

  • Get started by open Settings app on your iPad and iPhone.
  • After that, you should tap on Screen Time.
  • Then you have to tap on “Content and Privacy Restrictions.”
  • Thereafter, you should tap on Content Restrictions.
  • Tap on Don’t Allow.

Block Screen Recording

If you want to disable screen recording on iOS, you need to follow the instructions given below.

  • To get started by open Settings app on your iPad and iPhone.
  • After that, you should Screen Time.
  • Then, you should tap on “Content and Privacy Restrictions.”
  • Thereafter, you have to tap on Content Restrictions.
  • Later, you should tap Screen Recording.
  • Tap on Don’t Allow.

By following the instructions mentioned in the blog, you will be successfully able to use restrictions and parental control on the iPhone and iPad.

Source – How to Set Up Restrictions and Parental Controls on iPhone and iPad

How to Create Folders And Group Apps On iPhone

Creating folders on an iPhone is a fantastic method for clearing obsolete and useless applications from the home screen. Keeping similar field applications altogether shall make your work simple. For instance, all your study related apps like the book reading app, news app, and dictionary app should be kept together. It saves time and makes everything organized.

How to Create Folders And Group Apps On iPhone

Method 1: Making folders and group applications on an iPhone

  1. Firstly, to make a folder, you need to have more than one application in the folder. Select whichever you wish to have with you now.
  2. Then, do a long press on the applications till every application on display begins moving. This procedure is entirely like rearranging the apps.
  3. After that, shift one of the applications above of the other. As soon the first application mixes with the other, lift your fingers from the display. Putting one application on top of the other makes a folder.
  4. You might have noticed that each of the folders has an allotted name to it by default. However, you can modify that name. Click the symbol of x for removing the suggested name. Next, write the name according to your wish. If you wish to put more applications to the folder, press the wallpaper for closing the folder. After that, put more apps into the newly made folder.
  5. As soon as you’re done putting every application- you wish to have and completing the edited name, press the Home option, and note that your changes have been saved.
  6. Remember! If you are the owner of the iPhone X, XS, XR, there is going to be no Home button option. Rather, you need to press on Done option. It shall be towards the upper side at the right-hand side corner of the display.

Method 2: Editing folders on an iPhone

  1. Firstly, for editing the existing folder, do a long press on the folder until it starts moving.
  2. Then, press it one more time and note that the folder will open. And also that its matter is going to get displayed on the screen entirely.
  3. Now you can edit folders however you want.
  4. You can change the name of the folder by touching the name.
  5. You can add more applications by dragging and dropping it into the folder.
  6. You can remove applications from the folder by moving them out.
  7. Next, press the Home option or else the Done option for saving the modifications.

Source – How to Create Folders And Group Apps On iPhone

How to Set Your iPhone or iPad into DFU mode?

Do you want to get DFU mode on your iOS device? You may need it for restoring the firmware or troubleshooting the software. Whatever the reason may be, in this blog, you will learn how to access the DFU mode from your iPhone and iPad.

How to Set Your iPhone or iPad into DFU mode

Set DFU Mode on iPhone XR, XS or XS Max

If you want to set DFU mode on iPhone XR, XS or XS Max, you should follow the instructions given below.

  • Get started by connecting your iPhone XR, XS, or XS Max to the Mac or PC.
  • Ensure that iTunes is running on your device.
  • After that, switch off the iPhone XR, XS, or XS Max.
  • Then you have to long-press the power key for 3 seconds.
  • During still pressing the power key and long-press the volume down key.
  • You should keep holding both keys for 10 seconds.
  • When the Apple logo comes, you have pressed it for a long time.
  • Now, leave the side key but continue pressing the volume down key for 5 seconds.
  • Make sure, when the”Plug into iTunes” screen appears, you have pressed the keys down for too long and try once more.
  • If the screen stays black, then it means your device is perfectly in DFU mode.

Set DFU mode on iPhone 8 and iPhone X

You can set DFU mode on iPhone 8 and iPhone X. Here are the instructions given below.

  • To get started, connect iPhone X or iPhone 8 to the Mac or PC.
  • You have to ensure that iTunes is running on your device.
  • Then you should switch off your iPhone X or iPhone 8.
  • Thereafter, you have to long-press the power key for 3 seconds.
  • Later, long-press the volume down key.
  • Now, you have to keep pressing both keys for 10 seconds.
  • After that, you should release the power key and continue holding the volume down key for 5 seconds.
  • If the screen stays black, your device should be in DFU mode.

Set the iPhone 7 or iPad into DFU mode

If you want to set DFU mode on the iPhone 7 or iPad, you should follow the instructions given below.

  • To begin with, switch off your iPhone 7.
  • After that, you should connect the iPhone 7 to the Mac or PC.
  • Then you have to ensure that iTunes is running on your MacBook.
  • Thereafter, you should long-press the power key for 3 seconds.
  • Later, you have to long-press the volume down key on your iPhone 7 while pressing the power key.
  • Now, you should stay pressing both keys for 10 seconds.
  • After that, you have to release the power key but continue pressing the volume down key for 5 seconds.
  • If the screen remains black, it means your iPhone 7 should be in DFU mode.

Set the iPad Pro 2018 into DFU mode

You can set DFU mode on iPad Pro 2018. Here are the instructions given below.

  • First, you have to connect the iPad Pro 2018 into the Mac or PC.
  • After that, you should launch iTunes on your Mac.
  • Then you have to ensure that your iPad Pro is switched Off.
  • Thereafter, you should long-press the power key for 3 seconds.
  • Later, during still long-press the power key, long-press the volume down key also.
  • Now, keep pressing both keys for 10 seconds.
  • After that, you should let go of the Power key but keep pressing the volume key for 5 seconds.
  • If your device’s screen is black, your iPad Pro is perfectly in DFU mode.

By following the instructions mentioned in the blog, you will be successfully able to set your iPhone and iPad into DFU mode.

Source – How to Set Your iPhone or iPad into DFU mode?