How to Fix Driver Power State Failure on Windows 10?

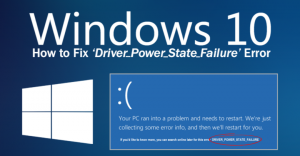
There are many reasons behind BSOD errors and they can occur due to the Unmatchable hardware, wrong drivers, or improper settings of power. If you are facing the driver power state failure BDOS error on your PC, then here are the instructions to fix the issue.

Drive power

Delete External Hardware

Firstly, attach the external hardware to the system. If you would like to check the core problem, attempt detaching the peripherals like scanner, speaker, USB drive or printer, etc. After that, reboot the system. In case the system works properly after disconnecting external hardware, then it means one of them causing the problem. In that case, you have to install all the drivers again into the system and check them individually.

Uninstall the Doubtful Driver

  • First of all, you should try to boot into the Safe Mode otherwise boot normally.
  • After that, hold the Windows and R button altogether over the keyboard to invoke the Run section.
  • Then input ‘devmgmt.msc’ into it and select the OK button.
  • You should extend the category then locate the yellow color exclamation sign device.
  • Reach the device, and right-click on it, then choose the Uninstall device.
  • Now, restart the system and look at whether the issue is fixed or not.

Upgrade Device Drivers

  • You have to boot into the safe mode.
  • Then reach the Driver Easy website and download it on your system.
  • After that, you should install it.
  • Thereafter, launch the Driver Easy then select the Scan Now button.
  • Now, Driver Easy will scan the system and identify any issue drivers.
  • Finally, select the Update option beside the graphics driver you require to download the correct driver version and individually install them manually.
  • Optionally, select the Update All button to download the right version of each driver, which is hiding or outdated on the PC.
  • Now, restart the system and look to view whether the error is fixed or not.

Disable Power Saving

  • You should boot into the safe mode.
  • Hold the Windows and R button altogether over the keyboard to invoke the Run section.
  • After that, input ‘control panel’ into it and select the OK button to launch the Control Panel screen.
  • You should click on the Power Options.
  • Make sure that Balanced (recommended) is chosen, then select the ‘Change plan settings’ beside it.
  • Go to the ‘Change advanced power settings’ and select it.
  • Then extend the ‘Wireless Adapter Settings’ and then select the ‘Power Saving Mode.’
  • After that, modify the settings and set to ‘Maximum Performance.’
  • You have to expand the ‘PCI Express’ and ‘Link State Power Management.’
  • Thereafter modify the settings and set to ‘Maximum power savings.’
  • Later, select the Apply button and then OK.
  • Now, restart the system to look to view whether the error is solved.

Uninstalling Third-Party Program

  • Go to the Windows Search on your system.
  • After that, insert ‘control’ into it and select the OK button to launch the Control Panel.
  • You should click on the Uninstall a program.
  • Reach the program, and right-click on it you would like to delete, then choose the Uninstall button.
  • Now, reboot the system to check whether the error is fixed.

Dyna Bravo is a creative person who has been writing blogs and articles about cybersecurity. She writes about the latest updates regarding McAfee.com/Activate and how it can improve the work experience of users. Her articles have been published in many popular e-magazines, blogs, and websites.

Source – How to Fix Driver Power State Failure on Windows 10?

www.Mcafee.com/activate – Download, Install and Activate Mcafee

Mcafee.com/activate – McAfee comes with dynamic recovery and scanning tools for the users to protect their data from cyber threats and malicious files and viruses that harm the device partially or wholly. The protective cover of McAfee empowers the system durability and data sections by removing most of the virus bodies from the device. Some potential threats attack the device without alarming the users that they have entered into their device. To make the device and data end to end protected, McAfee launches very powerful web protection and customized scanning tools.

Avail the premium features of this most trusted antivirus through visiting mcafee.com/activate.

Get the complete setup files of McAfee subscription package by these mentioned and easy to manage steps:

Guidelines to Download and Install McAfee on Your Device

  • At the start, type “mcafee.com/activate” through any of your selected web browsing applications.
  • Hit the Ok button to get into the home page of your web portal of McAfee.
  • Click the section related to your account with the name “My Account.”
  • After that, press on the Sign In button.
  • Now insert your username and password for login operation and tap on the Enter key.

Note: If you are new to McAfee, then hit the tab “Create New Account” and provide all your information for creating your McAfee account.

  • Once you have successfully created the account, you need to register yourself with McAfee. In order to register into the McAfee portal, tap on the “Register Now” button there.
  • Tap on the Download option there.
  • After that, abide by all the terms and conditions related to McAfee by hitting the button “Agree.”
  • Open the downloaded file and click on the expanded link for the installation procedure.
  • Finish the remaining instructions and guidelines as a mark of acceptance for installing the software safely.

Guidelines to Activate McAfee Antivirus on Your Device

Once you have installed your antivirus on the device by visiting the site of McAfee at mcafee.com/activate, then you must have to activate the installed setup on the device that you wish. Follow the under-mentioned guidelines to get the software activated completely:

  • Hit the McAfee icon located at your device to expand the antivirus.
  • Tap the Subscription link followed on the next page.
  • Hit the Edit tab for editing your account information. Then, go to the link mcafee.com/activateand tap the Enter button there.
  • Type 25-digit activation key into the enter product activation code section. One can fetch the activation key by locating the same on the package brought through an online or offline method.
  • Hit the Next button to proceed.
  • After that, set up a smart and powerful password so that anyone can’t assume it.
  • Tap on the Continue button there.
  • Wait for a little for some time as the activation process in under execution.
  • After a short while, a message will be sent to your mail regarding the software’s successful activation process.

Guideline to Reinstall McAfee on your Device

In some cases, understandable or by default, we uninstall McAfee from our device. If you have also uninstalled the antivirus and needs protection to your data and device, then visit the site mcafee.com/activate and reinstall the program as per the given instructions:

  • Launch the web browser and enter the site keywords of McAfee.
  • After that, hit the Enter key to go to the home page of this reliable antivirus.
  • After that, locate the section of “My Account.” If found, tap on it to expand its related options.
  • Now, press on the button “Sign-In.” Then, type the passcode along with the user Id to get into the account page.
  • Insert the mail address associated with your account.
  • Go to the Subscription option.
  • Hit the tab “Add Device” and then adjoin the device that you wish.
  • After that, press the options tab related to the Device type. Select your wished one and hit the Continue button.
  • Input the activation key that you have entered into the previous antivirus subscription. In case your subscription is expired, then; you need to purchase the new subscription plan for your McAfee.

McAfee.com/Activate – Enter Product Key – Activate McAfee Online

Mcafee.com/activate – The digital world is full of electronic gadgets, and they are well connected to the internet around the globe. In order to make the data secure, devices need a reliable and genuine program that troubleshoots viruses and security issues. The growth of McAfee and other antivirus programs becomes the advancement in the field of security and encryption processes. Sometimes, various strong-willed viruses enter into the system and corrupt various files and data.

In order to avoid these cases, McAfee is one of the strongest tools to defeat these antiviruses by removing them from the device completely. On can visit the site of McAfee at “www.mcafee.com/activate.” It helps you to know the salient features and powerful effects on numerous malware types, spyware, etc.

One, who are willing to know the downloading, installation, and activation procedures on their device can follow these under-mentioned guidelines,:

Easy Way for Downloading McAfee Antivirus (On First Device)

Abide by these guidelines to know the downloading instructions for McAfee with ease:

  • Hit the icon of your desired browsing application and hit the navigation pane.
  • Then, type the keywords: “mcafee.com/activate” into the search section and hit the Enter key.
  • After that, press the option “My Accounts.”
  • Continue by tapping the button, “Sign-In.”
  • Provide all the required and directed information. Ensure to cover all the mandatory sections.
  • Hit the tab “Subscription.”
  • Select the OS type for your device on which you wish to download your antivirus.
  • Choose your wished option as a Subscription type plan.
  • Hit the section “Download” to proceed with the download operation.
  • Press the Agree button there to get started with the complete downloading procedure.
  • Wait a bit for the download file to save on your Downloads section.
  • You will get the alert once you have found the download process completed.

Easy way to Download McAfee on Secondary Device

Pursue these guidelines to download the McAfee Setup on Another Device:

  • Launch the browser by hitting the browser icon as your preference.
  • After that, enter “mcafee.com/activate” into the search panel of your browser.
  • Hit the section of My Accounts.
  • Then, move to the next option of “Sign-In” and tap on it to get the Login page.
  • After that, provide various information into the web portal of McAfee to completely enter into your registered account.
  • Next, hit the subscription plan there and select the Device type to continue.
  • Hit the tab “Download.”
  • After that, press the “Download on Secondary Device” option there.
  • Now, type the e-mail address into the mail address bar.
  • Next, press the option “Send Link.” This option will command the device to send the link to the mail address that you have entered into the mail ID section for a secondary device.
  • After that, go to the secondary device and hit the mail application to launch.
  • Next, press the mail inbox and locate the mail that you have received from McAfee.
  • Hit the Download tab there. The process of downloading will begin just after hitting it.
  • Wait for a while so that you get the McAfee antivirus in the downloaded setup file.

Easy Way to Install McAfee on the Device with Ease

Users can fetch the assistance by these followed instructions to get the antivirus setup downloaded on another device. If you have completed the download process via www.mcafee.com/activate, move on to the next step of installation.

  • Tap on the menu tab, “Start.”
  • After that, navigate towards the McAfee file that you have downloaded earlier. It will be stored in the section of Downloads. If you are facing difficulty in searching the file, you can use the search bar that will help you find the file more easily.
  • Press double on the particular file to execute the procedure of installation.
  • Wait for a little for the installation to finish properly. You will get the message regarding the same on your device.

Easy Way to Activate McAfee on Your System

If you are facing any problem while accessing the instructions regarding activation of your McAfee subscription, then we are here to guide you properly. Make sure to have the McAfee activation code with you as it can be fetched via the product package of your subscription that you have got the same while making a purchase.

In case you have bought the antivirus through online mode, then it is directed to navigate to your registered mail application and search for the activation code there. After getting the activation code, pursue these guidelines to get the software on your system:

  • In the browser, insert the keywords: “mcafee.com/activate.”
  • Hit the Enter button.
  • Visit the section of “My Account” where you can manage all your McAfee accounts.
  • Tap on the Login button for getting into the account.
  • After that, enter all the asking details into their respective blank areas.
  • Now, select your country and language.
  • Then, type the e-mail address into the provided section of the Mailbox.
  • Next, proceed with the product activation code into the activation section panel.
  • Press the OK button there.
  • You will get the message regarding the process of successful alert.

How to Fix Right-Click not working on Chrome and Firefox?

Mozilla Firefox and Google Chrome are one of the best browsers in their segment. However, there are instances when you can face errors like mouse’s right button is not working correctly. The right-click may not stand out amidst the other functions, but its malfunction can render your device useless. So, here are some fixes to solve right-click not working in Chrome and Firefox.

How to Fix Right-Click not working on Chrome and Firefox

Close the Webpage Which Stops Right-Click

Most of the site administrators try turning off their sites. However, the script they use there can turn off the right-click for each page throughout the web browser. In that case, you should check and shut the malfunctioning webpage. If you can’t find out which site is stopping the right-click, then shut the web browser, and open it once more.

Run the Browser into Safe Mode

The users who intend to run the browser into Safe Mode can do so through the below-written guidelines.

For Firefox:

  1. Firstly, invoke the Troubleshooting detail page and reach the address bar of Firefox.
  2. After that, copy this address ‘about:support’ and then hit the Enter button.
  3. You should choose the ‘Restart with Add-ons Disabled’ option to verify the pop-up.
  4. Now, launch the ‘about:addons’ into the search section and reach the section of Extensions, you should remove troublesome extensions.

For Google Chrome:

  1. Firstly, invoke the Google Chrome into the incognito mode or open the web browser by holding ‘Ctrl + Shift + N’ keys altogether over the keyboard.
  2. If you see that right-click works well with add-ons disabled, then the problem is possible with add-ons.
  3. You should disable the doubtful add-ons that may be the reason for the issue.
  4. It might require a little test and error.
  5. Now, launch the ‘chrome://extensions/’ into the search section then select the Remove button to parallel to any extension you would like to remove.

Reset the Browser

If the Settings on the web browser have been changed by software, malware, and updates or resetting, the web browser will repair the problem. Once you refresh the Firefox or reset the Google Chrome, every setting that is changed for whichever cause is changed to default.

Reinstall your browser

In case the files related to the web browser are damaged, this will not repair the issue. In that situation, you will have to uninstall the recent browser version of the program and install it again. After that, install the newest version via the official site.

Dyna Bravo is a creative person who has been writing blogs and articles about cybersecurity. She writes about the latest updates regarding McAfee.com/Activate and how it can improve the work experience of users. Her articles have been published in many popular e-magazines, blogs, and websites.

Source  – How to Fix Right-Click not working on Chrome and Firefox

How to Setup and Restore Server Backups to Cloud?

Cloud offers you the access to the servers on the internet, databases, and software that perform over those servers. The most important thing about Cloud servers is situated inside the data centres worldwide. Also, Cloud offers you to access the exact apps and files from as the storage is located on servers rather than the local user device. Many users are still ignorant as to how it works, so here is everything you need to know about it:

cloud

Ready Devices for Backup via Backup Management Portal

  1. Go to Backup Dashboard and select the button of Add a device.
  2. It will reach you to the option of ‘Add Wizard.’
  3. Then you should select the ‘Servers and Workstations’ option via the given options.
  4. Thereafter, select the Customer option via the menu of drop-down and pick the OS of the device.
  5. Now, click on the ‘installation type’ and then choose the button of Next.
  6. Finally, reach the installer and download is given to the particular device.

Install and Access Backup Manager on Mac or Windows

  1. You should reach the installer you have downloaded, and it will reach you to the browse that you will proceed via instructions.
  2. Then, select the Language option of the backup manager.
  3. Select the Next button.
  4. Thereafter, reach the Personal Access section and give the password and name of the device.
  5. Afterward, give a security code, and don’t forget to store the code because, in case you lost the code, you cannot access the data.
  6. You should mention the backup time and select the Next button.
  7. In case you would like to be indicated, you can give an email ID wherever the email notifications will be sent.
  8. Now, select the Next button, and you have to wait for initializing the service.

Configure Data Selection

  1. Firstly, launch the Backup Manager on your device.
  2. After that, select the Backup section.
  3. You should choose the button of Add that you would like to back up.
  4. Go to the folders components or files that you would like to backup according to the chosen data source.
  5. Now, select the button of Save.

Configure Schedule-Based Backup

The users who are keen to configure schedule-based backup can pursue the directions given below.

  1. Firstly, invoke Backup Manager on your device you would like to backup data.
  2. Then, you should reach the section of Preferences and select the Schedule option on the left side.
  3. Thereafter, choose the option of App schedule to make a fresh backup schedule.
  4. You have to provide the schedule an applicable name, then you should perform scripts when you back up, and once you backup, then selecting them via the provided menus of the dropdown.
  5. Now, pick the backup time and pursue by selecting the days of the week on that the backup is to perform.
  6. Click on the Save option.

John Smith is an avid technical blogger, a magazine contributor, a publisher of guides at mcafee.com/activate, and a professional cyber security analyst. Through her writing, she aims to educate people about the dangers and threats lurking in the digital world.

Source – How to Setup and Restore Server Backups to Cloud

How to Create and Manage Your Amazon Prime Video Profiles

Amazon Prime Video can be shared with family and friends, but if you are facing some issues while managing the account, so it can be solved. Amazon Prime Video is the second-best streaming service platform after Netflix, and that is why they provide several services and features to its users. Users can make many profiles from one account to manage the account more significantly. It can also enhance your experience of watching movies and shows as well.

Amazon

Back then, there was only one profile option was available in the Amazon Prime Video, but now users are distinguished into several profiles. The profile creation method is also changed a bit from before. You can share your profile with your family and friends, or they can make their own profile to not to mess with your profile.

How to create a profile of Amazon Prime Video

To make a profile on Amazon Prime Video, you need to first log in to your account and move to your account settings to access the profile creation section.

  1. Launch the official website on your preferred browser.
  2. Tap on your existing avatar of profile.
  3. Click on the “Add new” option.
  4. Enter the “name” of the person who will use the profile.
  5. Tap on the “Save Changes” icon.

This procedure of making an account is fairly simple. You just have to log in to your account, and then you can access everything from it. Even if you make a profile for another user, you can still use it. It will be visible on the upper right side of the display. You might need to enter the password after saving the password. However, if you are looking for making a profile of kid, then before clicking on the “Save changes,” you need to toggle on the “Kid’s profile” section.

Manage Profiles in Amazon Prime Video

Every profile that you will create will show up on the screen. If you have kids and profiles, these profiles will also show up in the same section, but the content in the kid’s section will be different from others. If you want to manage the profiles after making the profiles, you can see the “Manage profiles” on your profile section. There you can manage every profile that you have made till now.

  • First, choose the profile that you want to access or to switch the profile. You can do it in the same tap, and then tap on the “Manage profiles” option.
  • The edit profile section will open up where you can change the name and can be removed too.
  • All three options are available in the edit section.
  • Choose your option, and then on the Save changes button will be accessible.

Through these points, you manage profile and easily create as well. Remove profile option is available in the manage profile option. If you are fed up or don’t have the use of multiple profiles, then you can remove other profiles through your profile. These profiles cannot be removed automatically, and these profiles every candidate can easily enjoy Amazon Prime Video without any interruption.

James Robert is a creative person who has been writing blogs and articles about cybersecurity. She writes about the latest updates regarding mcafee.com/activate and how it can improve the work experience of users. Her articles have been published in many popular e-magazines, blogs, and websites

Source  – How to Create and Manage Your Amazon Prime Video Profiles

How to Watch TV Shows and Movies on Apple TV

If you are a Binge-watching freak, then in your Apple TV device, you can enjoy it even more. You can watch all of your favorite shows on Apple TV even if you have purchased from many other streaming platforms. Apple provides an all-new and ultimate experience of watching shows and movies, and also Siri can work as playback control. The number of users around the world who now prefers to have Apple TV because its features and experience are accessing everything at a single place is totally amazing. You can watch anything on Apple TV and here’s how you can watch it.

Watching Movies and Shows on TV App

TV allows you to watch any show or movie there with all your collection in a single place.

  1. Launch the “TV” application through the home screen or via “tapping” home button situated on Apple TV.
  2. Choose a movie or show to watch by tapping on “Up Next” to start watching the content immediately.
  3. You also have an alternative option of “What to watch” from the other sections of movies on TV.
  4. Tap on “Play” or “Begin with the first episode” whatever visible on the screen.

Playing Videos from the Library of TV App

Now you will not be required to purchase movies or shows because it is a different section where you will already have purchased content.

  1. Open your “TV” application.
  2. Move to Library part at the screen’s upper side.
  3. Pick up a section, i.e., “Recent Purchase,” “Movies,” “TV Shows,” or any other genre that you wish to watch.
  4. Tap on the “Title” to play any content from the library.
  5. Press “Play” to begin the show, or you can also choose the specific episode to watch from the following.

Accessing Shows &Movies Chapter Menus on Apple TV

  1. Start watching a TV show or movie.
  2. Slide down until you see open and access the menu of info.
  3. Slide down for accessing the chapters.
  4. Swipe right or left to choose a chapter.
  5. Now any movie will come through jump backward or forward to the specific chapter that you selected.

How to Rewind and Fast Forward a TV Show or Movie on Apple TV

Most of the users who have used Siri remote, they know that brushing the trackpad of remote was a feature before, and it accidentally rewinds or fast forward the show with just rubbing. But now Apple changed the procedure of rewind and fast forward the TV show and movie on Apple TV.

For Backward and Skip Forward of 10 Second:

  1. While watching any TV show or movie, now you need to tap on the right or left side to move ahead or backward for 10 seconds. The Siri remote is so accurate, so the processing of the task will be instant.
  2. The content will be skipped forward and backward for 10 seconds.

For Rewind and Fast Forward:

  1. Tap “Pause” while the TV show or movie is on playing.
  2. Swipe “Right or Left” for fast forward the video for particular timing.
  3. Tap “Play.”

How to Recognize the Movies with iTunes Extras on the Apple TV

Now to find out which movies have iTunes extras, you need to do little searching. Recognizing then is not easy on browsing the screen. However, there are some special features available when you find out an iTunes extras movie, and before buying that, you can see those special features.

  1. Launch “TV” application.
  2. Move to “Movies.”
  3. Tap on specific “Movie,” and if that movie is part of iTunes extras, then they will be below the trailer and also related movies column.
  4. Tap on “Image” under the “Preview iTunes Extras,” and it shows some preview of what you will see in the movie you purchase to watch.

James Robert is a creative person who has been writing blogs and articles about cybersecurity. She writes about the latest updates regarding mcafee.com/activate and how it can improve the work experience of users. Her articles have been published in many popular e-magazines, blogs, and websites

Source – How to Watch TV Shows and Movies on Apple TV

How to Create a Transparent Background in Paint on Windows 10

Paint is an image creator or editor application in Windows 10 operating system. Several photographers overlook Microsoft Paint or new Microsoft paint 3D editing application, as they have limited features while compared to Photoshop. However, you can make the background transparent in Microsoft paint 3D with one thing that features available in the application. In this article, we will show you how you can make a transparent background in Paint.

Paint Background

How to remove background color in MS paint in windows 10

Here are two methods that help you make your picture background transparent in Microsoft Paint in Windows 10 operating system. The first way is to include the foreground area and cutting in a picture that results in your picture background becoming transparent. Then you need to paste your foreground mounted on another picture.

The second option include deleting a field in the picture that will make areas transparent that you can fill by attaching another background layer.

1) Hot to attach background transparent to picture in Paint

Here are the steps on how to attach background transparent to picture in Paint:

  1. Launch Paint by tapping the Cortina option and then entering “Paint” in the search field.
  2. Choose Open Paint.
  3. Tap on File and then hit Open and choose a picture to start.
  4. Tap the Select option and then tap on the “Transparent section” option.
  5. Choose the “free-form selection” button in the selection option menu.
  6. Trace near the foreground location to secure from the default picture along with cursor and holding the left button of the mouse.
  7. The rest images behind the picture automatically transparent background.
  8. Here right-tap on the rectangle option that appears near the selection button.
  9. Choose Cut in the context menu to delete the foreground in the picture as snapshot appeared below of the screen.
  10. Now launch all new pictures in Paint.
  11. Tap Ctrl + attach background transparent to picture in Paint key on your keyboard to paste the images that you have traced from the earlier picture.
  12. Now Left-tap the pasted image and then drag it to the position that your wish to mount on the picture.

 2) Attach background Transparent in Paint 3D

Here are the steps on how to attach background transparent in Paint 3D:

  1. Type “Paint 3D” in the windows search field, when you have creators updates and add the application into Windows 10 in the web pages.
  2. Choose to launch the Paint 3d application here.
  3. Tap “Menu” and then tap “Open.”
  4. Then hit “Browse file” and choose Paint 3D.
  5. Tap the canvas option that appears in the sidebar.
  6. Tap on “Transparent canvas” settings in the sidebar.
  7. Tap the “Select” option, and then you need to drag the rectangular section move on the area on the picture that you wish to delete.
  8. Tap Ctrl + X button on your keyboard to crop the area that you have selected from the picture, then leave the images in any area transparent background that layer you need to fill.
  9. Tap “menu” and then hit “Save as” and choose the “2D PNG button.
  10. Here you need to enter the file in the search box and then tap the “save” option.
  11. Tap “Menu” and the “New to launch the blank canvas.
  12. Choose “Menu” and then hit “open” and tap then “Browser files.”
  13. Choose to launch a background layer that you have saved recently.
  14. Tap “Menu” and then hit “Insert” and choose to start the transparent picture that you have recently saved.

Dyna Bravo is a creative person who has been writing blogs and articles about cybersecurity. She writes about the latest updates regarding McAfee.com/Activate and how it can improve the work experience of users. Her articles have been published in many popular e-magazines, blogs, and websites.

Source – How to Create a Transparent Background in Paint on Windows 10

How to Open WordPerfect on Windows 10?

WordPerfect is one of the essential tools for file extensions, therefore numerous users wish to add it to their system. However, if you are facing difficulty in doing so, then quickly obtain a resolve through below written guidelines.

Ms Word

Launch WordPerfect File with MS Word

In case you intend to launch a WordPerfect file with MS Word, then you can opt to follow the below-mentioned guidelines.

  • First of all, launch the MS Word app on your system.
  • After that, select the MS key to show all the options of the program.
  • You should select the Open option.
  • Now, you require to choose the File option and Open.
  • Go to the ‘File Type’ menu of drop-menu at the lower side of the section.
  • Then you have to set this to ‘All Files.’
  • Reach the search section and search for the file of the WordPerfect file.
  • Click on it and select the Open option.
  • In the MS Word, the file will launch once it’s changed automatically.
  • Navigate to the menu of File and select the ‘Save as’ option.
  • Ensure to tap Save As Type from the drop-down section, in case of sudden open save screen opening it.
  • Now, reach the save button and click on it.
  • In case a window shows alert notification you about modification associated with the format of the fresh file, click on the Yes button.

Change the Name of Extension

If the users are trying to change the name of the extension, then they should carefully apply the given steps.

  • You should grab the file of WordPerfect and put it on the Desktop.
  • Thereafter, select the file and right-click on it.
  • You have to choose the Rename option.
  • Now, select the file of extension and rename it from .wpd to .doc.
  • After that, go to the file and twice click on it.
  • In MS Word, the file should quickly launch it.
  • Finally, you should either let it in the file type of .doc or change it to the file of .docx type.

Modify the File Associations

In case you intend to modify the file associations, then you can opt to follow the below-mentioned guidelines.

  • Firstly, get the file and place it on the desktop.
  • After that, select the file then right-click on it.
  • You should click on the Open with option.
  • Go to the option which says ‘Choose default program.’
  • Then highlight MS Word and put a checkmark beside the option which says ‘Always use the selected program to open this kind of file.’
  • In case you cannot locate the Word as you want, then select the Browse option to find the ‘Winword.exe.’
  • Thereafter, go to the OK button and click on it.
  • The recent .wpdfile will quickly launch in Word.
  • Finally, you require to twice click to launch them in the MS Word moving ahead.

Dyna Bravo is a creative person who has been writing blogs and articles about cybersecurity. She writes about the latest updates regarding McAfee.com/Activate and how it can improve the work experience of users. Her articles have been published in many popular e-magazines, blogs, and websites.

Source – How to Open WordPerfect on Windows 10?

Mcafee.com/activate – Enter Product Key – www.mcafee.com/activate

Antivirus are one of the most useful software nowadays and the digital world enhancement leads are the major reason behind their emerging growth. McAfee is the one that stands on the top even amidst the most advanced antivirus with its premium specs and features. The users who are willing to install McAfee on their device should visit mcafee.com/activate. Learn everything about downloading, installing, and activating McAfee through the below-mentioned guidelines.

mcafee

How to Make an Account of McAfee

If the users are trying to make a McAfee account, then they should carefully apply the given steps.

  • Reach the preferred browser of the PC.
  • Thereafter, insert www.mcafee.com/activate into the address bar.
  • You should locate and choose My Account.
  • Go to the Sign-up button.
  • Then input the credentials in the shown boxes.
  • You have to set a password and username for the McAfee account.
  • Later, click on the Agree button.
  • Now, the account of McAfee is created successfully.

How to Download McAfee Antivirus for the Main Device

In case you intend to download McAfee antivirus for the main device, then you can opt to follow the below-mentioned guidelines.

  • Once again, go to the desired web browser on the PC.
  • Thereafter, enter www.mcafee.com/activate into the address section and hit the Enter key.
  • You should locate and click on My Account.
  • Navigate to the Sign-up button and choose it.
  • Input the information into the shown boxes.
  • Now, input password and username for the account to sign-in.
  • Click on the Subscription button.
  • Then reach the shown list and select the device OS.
  • Go to the Subscription button that you pursue to download.
  • Select the Download option.
  • Hit the Yes button to confirm.
  • Now, the downloading will begin in a few seconds.

How to Download McAfee Antivirus on another Device

If the users are trying to download McAfee to another device, then they should carefully apply the given steps.

  • Launch the desired browser on the PC.
  • Then insert mcafee.com/activate into the search section and hit the Enter button.
  • Locate and select My Account.
  • You should click on the option of Log-in.
  • Insert the account info in the shown box to sign-in.
  • Choose the subscription button.
  • Reach the shown list select the device OS.
  • Navigate to the Download option and select it.
  • On another device, select the Download button.
  • Then input email ID into the shown boxes.
  • You have to choose the option of Send Link.
  • In another device, reach the email application.
  • You should sign-in to the above-given email ID.
  • Then locate the email from McAfee.
  • Select the Download Link option.
  • Now, McAfee downloading will begin shortly.

How to Install McAfee Antivirus

In case you intend to install McAfee antivirus, then you can opt to follow the below-mentioned guidelines.

  • Navigate to the Windows logo on your system.
  • After that, reach the search section and locate the McAfee downloaded file.
  • After locating, launch the downloaded file to begin the installation process.
  • Now, McAfee will successfully be installed on your device.

How to Activate McAfee Antivirus

If the users are trying to activate McAfee antivirus, then they should carefully apply the given steps.

  • You should launch the device.
  • After that, open the desired web browser.
  • Input www.mcafee.com/activate into it and hit the Enter key.
  • Reach the My Account section and click on it.
  • You have to insert the credential of account to Sign-in.
  • Click on the option of ‘Language & Country.’
  • Reach the shown list and select the provincial country and language.
  • Then give a registered email ID.
  • In the shown text section, input the 25-digit Activation Code.
  • Click on the Enter button to begin the activation.
  • Now, the selected subscription of McAfee is effectively activated.