How to Download and Install macOS Catalina 10.15.2 Beta 4 on MacBook?

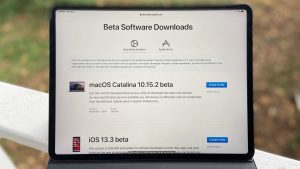
Mac is one of the most used devices in the world, and Apple ensures the device stays optimized. The beta version of the macOS Catalina 10.15.2 is here, and you can get it as well. So, here are the instructions to download and install macOS Catalina 10.15.2 beta 4 to the MacBook.

Beta Software

Create an Archived Backup of the Mac

In case you intend to create an archived backup of the Mac, then go through the below-mentioned steps.

  • You should link a Time Capsule or an external hard disk using a FireWire, USB, or Thunderbolt cord.
  • Go to the Apple icon within the top left-hand side of the screen.
  • You have to go to the drop-down section and choose System Preferences.
  • Then navigate to System Preferences screen and choose Time Machine.
  • Later, switch the toggle of Time Machine to enable it.
  • Now, go to the ‘Select Backup Disk’ and select the disk you want to use.

Download the Latest Beta on the Mac

  • You should go to ‘developere.apple.com’ on the Mac.
  • Thereafter, navigate to the Discover button.
  • You have to select the macOS button.
  • You should click on the Download option.
  • When the prompt comes, sign in to the developer account.
  • Move down and select Install profile tab for the macOS Catalina 10.15, then file download to the Mac automatically.
  • You should launch the Downloads screen and choose the macOS Catalina Developer Beta Access Utility.
  • Now, you have to twice-tap on ‘macOSDeveloperBetaAccessUility.pkg’ to open the installer.

Install the Software on your Mac

In case you intend to install the software of the Mac, then go through the below-mentioned steps.

  • You should go to Continue and click on it.
  • To accept the Terms and Conditions, click on, Agree.
  • You have to select the Install option.
  • Now, pursue the steps to install the macOS Catalina.

Make a Partition on the MacBook’s Hard Drive 

If you would like to make a partition on the MacBook’s hard drive, then abide by the given steps.

  • You should make a partition on the MacBook if not done already.
  • If the download is completed and prepares to install, then choose Continue.
  • To accept the terms and conditions, select Agree.
  • You should click on Agree to confirm.
  • Navigate to the Show All Disks to toggle within the main partition.
  • Thereafter select partition you would like to install the program on.
  • Now, navigate to the Install option, select it.

Setup with the macOS Catalina 

In case you intend to set up with the macOS Catalina, go through the below-mentioned steps.

  • You have to select the Continue option.
  • Thereafter, log in to the Apple ID and password.
  • iCloud will synchronize other files and desktop.
  • Now, you should select the Get Started option.

Marshall Lyne is a self-professed security expert; he has been making the people aware of the security threats. His passion is to write about Cyber security, cryptography, malware, social engineering, internet and new media. He writes for Norton security products at norton.com/setup.

Source – Download and Install macOS Catalina 10.15.2 Beta 4 on MacBook

Fix: Volume Shadow Copy Service Error on Windows 10

“Volume Shadow Copy Service” is popularly known as VSS errors on the Windows system Windows backs up your storage drives and system file snapshots automatically, even if you are using the particular storage or files. VSS is very important for Windows Backup and restoring system utilities. If you are facing any of the VSS errors while performing picture backup or restoring Windows, then it needs to be fixed instantly.

volume-shadow-copy-service-error

Types of Errors

There are two various VSS errors that you may see on your desktop. The error will show as:

“The Volume Shadow Copy Service used by System Restore isn’t responding/working. For various information regarding it, see the event-related log.”

“A VSS failed/ not responded. Please check your “VSS” and “SPP” app event-related logs for various information regarding this.”

You have to follow these methods to troubleshoot the issue:

1. Checking VSS

  • First of all, you have to check that the VSS is activated. To do so, you have to hit on “Cortana” tab on your Windows Taskbar.
  • Now, you have to type “services” in the given search bar and then hit the option “Services” to launch the windows.
  • Now, scroll your page down and then double hit the option “Volume Shadow Copy” to launch your
  • Now, hit the tab “Automatic” from the available pull-drop menu.
  • Now, Tap on “Apply” button and then hit “OK.”
  • After that, you have to restart your system in order to perform the booting process.

2. Junk Folders and Files for “All Drive Partitions”

On Windows 10, you can remove all the junks present on your drive partitions by running a disk clean- up tool.

In case you have more than one drive partitions, then you should scan each of them and detect any unnecessary junks and cache files by various 3rd party cleaning tools.

Here we will guide you to remove junk files from “All Drive Partitions”:

  1. First of all, launch the “Cortana” application.
  2. Now, enter “disk cleanup” in the provided search bar.
  3. Then, you have to hit the “Disk Clean-up” option to launch a new clean up
  4. After that, navigate to the pull-down menu and then choose any of the drive partitions.
  5. After that, tap on “OK.”
  6. Now choose file categories and then mark the checkbox to remove.
  7. Then hit the “OK” tab.
  8. After that, tap on the “Delete Files” option in order to confirm it.

Note: You can also remove system restore points along with various junk containing files.

  • In case you wish to delete system restore points and junks, then hit the “Clean up system files” option there. It will be inside the “Disk Clean up”
  • After that, you have to hit the drive partition option there and then tap on “OK.”
  • Now, choose the “More Options” button.
  • Then, hit the “Clean up” tab to delete all your system related restore points.

3. Deactivating Windows Firewall

  1. Hit the search bar to activate and then type “Windows Firewall” in the provided bar.
  2. Now, hit the enter key to launch the “Windows Defender Firewall.”
  3. After that, tap on the option “Turn Windows Defender Firewall on or Off” to expand various options.
  4. Next, choose the option “Turn off Windows Defender Firewall” and then tap on “OK.”

4. Turning Off Anti- Virus Software

Deactivating various antivirus utilities, especially related to the third-party software, will also help in troubleshooting your VSS issues.

You have to disable it temporarily by right-clicking on the utility system tray menu. In case you are unable to find it in your antivirus, then expand the program’s primary screen and then choose the disable (Off) option on the page.

These methods will hopefully fix your issue. After that, check that the VSS is working properly. Reboot the system to save all the changes that you have made.

Marshall Lyne is a self-professed security expert; he has been making the people aware of the security threats. His passion is to write about Cyber security, cryptography, malware, social engineering, internet and new media. He writes for Norton security products at norton.com/setup.

Source – Volume Shadow Copy Service Error on Windows 10

Norton.com/setup | Enter Norton Product Key

Norton.com/setup With a rapid increase in cyber-criminal activities, the need for having a trusted antivirus like Norton is increasing. In this era of technological advancements, we usually see big companies and businesses are facing the consequences of cyber-attacks; financial as well as personal. As a measure of data protection, not only companies but also every person is now relying on antivirus programs that can be obtained at the norton.com/setup page.

norton setup

The antivirus solutions tend to combine superior security and fast performance with an easy-to-use design to protect your devices from today’s advanced threats. Besides this, it also safeguards your passwords, protects your data, and keeps your computer running at peak performance.

What is Norton Antivirus?

Norton antivirus is a security solution that helps protect your device from the prying eyes. In addition to this, you can not only safeguard your single device but multiple devices using a single subscription. The main aim of having Norton setup on your device via norton.com/setup is securing your data and information.

A single subscription is enough to protect all your computers, smartphones, or tablets across Windows, Mac, Android, and iOS operating systems. The automatic update feature of Norton antivirus automatically installs the latest virus definitions and feature updates on your devices to assure that you always have the best protection available to fight against cyber crooks.

How to Setup a Norton Account?

It is necessary to set up a Norton account in order to monitor the connected devices and also to update your profile. With the help of Norton setup account. You can also make additional purchases from Norton Store if you have registered yourself with Norton. Also, note that it is essential to associate Security license with your Norton account.

Follow the steps given below to initiate the Norton account set up process:

  1. Visit the official web page of Norton Setup.
  2. From the page you are redirected to, click on the “Sign in” option followed by the “Create an Account” tab.
  3. Type in a valid email address that you want to associate with your account and create a new password. Remember these credentials because you might need it for future reference.
  4. In this step, you have to choose the region where you are living.
  5. Once you do this, it is time to read the Norton setup privacy policy and agree to it.
  6. After this, click on the “Create Account” option.

How to Download Norton?

Protecting your devices is as easy as adding a new device to your Norton account. This means you first have to download Norton on Your device for which the process is given below:

  1. Open your PC and visit the official website of norton.com/setup.
  2. Now click on the “Sign In” option and enter your login credentials.
  3. The Norton Setup window will appear on your screen from where you have to tap on “Download Norton”.
  4. Now you will be prompted to enter the Norton setup product key. Once you do it, click on the go arrow (>).
  5. In the end, click on the “Agree & Download” option.
  6. If the Norton setup User Account Control window appears, tap on“Continue”.

How to Install Norton Antivirus?

Once you are done with the downloading the Norton setup via norton.com/setup, you have to install and activate it. Continue reading the article for more information. To install Norton Antivirus, do the following:

  1. First of all, save the downloaded Norton setup file on your computer.
  2. Secondly, double-click on this file to install it.
  3. By default, the file will be saved in the “Downloads” folder of your device.

You have successfully installed Norton on your device. You can also protect your Android device if you have the subscription of multiple devices.

How to Uninstall Norton AntiVirus?

There might be circumstances where you need to uninstall your Norton Antivirus. The few reasons such as your antivirus are outdated and you are unable to get its updated version. To uninstall the Norton antivirus, do as described:

  1. Navigate to the “Taskbar” of your computer and click on the “start” option.
  2. From here, open the “Control Panel” and double click on the “Add or Remove Programs”.
  3. Click on the program that you want to remove or uninstall.
  4. In this step, click on the “Uninstall a program” option.
  5. Follow the on-screen instructions to complete the Norton Uninstall.
  6. In the final step, restart your computer to save the changes.

How to Reinstall Norton AntiVirus?

It is necessary to reinstall Norton Antivirus in case you want to prevent your computer from viruses and online threats. To reinstall the Norton setup, do as described:

  1. Open your web browser and visit the Norton setup page.
  2. Click on the “Sign In” option and enter your Norton setup credentials.
  3. Click on the “Product” option and select the product you want to reinstall.
  4. Enter the Norton setup product key and click on the “Download Now” option.
  5. Once the Norton setup file gets downloaded, tap on the “agree and install” option.
  6. Right-click on the installed files and then hit the “activate now” tab.
  7. In the end, hit the “Enter” key to complete the process.

Your device is again protected with the best-in-class Antivirus solution.