What versions of QuickBooks are supported in Windows 10?

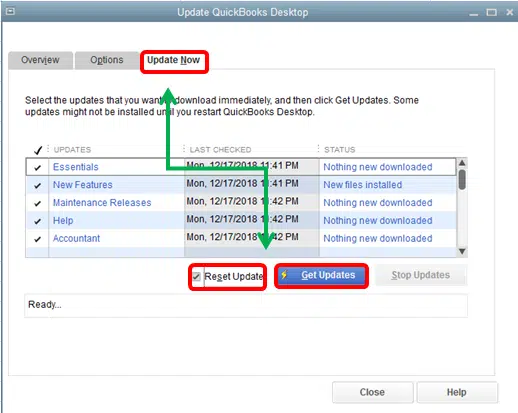
Is your QuickBooks version supported with Windows 10? In case you have updated or planning to upgrade to windows 10, then the major question that arises is that whether your QuickBooks version is compatible with Windows 10 or not. Windows 10 does not support every version of QuickBooks. An unsupported version may lead to compatibility issues. If in case QuickBooks version is not supporting, then you are required to immediately update latest version of QuickBooks desktop.

Thus, carefully read this post and unleash whether your QuickBooks is compatible with windows 10 or not. Or you can also call us at 1-800-615-2347, and discuss your queries with our QuickBooks professionals.


What are the Supported Versions of QuickBooks Desktop on Windows 10

To help you understand about Windows 10 that supported QuickBooks desktop versions take a look on the below given list:

QuickBooks Desktop 2016 R7 and higher

QuickBooks desktop 2016 R7 is good to go because this version is completely supported by Windows 10. So it has no compatibility issues with Windows 10. And the users are not required to necessarily update QuickBooks.

QuickBooks desktop 2015 and 2016 R1 to 6

Talking about the compatibility of QuickBooks desktop 2015 and 2016 R1 to 6, it is compatible only if the .NET framework 3.5 is present. In case the .Net framework 3.5 is disabled or not working then the user might face compatibility issues. Thus, the user needs to make sure to enable .NET framework 3.5 to make the QuickBooks 2015 compatible with Windows 10.


Steps for Enabling .NET framework 3.5

  • Firstly you need to open windows control panel and then programs and features. Then go for select the turn windows features on or off option.
  • And scroll through the items to locate the .Net framework 3.5
  • Followed by, enabling it
  • And also exit the control panel
  • At the end reboot the system


QuickBooks desktop 2014

The QuickBooks desktop 2014 version is not at all compatible with Windows 10. If you are using this version or any of the earlier versions, then you need to immediately download the latest version or else this could lead you to trouble.


After reading this post, it might be clear to you whether you whether your QuickBooks is supported with Windows 10 or you have to update it. But, in case any of your queries remained unanswered, then need not to worry, as we are here to help you.

You can contact our QuickBooks support professionals at 1-800-615-2347, and they will clear all your clouds of confusion.

How Can I Rectify Error Code 12157 in QuickBooks?

Wish to resolve the QuickBooks error 12157? Well, if yes, then reading this segment can be quite helpful in tackling the error. This error can be seen due to web connectivity issues in the windows operating system with Microsoft Win32 internet or which is also termed as WinInetAPI. QuickBooks uses API to run internet protocols easily mainly FTP, HTTP, and Gopher. QuickBooks error 12157 can also be seen when either downloading or setting up updates with the software.

To know the process to tackle QuickBooks payroll error 12157 issue successfully, make sure to stick around the segment till the end. Or else you can consult our tech support team, and let our experts perform the steps for you.

What instigates QuickBooks error 12157?

Before learning the fixes for any error, it is very important to first find out why the error actually occurred. Thus, below are the triggers to the QuickBooks update error 12157. Let us have a look:

  • In case the date or time on the system is incorrect.
  • The error code 12157 can be a direct result of restrictive settings of firewall and Internet security applications.
  • If your system has multiple QuickBooks installed, then this type issue can be encountered.
  • Internet and security apps crop up at the time of updating the QuickBooks desktop software.

Methods to deal with QuickBooks error code 12157

There are certain resolutions suggested by experts and certified QuickBooks professionals to fix the QuickBooks error 12157 manually. However, before carrying out the steps to resolve the error, it is important to update the software to the latest version. Following any of the below stated methods might help the users to get rid of this annoying error. So, without further ado let us begin with the list of procedures.

Method 1: Resetting system’s date and time

As one of the reasons behind the occurrence of this, is the erroneous date and time on the system, it is important to rectify the root cause of the error. Thus, one can follow the below steps to get fix the system’s date and time:

  • To begin with, you are required to visit the clock on the right bottom of the system’s screen.
  • After reaching there, right click the mouse.
  • Choose the Adjust Date/time from the list that appears after the above step.
  • Now, specify or choose the current date as well as time.
  • Followed by closing the screen by hitting ok after the date and time has been rectified.
  • The next step in the process is to close the QuickBooks.
  • And then reopen the QuickBooks.
  • Lastly, the user is supposed run the QuickBooks update again and observe whether the error still persists.

Method 2

  • Click on the start your computer option.
  • Log in as an administrator.
  • Followed by pressing start to catch and then clicking on all applications, accessories, computer tools, and later on hit the system repair option.
  • Once done with that, open new window and then click on Re install my PC option, followed by hitting Next.
  • Now, click a restore point and after that hit Next, along with that select the advanced system to restore the point.
  • The next step in the process is to hit next, on the confirmation
  • And the last step is to reboot the system.


We believe that chucking off the QuickBooks error 12157 can be a bit easier for you, after you perform the steps that we have scribbled above.

But if in case, you are still unable to fix the error, then we are here to rescue you. Feel free to consult our QuickBooks payroll error support professionals at 1-800-615-2347, and we will be delighted to assist you.

How Can I Rectify Error Code 6189 in QuickBooks?

Whenever you try to concentrate on your proceedings in QuickBooks software, some or the other thing hinders the smooth process. In this piece of writing, we will be discussing one of those things, which includes QuickBooks error 6189, 816 . Well, this is a pretty common thing, that might appear when you try to access the company file from a network device in a multi-user mode. It is basically a run time error that you might bump into when trying to use QuickBooks company file. You might see an error message appearing on your system screen which will be stating as

An error occurred when QuickBooks tried to access the company file ”.

The QuickBooks error code 6189, 816 further indicates any sort of issue with the multi-user network and not with the accounting data. Get a better grip onto such an error by reading this piece of writing fully. Or you can also consult our tech geeks for any further technical assistance.

What instigates QuickBooks error 6189, 816?

The following can be the instigators to QuickBooks error code 6189, 816 . Let us explore one by one:

  • Just in case another client signed into the company file in single user mode.
  • Issues with QuickBooks registry values in windows registry.
  • Damaged QuickBooks components.
  • Also, in case the company file on a network computer is in use by a program or a process.
  • Damaged network data source file on the QuickBooks server or host system.
  • Just in case there are accessibility issues with the company file or folder on QuickBooks host system.
  • Another reason can be if you mistakenly deleted the important drivers from the system needed for running QuickBooks.

Methods to resolve QuickBooks error 6189

You can try and rectify the QuickBooks error 6189, 816 using the below methods and steps:

Method 1: Run QuickBooks database server manager

  • You need to first choose the network issues
  • Go for QuickBooks database server manager , where you will be asked to install the QuickBooks software on the server, in case you haven’t already
  • In QuickBooks database server manager, select start scan option, if you are able to spot the company file. Or else browse to the location and hit the start scan option.
  • In this particular step, QuickBooks database server manager will fix the firewall permissions. You would only have to hit close when the process finishes.
  • Last but not the least open QuickBooks

Method 2: Restarting the systems and the servers

You can reboot the system and the servers, so as to tackle out the issue. The steps to be performed in here are:

  • Reboot the server system.
  • Look where the company file is hosted. QuickBooks enterprise hosting users can consult a professional for restarting.
  • Reboot the workstations
  • Open QuickBooks desktop on the server system and then open QuickBooks on each of the workstations.

Method 3: Move the company files to the local drive

Well, if the first two methods didn’t work for you, then you need to move the company file to the local hard drive, if the error continues and also if the company file is stored on a removable drive or online. Moreover, you can restore QuickBooks files, on the server system’s hard drive. Avoid storing the files on removable drives, simply for the reason that they aren’t designed in a way to run QuickBooks or multi-user networks.

Method 4: Run Quick fix my program from the QuickBooks tool hub

Step 1: Download and install QuickBooks tools hub

  • Close the QuickBooks software
  • Download the QuickBooks tools hub file and save it
  • Open the downloaded file
  • Carry out the prompts to install and agree to the terms and conditions
  • Double click the icon on the windows desktop

Step 2: Run Quick fix my program

  • Open the QuickBooks tool hub and then select program problems
  • Select quick fix my program
  • Start the QuickBooks desktop and open the data file


Chucking off QuickBooks error code 6189, 816 can be a little easy, once the above stated steps are performed fully. However, as always, for any queries, comments, or concerns, call us immediately at 1-800-615-2347. Our QuickBooks error support team will be more happy to help you!

How to Track your Cash Flow in QuickBooks Desktop?

Seeking for the process to track your cash flow in QuickBooks desktop? If yes, then your search ends over here. This segment will brief you with the complete set of steps to track the cash flow in QuickBooks successfully. The cash flow is basically the amount of money moving in and out of the business and the bank account. In QuickBooks, one can use different reports and projections to get a clear look at the current and future business finances.

Go through this segment with full concentration and unleash the complete set of steps to track your cash flow in QuickBooks desktop . Or you can also connect with our tech geeks and they will come up with the most effective set of steps for you.


Steps to track your cash flow in QuickBooks

Tracking cash flow in QuickBooks becomes easy using the steps discussed in below:

Step 1: Ascertain that the data is appropriate

  • Ascertain that you have entered all the transactions into QuickBooks
    • In case you have set up bank feeds, then download the transactions and match them to the transactions in QuickBooks
  • You need to now reconcile the accounts in QuickBooks and ensure that they match the real-life bank and credit card statements. In case you need assistance reconciling the account , then it is a good idea to reach out to the accountant.

Step 2: Use the financial reports to see the progress

Run a profit and loss report

  • Move to the reports menu and then company and financial
  • Choose profit and loss detail
  • Set the date range for the past 3 months
    • If you want to change what appears on the report, then choose customize report and customize it based on the data you need
  • After you are done, print, email, or export the report to excel


Run a balance sheet detail report

  • This can be done by moving to the reports menu and then company and financial
  • Heading forward, choose the balance sheet detail
  • Furthermore, choose customize report and also customize it based on the data you require
  • After you are done, make sure to print, email, or export the report to excel


While wrapping up this segment, we believe that you might be able to learn the right process to track cash flow in QuickBooks .

However, if for some reason you aren’t able to get a proper track of cash flow, then in that case we would highly recommend you connecting with our tech geeks using our dedicated QuickBooks desktop support helpline ie, 1-800-615-2347 .

How to Mend QuickBooks Error Code 6010?

QuickBooks Company file can be marred by different technical issues. One common error that is reported by several users is error code 6010. This issue is related to issues with the server workstation that is hosting the company file. It can also be possible that the company file is damaged or the data gone overload. Through this segment, get an insight into QuickBooks error code 6010 and the methods to easily rectify it. You might see the following error message on your desktop screen:

An error occurred. Your QuickBooks installation may have been modified. Reinstall QuickBooks and then try again. If the problem persists, contact Intuit Technical Support and provide them with the following error codes: (-6010, -100).

What Leads to QuickBooks Error Code 6010?

The main drivers of this error code are:

  • Accidental deletion of QB-related registry files can lead to Error code 6010 in QuickBooks desktop.
  • Inability of QuickBooks to operate correctly due to a firewall or security program may also cause this error.
  • QuickBooks files with the “.TLG extension may evoke this error.
  • This error might be caused by the ‘QBW’
  • The PC needs to be cleaned due to excessive accumulation of junk files.
  • This issue may be instigated by certain background third-party programs or applications.

Different Solutions to Rectify QuickBooks Error Code 6010

The various solutions or getting this QuickBooks desktop issue 6010 fixed are explained in this section:

Solution 1: Run the QuickBooks Database Server Manager

  • To begin with, hit on “Start” menu on the Desktop, then choose “All Programs
  • You are now supposed to access QuickBooks Database Server Manager by launching the QuickBooks Desktop program.
  • You now have to opt for each and every Scan Folder you need.
  • In the next step, hit on the “Scan Folders” tab.
  • If you are unable to locate your folder, opt for “Add Folder.”
  • After that, hit on “Scan” and let the scan finish.
  • Later on, open the file and launch QuickBooks accounting software once more.
  • Now open your account and log in.
  • This should rectify error code.

Solution 2: Use QuickBooks File Doctor tool

  • Initially, you need to download and install QuickBooks Tool Hub.
  • After this, run this Tool hub, and go for “Company File Issues.”
  • And further, hit on the “Run QuickBooks file doctor” option now.
  • After selecting the necessary company file, tap on “proceed.”
  • And then, type your admin password and QuickBooks username.
  • Followed by hitting on the “Next” button afterward.
  • Wait for the procedure to complete. You must restart QuickBooks after processing your company filing to see if this method could fix QuickBooks Error 6010

Solution 3: Fix minor Company file issues

  • Under this process, go to the folder which is containing the company file.
  • After that, right-click Company file and ensure it as the extension ‘’QBW.’’
  • Also, remove any blank spaces and unnecessary characters from the file name.
  • Now run QuickBooks and try opening the same company file once again.

Solution 4: Renaming ‘.ND’ and ‘.TLG’ files

  • Initially, you need to go to QuickBooks folder and search for the company file with the ND and TLG extensions.
  • After that hit a right-click the files individually and then click on ‘’rename.’’
  • And further, add “OLD” at the end.
  • Now run QuickBooks once again and access the same company file again.

Solution 5: Terminate QuickBooks processes

  • Sign into the server computer as “Admin.”
  • Now access the Task manager. For this, go for the keys Ctrl + Shift + Esc keys.
  • Subsequently, hit on ‘’Show Processes for Other Users’’ under the “Users” tab.
  • You must opt for ‘’End Task’’ after choosing all of the QuickBooks processes.
  • Finally, the company file must also be opened in multi-user mode.

Solution 6: End Multi-user Access

  • The very first step is to run QuickBooks and go to “File” menu, followed by “Utilities”.
  • After that choose “Stop hosting multi-user access
  • And further, reopen QuickBooks after closing it.
  • And then, head to the “program settings” and then turn off the “Internet Monitor function.”
  • Now restart the computer afterward.
  • Lastly, re-launch the QuickBooks Desktop.

Wind Up!

This discussion unveiled all the details you need to fix QuickBooks Error code 6010. If you feel that you are being surrounded by irreparable technical issues, you can directly call our QuickBooks error support experts at the helpline i.e., 1-800-761-1787.

How to Resolve QuickBooks Error Code 16026?

The process of QuickBooks updates can be different types of errors. QuickBooks error 16026 is one such error. It belongs to Error 16xxx series. Update errors are pretty common but getting them fixed is comparatively easy. Read the blog all the way through till the end to know about the solutions to troubleshoot QuickBooks Error 16026.

Causes of QuickBooks Desktop Error 16026

The common causes of Error code 16026 are:

  • Damaged Company file is one of the main reasons of this error.
  • Incomplete QuickBooks installation.
  • Internet Explorer (IE 6.0 and earlier) is not updated.
  • Out-of-date Operating system.
  • QuickBooks installation files got damaged.
  • Running an unsupported version of QuickBooks on the Operating system.

Procedure to fix QuickBooks Error 16026

The steps to resolve QuickBooks Error code 16026 are:

  • Restart QuickBooks and launch the Financial Institution directory.
  • Go to: Finance >> Banking online >> Financial Institutions obtainable
  • If the Financial Institution Directory is visible on the left, QuickBooks has successfully accessed Intuit online services.
  • If you can use your web browser to access the Internet from within QuickBooks, try downloading the most recent update for QuickBooks.
  • Double-click the QuickBooks desktop icon while holding down the Ctrl+Shift keys simultaneously.
  • Select Help > Update QuickBooks Desktop.
  • Click on Get Updates upon clicking on the Update Now.
  • When all is done, click on Close.
  • Verify the Internet Explorer version and cypher strength to see if they comply with the system requirements.
  • Start Internet Explorer.
  • Click on About Internet Explorer under Help.
  • Download the most recent version of Internet Explorer from Microsoft website if you are still using version 6.0.

Alternative Solutions to rectify QuickBooks Error 16023

User can perform the following solution if the earlier mentioned steps fail to fix the issue.

Solution 1: Use QuickBooks File Doctor Tool

It is a tool hub offered by Intuit. The tool can be downloaded from Intuit website and is free to use. The steps to use it to fix common QuickBooks issues including QuickBooks Error 16026 are:

  • Download and Install QuickBooks Tool Hub.
  • Run the tool and access the File Doctor Tool.
  • Browse for the company file and scan for any technical issues.
  • Now try to open the file again.

Solution 2: Rename ND and TLG files

If this error is caused due to Company file damage, then renaming the Network and Transaction Log files can fix it. The steps are:

  • Go to the QuickBooks folder by right-clicking QuickBooks icon and click on Open File
  • Search for the ND and TLG files.
  • Right-click the files one by one and choose Rename.
  • Add .old at the end of the file name.
  • This should effectively fix QuickBooks Error 16026.

Solution 3: Restore the company file

  • Run QuickBooks as an admin at first.
  • Following that, click on the File menu.
  • Afterwards, hit on Restore company option.
  • Choose the backup file and then opt for the location to save the file.
  • Once done, hit Enter.

Conclusion!

Within the scope of the current discussion, we elaborated on QuickBooks error 16026 and the different solutions to effectively fix it. If you still face this issue, then you can call our team of proficient experts at the helpline 1-800-761-1787.

Different Techniques for Fixing QuickBooks Error 12057

QuickBooks Error 12057 is a type of update error in QuickBooks Desktop. This issue may suddenly appear as you attempt to download the new updates for QuickBooks. The major reasons for QuickBooks error code 12057 are wrong SSL settings, internet connectivity not being seamless, insufficient privileges, etc. To get a hold of this error, make sure that you go though the full length of this article.

What leads to QuickBooks Error code 12057?

This update error in QuickBooks can occur due to any of the following reasons:

  • Incorrect SSL settings may lead to Error 12057.
  • Some network maintenance may be going on in the background.
  • Poor internet connectivity can be another primary reason for this error.
  • Insufficient admin rights can also provoke Error 12057 while you update QuickBooks Desktop .

Technical way outs against QuickBooks Error code 12057

The different ways to get this issue fixed are:

Way 1: Update QuickBooks manually in the safe mode

  • Type msconfig in the start menu and press Enter.
  • This opens System Configuration Here, click on Safe Mode and also Selective Startup and Load services check boxes.
  • Now, go for a system restart and keep pressing the F8 key repeatedly. This will lead to the Advanced Boot Options screen.
  • Choose Safe mode with networking and hit Enter .

QuickBooks-installation-error-1334-Screenshot-Image

  • As the Desktop loads up, go to Intuit website and manually download the update file and run it to start with the installation of the update.

Way 2: Turn on SSL 2.0 and SSL 3.0

Incorrect SSL settings may also be a main cause of QuickBooks Error code 12057. The steps to handle it are:

  • First of all, run the QuickBooks Desktop program.
  • When the program s, go to Help and choose the Internet Connection Setup option.

  • Choose the option to let the program use the Internet connection settings to set up a connection to the Internet.
  • Now, click on Next and then on Advanced. Here, you need to click on Advanced Connection Settings option.
  • Go for the Security option and click on the option to Use SSL 2.0 and Use SSL 3.0.

  • Hit on Ok, followed by done.
  • When all the processes are completed, try to update QuickBooks.

Way 3: Open the PC as administrator

  • Access the Control Panel and from there go to User Accounts.
  • Click on allow all the administrator permissions for the user.
  • Followed by that, right-click QuickBooks icon.
  • Now, click on Run as administrator option.

  • Go to the Help menu now, then attempt to update QuickBooks.

Way 4: Repair QuickBooks

Another useful approach to fix QuickBooks Error code 12057 is by repairing QuickBooks. The steps for this are:

  • Go to Control Panel and from there, head to Programs and Features.
  • Now, go to QuickBooks and click on Uninstall/Change.
  • Click on the Repair option and wait for it to conclude.
  • When the process is done, run QuickBooks again, go to Help, and then click on Update QuickBooks Desktop. This should solve the issue on your system.

Way 5: Go for Windows update

One should make sure that all the windows components are updated to their latest versions. For this, an easy way is the Windows Update feature. It includes the following process:

  • Click on Start and from there search for “Update”.
  • Click on Search for updates icon and click on all the available updates.
  • Now, begin the download process. Restart the PC and let these updates install on the system.
  • This should fix QuickBooks Error 12057. This can be verified by trying the QuickBooks update again.


Summing up!

This blog covered all the fixes you need to handle to fix QuickBooks Error code 12057 . If you are seeking technical support, just give our QuickBooks ProAdvisors a call at the helpline 1-800-761-1787.

How Can I Troubleshoot QuickBooks Payroll Error 2000?

QuickBooks Payroll can experience QuickBooks Error 2000 when users try to process payroll operations. This error can be caused due to network disruptions, data issues, outdated QuickBooks program, and other factors.  This article uncovers different methods to help you effectively fix QuickBooks error code 2000. So keep reading!

Factors Triggering QuickBooks Payroll Error 2000

This error can be resolved by the following:

  • Data transmission failure leading to QuickBooks Payroll Error 2000.
  • Network-related issues causing Payroll Error 2000.
  • Failure to retrieve the latest data from the server may result in the error.
  • Changes in account information unrecognized by the server can lead to error 2000.
  • Usage of an outdated version of QuickBooks Desktop.
  • Corruption or damage to essential .ini files associated with QuickBooks.

Troubleshooting Methods for QuickBooks Payroll Error 2000

This section contains different methods that should help in the easy fixation of QuickBooks Error code 2000. So, read it carefully and perform the steps carefully.

Method 1: Provide Correct Banking Credentials

Incorrect banking credentials could possibly result in QuickBooks Error 2000. So, the user should login while carefully entering the correct credentials. Follow the steps for a better understanding.

  • Access your bank’s website and navigate to the login page.
  • Enter accurate login information to access your account.
  • If login credentials are entered incorrectly, retry carefully.
  • Utilize the “Forget password” link if login issues persist, and follow on-screen instructions to reset the password.
  • Verify resolution of QuickBooks Payroll Error 2000.

Method 2: Use QuickBooks Install Diagnostic Tool

QB Install Diagnostic Tool is one of the many tools in QuickBooks Tool Hub. This tool can be used by doing the following:

  • Download and install the QuickBooks Tool Hub from Intuit.
  • Open the Tool Hub and choose the QuickBooks Install Diagnostic Tool from the Installation problems menu.
  • Wait for the process to complete; afterward, confirm resolution of QuickBooks Error 2000.

Method 3: Rename.ini File

QBWUSER.ini file should be renamed. This can resolve QuickBooks Error code 2000 in many cases.

  • Navigate to the QuickBooks Folder and locate the QBWUSER.ini file.
  • Right-click on the file, choose “Rename,” and append “.old” to the file name, transforming it to QBWUSER.ini.old.
  • This prevents QuickBooks from accessing the file, compelling the generation of a new, error-free one.

Method 4: Update QuickBooks

Try the QuickBooks update again. If the automatic method fails, try the manual procedure. The steps for the same are:

  • Click on the ‘Help’ option in QuickBooks Desktop.
  • Choose QuickBooks Update, select the “Update Now”

  • Opt for “Get Updates” to initiate the QuickBooks software update.

  • Restart QuickBooks Desktop after the update to check for resolution of QuickBooks Error 2000.
  • If the error shows up, go to Intuit and download the updates manually.
  • Now, install the updates by double-clicking the downloaded update file.


Method 5: Repair QuickBooks

QuickBooks repair is possible just like other programs. The steps are:

  • Go to Start and open Control Panel.
  • From there, you need to click on Programs and Features.
  • Then choose QuickBooks and subsequently click on Uninstall/Change.
  • Next click on Repair.
  • Restart the PC and run QuickBooks. This should fix Error code 2000 in QuickBooks

Winding up!

This blog explained various methods that should fix QuickBooks payroll error 2000 on the system. If you need any technical assistance, just call our experts at the helpline 1-800-761-1787.

Walkthrough Discussing the Rectification of QuickBooks Error 1334

QuickBooks users can counter different update errors. QuickBooks Error Code 1334 belongs to this domain of errors. Its causes constitute damaged Windows registry, virus, QuickBooks being installed incompletely, threat caused by background programs, including other factors. Read the blog to the full to get a better understanding of this error and the various ways of fixing QuickBooks error 1334.

Different strategies of QuickBooks Error 1334

The causes of this error are:

  • Virus intrusion on the computer
  • Damage in the Windows registry
  • Conflicts with background program.
  • incomplete QuickBooks Desktop installation
  • Accidental deletion of important QuickBooks files

Step-by-Step walkthrough for QuickBooks Error 1334

The multiple fixes for Error code 1334 are:

Solution 1: Switch to Safe mode

Switch to the safe mode and try the update process again. Follow the steps for your convenience:

  • Press Win and R keys simultaneously to open the Run
  • Need to type “MSConfig” and then press Enter to open System Configuration.
  • In the “Boot” tab, select “Safe boot” and click OK.
  • Restart and press F8 to enter Safe mode with Networking.
  • Open QuickBooks, go to Help, and click Update QuickBooks.”
  • If unsuccessful, manually update QuickBooks from Intuit’s website.
  • Open MsConfig, select Normal mode, and restart to verify resolution.

Solution 2: Delete unnecessary temp files

Removal of the temp files can fix the issue. The steps to be implemented for this are:

  • Access Disk Cleaner via the start menu.
  • Choose the C Drive and mark temporary files for cleanup.
  • Clear browser history and cache files.

Solution 3: Try the System Restore feature

Restoring the system to an earlier time can potentially fix the error. For this, the easy steps are:

  • Log in as an administrator.
  • Navigate to “Programs” > “System Tools” > “System Restore.”
  • Select a recent Restore Point and proceed with the system restore process.

Solution 4: Check the company file extension

Wrong file extension can also be a cause of this error. The rectification of the extension should fix Error code 1334. The steps are:

  • Navigate to Drive:/Users/Public/Documents/Intuit/QuickBooks.
  • Verify the correct file extension (.qbw) of your company file.
  • If incorrect, right-click, choose Rename, and rectify the extension.
  • Open QuickBooks to check for Error 1334 during updates.

Solution 5: Update QuickBooks manually in Safe Mode

Try the update in the Safe mode. For this, the steps are:

  • Go to Start, search for “msconfig” and hit Enter.
  • Windows Configuration will open. Click on Selective Startup and load services.
  • Hit on Safe Mode and restart the computer.
  • As the PC loads in the Safe mode, go to the browser, then go to Intuit website and download the latest updates of QuickBooks manually.
  • Now, open the downloaded file and get the update installed on the computer.
  • This should fix QuickBooks Error code 1334.

Conclusion!

This blog explains different methods to fix QuickBooks Error code 1334. If you come across more such issue, just give us a call at the helpline 1-800-761-1787.

Steps to Request for a Refund for QuickBooks Products

QuickBooks users have the leverage of returning the QuickBooks products within a stipulated time frame. This time period should not exceed 60 days of shipping, downloading and unlocking date. Users can return the hardware and the software. Go through this blog to get further information on the process “ request for a refund for QuickBooks Products ”.

Walkthrough to request for a return of the QuickBooks

Refund can be made by performing the steps below:

  • Login to Intuit account.
  • Then, head for Product and Services.
  • After that, click on Products.
  • Choose QuickBooks product that you wish to remove.
  • Right-click the return product link and also provide the reasons for the return.
  • Hit on Return product.
  • If you want a refund, your license will be suspended instantly.
  • After that, you won’t be able to use QuickBooks with the same license.

You may also read: How to Overcome From QuickBooks Error C=387?

How to return hardware?

  • The hardware components can be returned through USPS or by using a registered or certified email or refund receipt.
  • Intuit is not accountable for any kind of damage afflicted during shipping.
  • Shipping costs associated with the order won’t be reimbursed.
  • The user needs to provide the necessary details in the QuickBooks return form.

Return a QuickBooks product from Amazon.

QuickBooks products that have been purchased via Amazon have a return period of 60 days from the purchase date. You can also directly contact the Amazon customer care to get full information related to the tracking details. The terms and conditions for the repayment are mentioned on the Amazon website.

Recommended to read: How to Resolve QuickBooks Install Error Code 1935?

Return a product bought from eBay.

If you purchase QuickBooks from eBay, you can request a refund for the Intuit product. Here, you will need to do the following

  • Provide first name and last name.
  • Use a registered email address on eBay.
  • Provide eBay the item number for the QuickBooks product you purchased.
  • The product supply key is provided to you through email.

Returning a product to a retailer not accepting the product

You can return the product within 60 days of purchase to the retailer. You need to provide the following:

  • You should return all the components and the manual associated with the product.
  • Obtain a copy of the retail purchase receipt.
  • Provide you payee name in order to obtain a refund check.
  • Enter your phone number and the correct email address.

You may also know: How to Fix QuickBooks Error Code 4120?

Conclusion!

This blog disclosed all the details related to requesting a refund for QuickBooks products . If you have any related queries, you can directly call our experts at the helpline 1-800-761-1787 .