Understanding the Brother Printer Installer in Details

Welcome to the comprehensive guide to the Brother printer installer, an essential aspect often overlooked in the printer setup process. This article aims to demystify the intricacies, provide step-by-step insights, and equip you with expert guidance for a seamless installation experience.

Installing a Brother printer involves a few fundamental steps. Understanding these basics is crucial before diving into the detailed installation process. Let’s delve into the essential prerequisites and preparatory measures.

Gearing Up: Pre-Installation Checklist for Brother Printer Setup

A meticulous pre-installation checklist significantly streamlines the setup process by Brother printer installer. This section covers the checklist essentials, ensuring a smooth initiation of the installation procedure.

Navigating the Brother Printer Driver Download

Obtaining the correct printer driver is pivotal for successful installation. Here, we walk you through the process of sourcing and downloading the appropriate Brother printer driver.

Step-by-Step Installation Guide for Brother Printer

This section offers a comprehensive step-by-step guide, simplifying the installation process. Each phase is detailed, providing a clear roadmap to effortlessly install your Brother printer.

Troubleshooting: Addressing Installation Hurdles

Encountering challenges during installation is common. This segment sheds light on troubleshooting techniques and common issues faced during the Brother printer installation process.

Key Steps for Brother Printer Installation

  1. Preparation Phase: Before diving into installation, ensure you have the necessary components and a stable internet connection.
  2. Driver Download: Acquiring the correct driver is crucial. Visit the official Brother website and select the driver compatible with your printer model and operating system.
  3. Installation Process: Follow a step-by-step guide for seamless installation, ensuring every phase is meticulously executed.
  4. Troubleshooting: In case of installation issues, restart your system, check connectivity, and reinstall the driver if needed. Seeking assistance from Brother’s customer support can also be beneficial.

Optimizing Printer Performance Post-Installation

Upon successful installation, optimizing your printer’s performance is key. Learn about essential post-installation measures for enhanced printing efficiency.

In conclusion, navigating the Brother printer installer is a journey simplified by understanding the nuances and following a structured approach. This guide aims to empower users with comprehensive knowledge, troubleshooting insights, and step-by-step instructions for a hassle-free installation.

Troubleshooting Guide for Brother Printers: Fixing Common Issues

Encountering issues with your Brother printer? Fear not! Troubleshooting common problems is crucial for a smooth printing experience. This comprehensive guide unveils solutions to tackle prevalent printer issues.

Common Brother Printer Problems and Solutions

  1. Paper Jams: Paper jams are frequent printer nuisances. To resolve this, gently remove jammed paper following the printer’s manual instructions.
  2. Print Quality Issues: Poor print quality might stem from low ink levels or clogged nozzles. Clean the print heads and replace cartridges for improved output.
  3. Connectivity Problems: If facing connectivity issues, ensure the printer is connected to the correct network. Restart your router or reconnect the printer to rectify the problem.
  4. Slow Printing Speed: Slow printing can result from high-resolution settings or outdated drivers. Adjust settings and update drivers for enhanced speed.
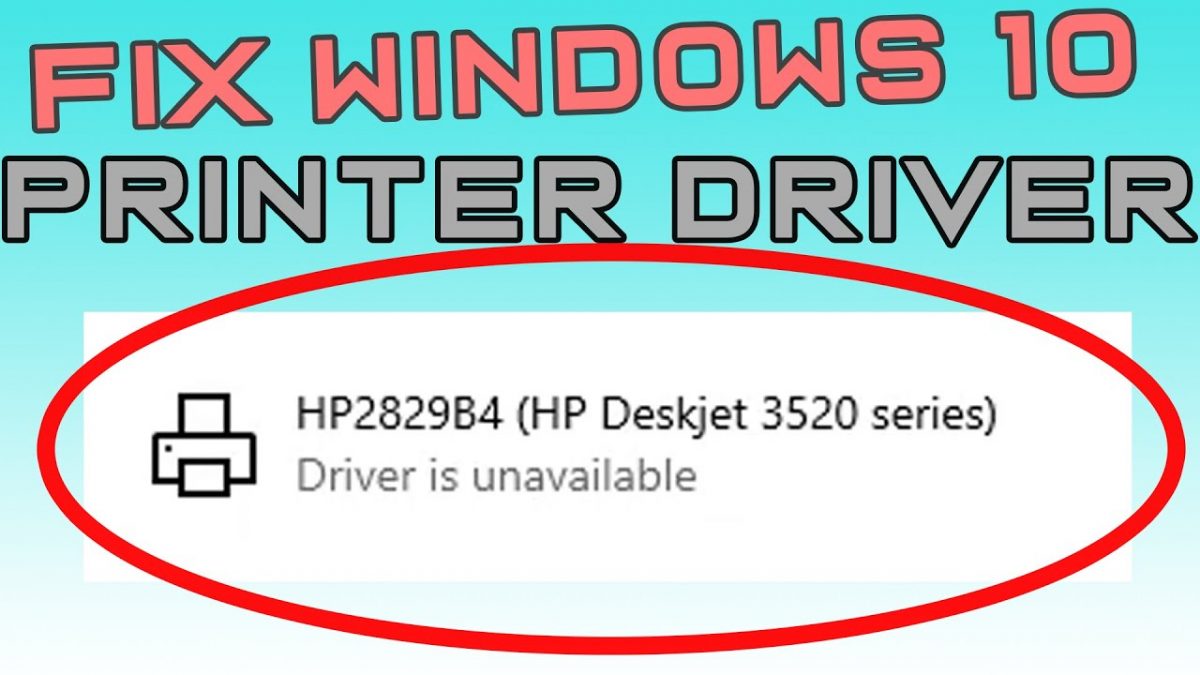
  5. Driver Installation Errors: If encountering driver installation errors, uninstall the existing driver, restart your system, and reinstall the latest driver from the official Brother website.

Advanced Troubleshooting Techniques

  1. Printer Firmware Updates: Regularly updating printer firmware ensures optimal performance and resolves software-related issues.
  2. Hardware Inspection: Inspect the printer for any visible hardware issues, such as loose connections or damaged parts. Contact technical support for hardware repairs.
  3. Resetting the Printer: Performing a factory reset can resolve persistent issues. However, ensure to back up important settings before resetting.

In conclusion, resolving common issues encountered with Brother printers involves a systematic approach. This guide equips you with solutions, Brother printer troubleshooting techniques, and FAQs for a seamless printing experience.

Fix ‘HP Printer Driver is Unavailable’ Error on Windows and Mac

Are you encountering the ‘HP Printer Driver is Unavailable‘ error on your Windows or Mac system? Resolve this issue swiftly with our step-by-step guide to reinstalling and troubleshooting the HP printer driver.

Fixing ‘HP Printer Driver is Unavailable’ on Windows:

1. Uninstall Existing Drivers:

  • Go to “Control Panel” > “Programs” > “Programs and Features.”
  • Locate your HP printer software, right-click, and select “Uninstall” to remove it completely.

2. Reinstall HP Printer Driver:

  • Visit the official HP website and download the latest drivers for your printer model compatible with your Windows version.
  • Install the downloaded drivers following the on-screen instructions.

3. Update Printer Software:

  • After installing the drivers, check for any additional software updates available for your HP printer and install them.

Resolving ‘HP Printer Driver is Unavailable’ on Mac:

1. Remove Current Printer Setup:

  • Open “System Preferences” > “Printers & Scanners.”
  • Select your HP printer and click the ‘-‘ (minus) sign to remove it.

2. Reinstall HP Printer Driver:

  • Visit the HP website and download the latest driver software specifically for macOS.
  • Follow the installation prompts to install the downloaded driver software.

3. Update Printer Software:

  • Post-installation, check for any available software updates for your HP printer on the HP website and install them accordingly.

Additional Tips for Both Windows and Mac:

  • Ensure your computer is connected to a stable internet connection during the driver download and installation process.
  • Restart your computer and printer after installing the updated drivers for proper synchronization.

By following these steps, you can resolve the ‘HP Printer Driver is Unavailable’ error on both Windows and Mac systems, ensuring your HP printer functions smoothly and efficiently.

Effortless HP Printer Setup Using 123.hp Setup on Windows and Mac

Discover a hassle-free method to set up your HP printer using the 123.hp setup on both Windows and Mac operating systems. Follow these simple steps for a seamless installation process and start printing in no time.

Setting Up HP Printer with 123.hp Setup on Windows:

1. Prepare for Installation:

  • Ensure your HP printer is unpacked, powered on, and loaded with paper and ink/toner cartridges.
  • Connect your printer to your Windows computer using a USB cable or ensure it’s connected to the same Wi-Fi network.

2. Visit 123.hp Setup Website:

  • Open a web browser and go to the 123.hp setup website.
  • Enter your HP printer model number when prompted.

3. Download and Install Software:

  • Click on the “Download” button to get the recommended HP Easy Start software for your printer model.
  • Run the downloaded file and follow the on-screen instructions to install the software.

4. Complete Setup:

  • The software will guide you through the setup process, including connecting your printer to the network (if wireless) and registering your printer with HP.

HP Printer Setup with 123.hp Setup on Mac:

1. Printer and Connection Preparation:

  • Ensure your HP printer is set up, powered on, and ready for connection.
  • Connect your printer to the Mac via USB or ensure both devices are on the same Wi-Fi network.

2. Access 123.hp Setup:

  • Launch a web browser on your Mac and navigate to the 123.hp setup website.
  • Enter your HP printer model number as prompted.

3. Software Download and Installation:

  • Click on “Download” to acquire the recommended HP Easy Start software tailored to your printer model.
  • Run the downloaded file and follow the installation prompts to set up your printer.

4. Finalize Installation:

  • The software will assist in connecting your HP printer to your Mac, completing the setup, and ensuring successful communication between the devices.

Additional Tips:

  • Follow the instructions provided by the software carefully during the setup process.
  • Ensure a stable internet connection throughout the installation for a smooth setup experience.

By following these steps, you can effortlessly set up your HP printer using the 123.hp setup on both Windows and Mac systems. Enjoy hassle-free printing and seamless connectivity with your HP printer.

Brother Printer Offline Issue on Windows 11: Solution Guide

Is your Brother printer displaying an offline status on your Windows 11 system, obstructing your printing tasks? This common issue can occur due to various reasons, such as connectivity issues, outdated drivers, or misconfigured settings. Follow these step-by-step methods to resolve the Brother Printer Offline Issue on Windows 11

Method 1: Check Printer Connections and Restart

  1. Verify Physical Connections:
    • Ensure that the Brother printer is properly connected to your computer via USB or network cables.
    • If using a network connection, check the router connections and restart it if necessary.
  2. Restart Printer and Computer:
    • Power off your Brother printer and your Windows 11 computer.
    • Wait for a few minutes, then power them back on. Sometimes, a simple restart can resolve connectivity issues.

Method 2: Set Brother Printer as Default

  1. Access Printer Settings:
    • Open “Settings” on your Windows 11 system.
    • Go to “Devices” and select “Printers & scanners.”
  2. Set Brother Printer as Default:
    • Locate your Brother printer from the list of installed printers.
    • Right-click on your Brother printer and choose “Set as default printer.”

Method 3: Check Printer Status and Restart Print Spooler Service

  1. Verify Printer Status:
    • Open “Control Panel” and go to “Devices and Printers.”
    • Right-click on your Brother printer and ensure it displays as “Ready” or “Online.”
  2. Restart Print Spooler Service:
    • Press “Win + R” keys, type “services.msc,” and hit Enter.
    • Locate “Print Spooler” in the list, right-click, and select “Restart.”

Method 4: Update Printer Drivers

  1. Update Drivers Automatically:
    • Go to the Brother support website and search for your printer model.
    • Download and install the latest drivers and software available for Windows 11.
  2. Update Drivers via Device Manager:
    • Press “Win + X” keys and select “Device Manager.”
    • Expand “Print queues,” right-click on your Brother printer, and choose “Update driver.”

Method 5: Disable Use Printer Offline Option

  1. Access Printer Settings:
    • Open “Control Panel” and go to “Devices and Printers.”
  2. Disable Use Printer Offline:
    • Right-click on your Brother printer and uncheck the “Use Printer Offline” option.

Method 6: Reinstall Brother Printer

  1. Uninstall Printer Software:
    • Go to “Settings” > “Apps” and uninstall any Brother printer-related software.
  2. Reinstall Printer Software:
    1. Visit the Brother website, download the latest printer software compatible with Windows 11, and install it.
    2. By following these detailed steps, you can troubleshoot and fix the “Brother Printer Offline” issue on your Windows 11 system, ensuring your Brother printer functions seamlessly and is ready for your printing needs.

Remember to verify each step carefully and check your printer’s status to ensure it shows as “Online” or “Ready” in the “Devices and Printers” section on Windows 11.

Simplifying Printing Setup with Brother Printer Installer: An In-Depth Guide

Are you seeking an effortless way to set up your Brother printer? Look no further! The Brother printer installer streamlines the setup process, making it hassle-free and efficient. This comprehensive guide covers everything you need to know about using the Brother printer installer for seamless installation.

What is the Brother Printer Installer?

The Brother printer installer is a user-friendly software tool designed to simplify the installation process for Brother printers. It ensures a smooth setup experience by guiding users through each step required to connect their printers to a computer or network. With intuitive features and straightforward instructions, the installer reduces complexities, enabling users to quickly get their printers up and running.

Benefits of Using Brother Printer Installer:

  1. Simplified Setup: The installer offers a step-by-step setup procedure, making it easy for users, regardless of technical expertise.
  2. Compatibility: It ensures compatibility with various operating systems, ensuring a smooth installation experience on Windows, macOS, or Linux platforms.
  3. Driver Installation: Automatically installs the necessary drivers, eliminating the need for manual driver downloads or installations.
  4. Network Configuration: Guides users through network connectivity settings, enabling seamless wireless or wired connections.
  5. User-Friendly Interface: The installer’s intuitive interface provides clear instructions, ensuring a straightforward setup process for users.

How to Use Brother Printer Installer:

  1. Download Installer:
    • Visit the official Brother website and locate the printer model’s support page.
    • Download the Brother printer installer compatible with your operating system.
  2. Run Installer:
    • Locate the downloaded installer file and double-click to run the setup.
    • Follow the on-screen prompts to initiate the installation process.
  3. Connect Printer:
    • Power on your Brother printer and connect it to your computer using a USB cable or follow the installer’s instructions for a wireless setup.
  4. Follow Setup Wizard:
    • The installer will launch a setup wizard, guiding you through printer detection, driver installation, and network configuration steps.
  5. Complete Installation:
    1. Once the installation is complete, the installer will prompt you to print a test page to verify the successful setup of your Brother printer.

The Brother printer installer is your go-to solution for a hassle-free setup experience, ensuring that your Brother printer is ready for efficient printing tasks. Whether you’re a novice or an experienced user, this installer simplifies the installation process, allowing you to focus on productive printing without technical hindrances.

Canon Printer Installer: Step-by-Step Guide for Windows & Mac

Setting up your Canon printer drivers for Windows 11 requires the corresponding driver software. This guide simplifies the process, ensuring a smooth and seamless printing experience.

Steps:

1. Identify Your Printer Model:

Locate your Canon printer model number. It’s usually found on the printer itself or in its documentation.

2. Visit Canon Support Website:

Go to https://www.usa.canon.com/support and search for your printer model.

3. Choose the Correct Driver:

On your printer’s support page, select the “Drivers & Software” tab. Choose the driver compatible with Windows 11.

4. Download the Driver File:

Click the “Download” button and save the driver file to your computer.

5. Run the Installation Wizard:

Double-click the downloaded file to launch the installation wizard.

6. Follow On-screen Instructions:

Accept the license agreement and select installation options as instructed.

7. Complete Installation:

Once finished, a confirmation message will appear. Restart your computer.

8. Verify Printer Functionality:

Connect your printer and try printing a test document.

Additional Tips:

  • Ensure your computer meets the minimum system requirements for the drivers.
  • Temporarily disable antivirus and firewall software during installation.
  • If you encounter issues, consult Canon’s online resources or contact their support team.

By following these simple steps, you can effortlessly download and install Canon printer drivers on Windows 11, paving the way for a productive and enjoyable printing experience.

Canon Printer Installer: Step-by-Step Guide for Windows & Mac

Unleash the power of your Canon printer! This user-friendly guide provides step-by-step instructions for installing your Canon printer on both Windows and Mac operating systems.

Windows Installation:

1. Identify Your Model:

Locate your Canon printer model number on the device itself or in its documentation.

2. Visit Canon Support Website:

Navigate to https://www.usa.canon.com/support: https://www.usa.canon.com/support and search for your model.

3. Choose Drivers & Software:

On your model’s support page, select the “Drivers & Software” tab. Choose the driver compatible with your Windows version.

4. Download & Run Installation Wizard:

Click “Download” and save the file. Double-click to launch the installation wizard.

5. Follow On-screen Instructions:

Accept the license agreement and select desired installation options.

6. Complete Installation & Restart:

Upon completion, restart your computer.

7. Connect & Verify:

Connect your printer and test its functionality.

Mac Installation:

1. Download Canon Drivers & Software:

Visit Canon’s website and search for your model. Choose “Drivers & Software” and select the Mac-compatible driver.

2. Double-click the Downloaded File:

This will launch the Canon installer application.

3. Follow On-screen Instructions:

Accept the license agreement and choose installation options as desired.

4. Complete Installation:

Once finished, a confirmation message will appear.

5. Connect & Verify:

Connect your printer and test its functionality by printing a document.

Additional Tips:

  • Ensure your computer meets the minimum system requirements for the drivers.
  • Temporarily disable antivirus and firewall software during installation.
  • For troubleshooting, consult Canon’s online resources or contact their support team.

By following these clear instructions, you can effortlessly use Canon printer installer on both Windows and Mac, paving the way for a seamless and productive printing experience.

How to Connect a Canon Printer to Your Computer

Canon printers are renowned for their quality, and connecting one to your computer is a breeze. In this comprehensive guide, we will walk you through the steps of how to connect Canon printer to computer, ensuring a seamless printing experience.

Why Connect Your Canon Printer to Your Computer?

Before we dive into the technicalities, let’s understand why you should connect your Canon printer to your computer

Checking Compatibility

Before you embark on the journey of connecting your Canon printer, make sure that it’s compatible with your computer. Canon’s official website provides a list of compatible models and drivers for various operating systems.

Gathering Essentials

To connect your Canon printer to your computer, you’ll need a few essentials. Gather the printer, a USB cable, power cable, and the installation CD or download link for the printer drivers.

Connecting via USB Cable

The most straightforward method is connecting via a USB cable. Simply plug one end into the printer and the other into your computer. Your computer should recognize the device, and you’ll be ready to print.

Connecting via Wi-Fi

For wireless printing, connect your Canon printer to your Wi-Fi network. Access the printer’s menu and follow the on-screen instructions. Make sure your computer is on the same network, and you’re good to go.

Installing Drivers

To enable seamless communication between your computer and the printer, install the necessary drivers. You can do this by using the provided installation CD or by downloading the drivers from Canon’s official website.

Setting Up Wireless Printing

Once the drivers are installed, configure your printer for wireless printing. This step is crucial for convenience and accessibility.

Troubleshooting Connection Issues

Encountering issues during the connection process is not uncommon. We’ll explore some common problems and how to resolve them.

Printing a Test Page

After successfully connecting your Canon printer, print a test page to ensure everything is in order. This will help you identify any issues that may need addressing.

Printer Maintenance

Maintaining your printer is essential for longevity and print quality. We’ll cover some tips for keeping your Canon printer in top shape.

Printing from Your Computer

Learn how to print documents and images from your computer using your newly connected Canon printer.

Mobile Printing

In an era of smartphones, printing from your mobile device is a valuable feature. Discover how to print from your smartphone or tablet.

Cloud Printing

Cloud printing allows you to print from anywhere. We’ll guide you on how to set up and use this feature with your Canon printer.

Securing Your Printer

Protect your printer from unauthorized access and ensure your prints remain confidential. We’ll provide steps to secure your device.

Common Printing Problems

Explore some common printing issues and their solutions to ensure a smooth printing experience.

Connecting your Canon printer to your computer is a simple yet crucial step for all your printing needs. Whether you choose a wired or wireless connection, following these steps will ensure that your Canon printer and computer work harmoniously.

Effortless Canon Setup for Windows and Mac: A Comprehensive Guide

To make the most of your Canon printer, it’s crucial to set it up correctly on your Windows or Mac computer. In this guide, we will walk you through the seamless process of setting up your Canon printer using http://ij.start.canon, ensuring you can start printing in no time.

Why Setting Up Your Canon Printer is Essential

Setting up your Canon printer correctly is crucial to enjoy the full range of features and capabilities it offers. Whether you need to print documents, photos, or other materials, a properly configured printer ensures optimal results.

Step-by-Step Guide: Setting Up Your Canon Printer on Windows and Mac

1. Check Compatibility

Before starting the setup process, ensure that your Canon printer is compatible with your Windows or Mac computer. Visit the official Canon website to check compatibility and download the necessary drivers.

2. Gather Essentials

Collect all the essentials you’ll need for the setup, including the printer, power cable, USB cable (if required), and the installation CD or download link for the printer drivers.

3. Connect to Your Computer

  • For Windows:
    • Connect your Canon printer to your Windows computer using the USB cable.
    • Power on the printer.
  • For Mac:
    • Connect your Canon printer to your Mac using the USB cable or your wireless network.
    • Power on the printer.

4. Install Drivers

To ensure your Canon printer communicates seamlessly with your computer, install the necessary drivers. You can do this by: – Using the installation CD provided with the printer. – Downloading the drivers from the official Canon website.

5. Configuration

  • Windows:
    • Open the Control Panel and navigate to ‘Devices and Printers.’
    • Click ‘Add a Printer.’
    • Follow the on-screen instructions to locate and install your Canon printer.
  • Mac:
    • Go to ‘System Preferences.’
    • Select ‘Printers & Scanners.’
    • Click the ‘+’ icon to add your Canon printer.

6. Test Printing

Print a test page to ensure that the setup was successful. This also helps you verify the print quality and settings.

7. Wireless Printing (Optional)

For added convenience, consider setting up wireless printing. This allows you to print from anywhere in your home or office.

Setting up your Canon printer on Windows and Mac using http//ij.start.canon  is a straightforward process that ensures you can harness the full potential of your printer. Whether you’re printing documents for work or family photos, proper setup is the key to success

Troubleshooting Guide for Epson Printer Not Printing Black Color

Is your Epson printer failing to produce black prints? Don’t fret; we’ve got you covered. In this comprehensive troubleshooting guide, we’ll walk you through common reasons behind Epson Printer not printing black color and offer solutions to get your Epson printer back to producing crisp, black documents.

1. Inspect the Ink Cartridges:

  • One of the primary culprits for the absence of black ink is an empty or clogged ink cartridge. Check the ink levels in your black cartridge. If it’s low or empty, replace it with a new one.
  • If the cartridge seems fine, perform a nozzle check and clean the printhead using the Epson printer utility software.

2. Verify Print Settings:

  • Ensure that your printer settings are configured correctly. Check that you haven’t inadvertently selected grayscale or a similar setting that excludes black ink.
  • Set your printer to ‘Color’ or ‘Automatic’ mode to allow the use of black ink in color prints.

3. Use Genuine Epson Ink:

  • Epson printers are designed to work best with genuine Epson ink cartridges. Using third-party or refilled cartridges can sometimes cause printing issues. Invest in authentic Epson cartridges for optimal results.

4. Update Printer Drivers:

  • Outdated or corrupted printer drivers can lead to printing problems. Visit the Epson website to download and install the latest printer drivers compatible with your printer model and operating system.

5. Perform Print Head Cleaning:

  • Epson printers offer a print head cleaning feature in their utility software. Run this cleaning cycle a few times to remove any dried ink or debris that might be blocking the black ink flow.

6. Check for Paper Jams:

  • Paper jams can disrupt the printing process and affect ink distribution. Inspect the printer for any paper jams or obstructions, and clear them if found.

7. Conduct a Test Print:

  • Print a test page to see if the issue persists. If you notice any improvement, continue printing to help clear the printhead. Repeat this process until the black ink is restored.

8. Seek Professional Assistance:

  • If all else fails, consider contacting Epson customer support or a certified technician to diagnose and fix the issue. It might be a hardware problem that requires expert attention.

A non-functioning black ink cartridge or misconfigured printer settings can often be the cause of your Epson printer not printing black color. By following these troubleshooting steps, you can resolve the issue and continue enjoying high-quality prints from your Epson printer. If problems persist, don’t hesitate to seek professional assistance to get your printer back in top working condition.

How to Connect Your Epson Printer to Wi-Fi: A Step-by-Step Guide

Connecting your Epson printer to Wi-Fi not only streamlines your printing process but also allows for printing from multiple devices. In this step-by-step guide, we’ll walk you through the process of connecting your Epson printer to a Wi-Fi network effortlessly.

Step 1: Preparation

Before you start, ensure you have the following:

  • An Epson printer with a control panel.
  • A Wi-Fi network name (SSID) and password.
  • A computer or mobile device connected to the same Wi-Fi network.

Step 2: Power On Your Printer

Turn on your Epson printer and make sure it’s in a ready state. This might take a moment as the printer initializes.

Step 3: Access the Control Panel

Locate the control panel on your Epson printer. Depending on your printer model, it may have buttons or a touch screen.

Step 4: Access Wi-Fi Setup

Navigate to the Wi-Fi setup or network settings on the control panel. This is where you’ll configure the Wi-Fi connection.

Step 5: Select Your Wi-Fi Network

Your printer will search for available Wi-Fi networks. When the list appears, select your network from the list of available networks.

Step 6: Enter the Wi-Fi Password

You’ll be prompted to enter the Wi-Fi password (also known as the network security key). Use the control panel or touchscreen to input the password accurately.

Step 7: Confirm and Connect

After entering the Wi-Fi password, confirm your entries. Double-check the password for accuracy.

Step 8: Connection Confirmation

Once the correct password is entered and confirmed, your Epson printer will attempt to connect to the Wi-Fi network. This may take a few moments.

Step 9: Print a Test Page

To ensure your printer is successfully connected, print a test page from your computer or mobile device. If the page prints without any issues, your Epson printer is now connected to Wi-Fi.

Step 10: Enjoy Wireless Printing

Congratulations! You’ve successfully connected your Epson printer to Wi-Fi. Now, you can print wirelessly from your computer, smartphone, or tablet.

So Connect Epson printer to Wi-Fi is a straightforward process that enhances the convenience and functionality of your printing setup. By following these steps, you can enjoy the benefits of wireless printing and effortlessly print from various devices on your network. Say goodbye to cumbersome cables and hello to seamless, wireless printing with your Epson printer.

Learn How to Set MSN com Homepage on Various browsers

Certainly! Setting MSN.com as your homepage in different web browsers is a straightforward process. Below are instructions for popular web browsers for msn com homepage setup:

Google Chrome:

  1. Open Google Chrome: Launch the Google Chrome browser on your computer.
  2. Go to MSN.com: Type “www.msn.com” into the address bar and press “Enter.”
  3. Access Chrome Settings: Click on the three vertical dots (menu icon) in the top-right corner to open the Chrome menu.
  4. Open Settings: Hover your mouse over “Settings” in the menu, and a submenu will appear. Click on “Settings.”
  5. Set MSN.com as Homepage:
    • In the “On startup” section, select “Open a specific page or set of pages.”
    • Click “Add a new page.”
    • Enter “www.msn.com” in the “Add a new page” dialog box and click “Add.”
  6. Save Changes: Click “Save” at the bottom of the Settings page.

Now, every time you open Google Chrome, MSN.com will be your homepage.

Mozilla Firefox:

  1. Launch Firefox: Open the Mozilla Firefox browser on your computer.
  2. Go to MSN.com: Enter “www.msn.com” in the address bar and press “Enter.”
  3. Access Firefox Options:
    • Click on the three horizontal lines (menu icon) in the top-right corner to open the Firefox menu.
    • Select “Options.”
  4. Set MSN.com as Homepage:
    • In the left sidebar, click on “Home.”
    • In the “Homepage and new windows” section, select “Custom URL” from the drop-down menu.
    • Enter “www.msn.com” in the URL field.
  5. Save Changes: Close the Options tab, and your homepage settings will be saved.

From now on, when you open Firefox, MSN.com will be your homepage.

Microsoft Edge:

  1. Launch Microsoft Edge: Open the Microsoft Edge browser on your computer.
  2. Go to MSN.com: Enter “www.msn.com” in the address bar and press “Enter.”
  3. Access Edge Settings:
    • Click on the three horizontal dots (menu icon) in the top-right corner to open the Edge menu.
    • Select “Settings.”
  4. Set MSN.com as Homepage:
    • In the “On startup” section, select “Open a specific page or pages.”
    • Click “Add a new page.”
    • Enter “www.msn.com” in the “Enter a web address” field and click “Add.”
  5. Save Changes: Close the Settings tab, and your homepage settings will be saved.

Now, whenever you open Microsoft Edge, MSN.com will be your homepage.

Safari (macOS):

  1. Launch Safari: Open the Safari browser on your Mac.
  2. Go to MSN.com: Type “www.msn.com” into the address bar and press “Enter.”
  3. Access Safari Preferences:
    • Click on “Safari” in the top menu bar.
    • Select “Preferences.”
  4. Set MSN.com as Homepage:
    • In the “General” tab, find the “Homepage” field.
    • Enter “www.msn.com” in the Homepage field.
  5. Save Changes: Close the Preferences window, and your homepage settings will be saved.

Now, when you open Safari on your Mac, MSN.com will be your homepage.

These steps should help you set MSN.com as your homepage in various web browsers. Please note that browser interfaces may change with updates, but the basic process for setting a homepage remains similar.

How do i restore my msn homepage

Restoring your MSN homepage is a relatively simple process, and it may vary slightly depending on the web browser you are using. Below are steps for restoring MSN.com as your homepage in some popular browsers:

Google Chrome:

  1. Open Google Chrome: Launch the Google Chrome browser on your computer.
  2. Access Chrome Settings: Click on the three vertical dots (menu icon) in the top-right corner to open the Chrome menu.
  3. Open Settings: Hover your mouse over “Settings” in the menu, and a submenu will appear. Click on “Settings.”
  4. Homepage Settings:
    • In the “On startup” section, select “Open a specific page or set of pages.”
    • Below it, you will see “Add a new page.” Click on it.
  5. Restore MSN.com as Homepage:
    • You’ll see a list of pages that open when you start Chrome. Find MSN.com and click the three vertical dots next to it.
    • Select “Make default.”
  6. Save Changes: Click “Save” at the bottom of the Settings page.

Now, MSN.com should be restored as your homepage in Google Chrome.

Mozilla Firefox:

  1. Launch Firefox: Open the Mozilla Firefox browser on your computer.
  2. Access Firefox Options:
    • Click on the three horizontal lines (menu icon) in the top-right corner to open the Firefox menu.
    • Select “Options.”
  3. Homepage Settings:
    • In the left sidebar, click on “Home.”
    • In the “Homepage and new windows” section, select “Custom URL” from the drop-down menu.
    • Ensure that “www.msn.com” is entered in the URL field.
  4. Save Changes: Close the Options tab, and your homepage settings will be saved.

Now, MSN.com should be restored as your homepage in Mozilla Firefox.

Microsoft Edge:

  1. Launch Microsoft Edge: Open the Microsoft Edge browser on your computer.
  2. Access Edge Settings:
    • Click on the three horizontal dots (menu icon) in the top-right corner to open the Edge menu.
    • Select “Settings.”
  3. Homepage Settings:
    • In the “On startup” section, select “Open a specific page or pages.”
    • Click “Add a new page.”
  4. Restore MSN.com as Homepage:
    • You should see a list of pages that open when you start Edge. Find MSN.com and click the three horizontal dots next to it.
    • Select “Make default.”
  5. Save Changes: Close the Settings tab, and your homepage settings will be saved.

Now, MSN.com should be restored as your homepage in Microsoft Edge.

So if you are looking for how do i restore my msn homepage follow the above steps

HP Printer Setup: Effortless Wi-Fi Connection Methods

Setting up your HP printer with a Wi-Fi connection opens the door to convenient and wireless printing from multiple devices. In this guide, we’ll explore the various methods for HP printer setup WiFi, ensuring you can enjoy hassle-free printing at your fingertips.

Why Choose Wi-Fi Setup for Your HP Printer?

Wi-Fi setup for your HP printer offers several advantages:

1. Wireless Convenience

With Wi-Fi, you can print from your computer, smartphone, or tablet without the need for physical connections. It adds flexibility to your printing options.

2. Multi-Device Printing

Wi-Fi setup allows multiple devices to connect to the same printer. You, your family, or colleagues can all print documents and photos effortlessly.

3. Cloud Printing

Many HP printers support cloud printing services, enabling you to print from anywhere with an internet connection. You can even schedule prints while away from your printer.

4. Simplified Setup

HP has made Wi-Fi setup user-friendly. The process is streamlined, reducing the time and effort required to get your printer up and running.

HP Printer Wi-Fi Setup Methods

1. WPS (Wi-Fi Protected Setup)

WPS is one of the easiest methods for connecting your HP printer to Wi-Fi:

  1. Press the WPS button on your router.
  2. On your HP printer, go to the Wi-Fi settings and select “WPS.”
  3. The printer will automatically connect to your Wi-Fi network.

2. HP Smart App

The HP Smart App simplifies printer setup:

  1. Download and install the HP Smart App on your smartphone or tablet.
  2. Open the app and follow the on-screen instructions to add your printer.
  3. The app will guide you through connecting your printer to Wi-Fi.

3. Wi-Fi Direct

Wi-Fi Direct allows you to connect your device directly to your HP printer without a network:

  1. On your printer, enable Wi-Fi Direct.
  2. On your device, go to Wi-Fi settings and connect to the printer’s network.
  3. Once connected, you can print directly from your device.

4. Manual Wi-Fi Setup

If you prefer manual configuration, you can set up Wi-Fi on your HP printer using your printer’s control panel:

  1. Navigate to your printer’s settings menu.
  2. Select “Wireless” or “Network Setup.”
  3. Follow the on-screen prompts to search for and connect to your Wi-Fi network.

With the multiple Wi-Fi setup methods available for your HP printer, you can choose the one that suits your preferences and technical comfort level. Whether it’s the simplicity of WPS, the convenience of the HP Smart App, the flexibility of Wi-Fi Direct, or the control of manual setup, HP ensures you have options to make your printing experience seamless and efficient

Effortless Printer Setup with 123.hp.com: Your Comprehensive Guide

Setting up your printer is a crucial step in transforming your digital files into physical documents. 123.hp.com is your go-to destination for a hassle-free and user-friendly printer setup experience. In this guide, we’ll explore the various setup methods available at 123.hp.com, ensuring you can start printing effortlessly.

Why Choose 123.hp.com for Your Printer Setup?

123.hp.com offers several advantages that make it an ideal choice for your printer setup needs:

1. Official HP Support

123.hp.com is the official website of HP, a renowned leader in the printer industry. When you use this platform, you’re accessing HP’s extensive knowledge base and support resources.

2. Easy Navigation

The website is designed with user-friendliness in mind. It offers intuitive navigation, ensuring that you can quickly find the setup information you need, regardless of your technical expertise.

3. Comprehensive Guidance

123.hp.com provides step-by-step instructions, videos, and troubleshooting guides to help you with every aspect of printer setup, from unboxing to printing your first page.

Printer Setup Methods at 123.hp.com

1. Automatic Setup with HP Smart App

HP Smart App is a convenient and user-friendly way to set up your printer:

  1. Download and install the HP Smart App on your smartphone or tablet.
  2. Open the app and follow the on-screen prompts to add your printer.
  3. The app will guide you through connecting your printer to Wi-Fi and installing the necessary drivers.

2. Manual Setup Using HP Easy Start

HP Easy Start is a versatile tool for manual printer setup:

  1. Visit 123.hp.com setup and enter your printer model.
  2. Download the HP Easy Start software for your operating system.
  3. Run the software and follow the on-screen instructions to connect your printer to Wi-Fi and install drivers.

3. Wireless Setup via Printer Control Panel

If you prefer a more hands-on approach, you can set up your printer directly from the control panel:

  1. Access your printer’s control panel and navigate to the wireless setup menu.
  2. Follow the prompts to connect your printer to your Wi-Fi network manually.

4. USB Setup for Wired Connection

For those who prefer a wired connection, you can set up your printer using a USB cable:

  1. Visit 123.hp.com and enter your printer model.
  2. Download the HP Easy Start software for your operating system.
  3. Run the software and choose the USB setup option to connect your printer via USB.

123.hp.com is your trusted partner in achieving a seamless and trouble-free printer setup. Whether you prefer the convenience of the HP Smart App, the versatility of HP Easy Start, the control of manual setup, or the reliability of a wired USB connection, 123.hp.com provides you with all the resources and guidance you need

How to Set Up Canon WiFi Printer: A Quick and Easy Guide

Canon Wi-Fi printers offer the convenience of wireless printing from multiple devices, making it easier than ever to print documents, photos, and more. If you’ve recently purchased a Canon Wi-Fi printer and are looking to set it up, this step-by-step guide will walk you through the process. By the end of this article, you’ll have your set up Canon wifi printer and running seamlessly.

Why Choose a Canon Wi-Fi Printer?

Wireless Convenience

Canon Wi-Fi printers eliminate the need for cumbersome cables, allowing you to print from your computer, smartphone, or tablet without physical connections.

Multi-Device Printing

With Wi-Fi connectivity, you can connect multiple devices to your Canon printer, making it accessible to everyone in your household or office.

Cloud Printing

Canon Wi-Fi printers often support cloud printing, allowing you to print documents directly from cloud storage services like Google Drive and Dropbox.

Mobile Printing

Print photos and documents from your mobile device with ease, whether you’re at home or on the go.

Setting Up Your Canon Wi-Fi Printer

Now, let’s dive into the step-by-step process of setting up your Canon Wi-Fi printer.

Step 1: Unboxing

Start by unboxing your Canon Wi-Fi printer and removing all the protective materials.

Step 2: Power On

Plug in your printer and power it on. Follow the initial setup instructions provided on the printer’s display screen. Typically, you’ll be prompted to select your language and region.

Step 3: Connect to Wi-Fi

  • Navigate to the printer’s settings or Wi-Fi setup menu.
  • Select your Wi-Fi network from the available options.
  • Enter your Wi-Fi password to establish the connection.

Step 4: Install Printer Software

Visit the Canon website and download the necessary printer software and drivers for your specific printer model.

Step 5: Run Installation Wizard

Run the downloaded software and follow the on-screen prompts to install the printer drivers on your computer.

Step 6: Test Print

After installation, perform a test print to ensure your Canon Wi-Fi printer is functioning correctly. Print a simple document or photo to verify the connection.

Step 7: Mobile Printing

If you want to print from your smartphone or tablet, download the Canon PRINT Inkjet/SELPHY app (available for iOS and Android) and follow the app’s instructions to connect your mobile device to the printer.

Step 8: Cloud Printing (Optional)

If your Canon Wi-Fi printer supports cloud printing, log in to your cloud storage account (e.g., Google Drive) through the printer’s display screen. This allows you to print documents directly from your cloud storage.

Setting up your Canon Wi-Fi printer is a straightforward process that offers the flexibility of wireless printing from various devices. With mobile printing, cloud integration, and multi-device support, you have the freedom to print conveniently and efficiently.

Whether you’re printing important documents, cherished photos, or creative projects, your Canon Wi-Fi printer is ready to meet your needs. Say goodbye to cable clutter and hello to the convenience of wireless printing.

By following this guide, you can quickly set up your Canon Wi-Fi printer and begin enjoying the benefits of hassle-free, wireless printing in no time.

Canon Printer Drivers for Windows 11: Seamless Printing at Your Fingertips

With the release of Windows 11, Canon ensures that users can experience seamless and hassle-free printing on their Canon printers. To achieve this, it’s crucial to have the right Canon printer drivers that are compatible with the new Windows operating system. In this article, we’ll explore how to obtain and install Canon printer drivers for Windows 11, ensuring that your printing experience remains top-notch.

The Importance of Canon Printer Drivers for Windows 11

Compatibility Assurance

Canon printer drivers for Windows 11 are designed to ensure that your Canon printer functions correctly with the latest Windows operating system. This compatibility is crucial for error-free printing.

Performance Optimization

These drivers optimize your Canon printer’s performance, enhancing print quality and minimizing potential issues like print delays and errors.

Access to Features

The right drivers unlock all the features and functions of your Canon printer, allowing you to take full advantage of its capabilities.

How to Obtain and Install Canon Printer Drivers for Windows 11

Let’s walk through the step-by-step process of obtaining and installing Canon printer drivers for Windows 11:

Step 1: Identify Your Printer Model

Before you begin, make sure you know the exact model of your Canon printer. This information is usually found on a label on the printer itself.

Step 2: Visit the Canon Website

Go to the official Canon website and navigate to the “Support” or “Drivers” section.

Step 3: Enter Your Printer Model

Enter your Canon printer’s model number into the search bar provided on the website. This ensures you access the correct drivers for your specific printer.

Step 4: Select Windows 11

Ensure that you select “Windows 11” as your operating system. This step is crucial to ensure compatibility with the new OS.

Step 5: Download the Drivers

Once you’ve selected Windows 11, you’ll see a list of available drivers for your printer model. Download the latest driver by clicking on the download button next to it.

Step 6: Install the Drivers

Run the downloaded driver file to initiate the installation process. Follow the on-screen instructions provided by the driver installer.

Step 7: Restart Your Computer

After the installation is complete, it’s advisable to restart your computer. This ensures that the new drivers are properly integrated into the Windows 11 system.

Step 8: Test Your Printer

Finally, print a test document to confirm that your Canon printer is functioning correctly with Windows 11.

Obtaining and installing the right Canon printer drivers for Windows 11 is essential to ensure that your Canon printer performs optimally on the new operating system. These drivers not only provide compatibility but also unlock the full potential of your printer, delivering high-quality prints and seamless functionality.