ij.start.canon setup Guide to Install Canon IJ Printer

Are you in search of ij.start canon on Mac along with Windows PC? Even though it is true that there are many names for printers which are available to search , ij.start cannon is one of those shrewd choices of clients when it comes to deciding on the most suitable printer. Canon Contact Support printer is renowned for its top-quality print quality. For you to make use of this printer, you must become acquainted with the fundamental steps to the arrangement. In this article we’ll provide the rules and directions for that ij.start.canon setup measure. Now let’s start!

Ij.start.canon is an easy and speedy method to provide the ability to connect your printer to any other device, such as windows, Mac or iPhone. Furthermore, www.ij.start.cannon is a web address which provides access to download driver and software of Canon printer for your device. The site is used by all new users looking to set up their printer. Additionally, current users of the printer who wish to update their driver that is out of date can go to this website.

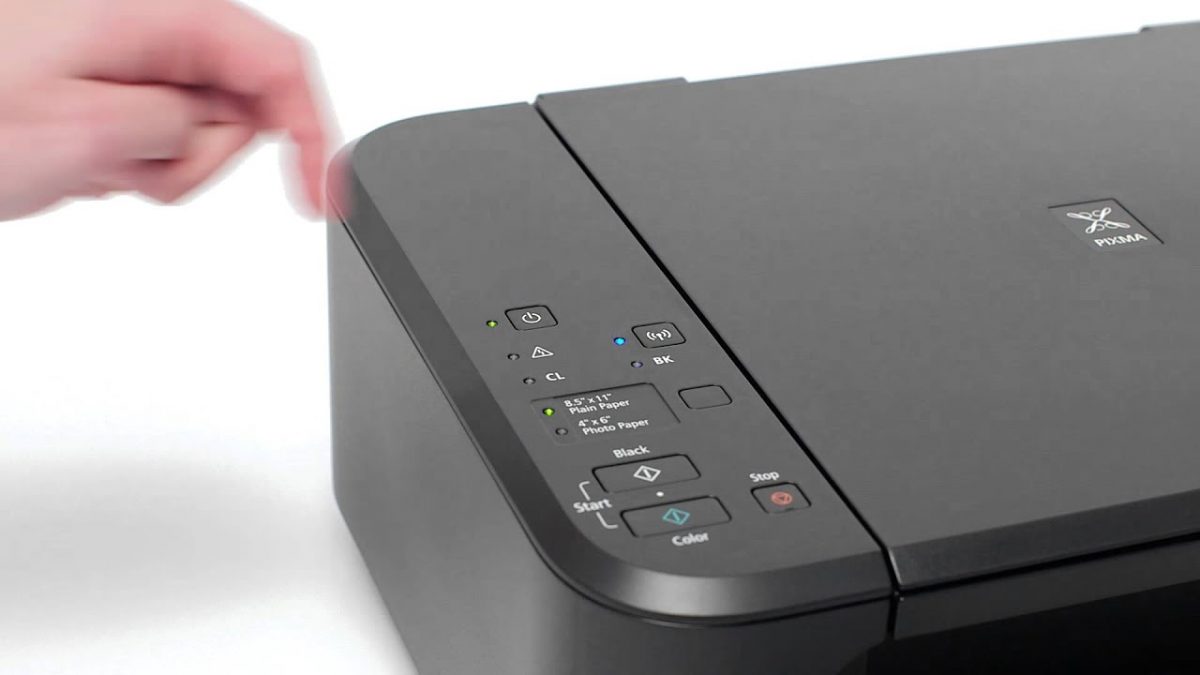
Setup Canon Printer on Windows (Wireless) – Canon ij Setup Guide

  • The first step is to download and install the driver for your printer via ‘Ij.start.canon’.
  • Make sure to turn off the Canon printer and ensure that it’s properly connected using an on/off switch.
  • After that then, open the downloaded version of driver setup, and then follow the steps until the moment you get to screen with the option of selecting “Wireless Setup”.
  • Once you have selected WiFi, open your Canon printer’s screen, and then tap the WiFi setting button.
  • Set the device’s settings, then click OK.
  • Next, choose Device Settings>LAN Settings. Then, press “OK”
  • LAN Settings>Wireless Lan Setup, and select OK. Your printer will then look for an access point.
  • Make sure you’re WiFi router is on. Now, the WiFi flash light will light up on the printer.
  • A network list will be displayed on screen. Choose the WiFi networks from that list, then click on OK.
  • It will then ask you for your WPA/WEP code (WiFi password). Enter your password correctly in the box and then click on the “OK” button
  • Within a matter of seconds, the printer will be connected to the WiFi network.
  • Therefore, following the steps above, you can effortlessly finish Canon ij wireless setup for your Windows system.

To ensure your printer is installed on your Windows system Follow these steps:

  • Navigate to the control panel’, and then select the the ‘device and printer’ selection.
  • Verify that your printer appears in the next screen by clicking a the green check mark. If not, you will need to manually turn it to the list by selecting the “Add printer.
  • Then you’ll be able to see a list of all available printers. Choose the Canon printer from the list.
  • Tap the next button and wait a couple of seconds for your printer to be added.
  • Once the printer is installed when it is added, you will see the printer being added by the green check mark.

How to set up Canon Printer on Windows via USB –

  • The first step is to first download firstly, the Canon printer driver and then complete the installation.
  • After that, connect your printer and Windows system using USB Cable.
  • Access the Control panel via the ‘Run’ dialog box via the Windows search feature.
  • type control panel in run box
  • Choose the ‘Devices and Printers’ option. Then you’ll find your printer’s green check-mark.
  • If you’re unable to locate your printer, simply click the “Add printer” to manually add it.
  • Print it out.

Then, your printer is ready to be added and be ready for use

Steps to Setup Canon Printer on Mac

  • Firstly, download and setup driver through ij.start.canon and go for the next step.
  • Follow the steps outlined in the previous section of this write-up to connect your Canon Printer on the same network with your other device.
  • Then, go to the ‘Apple menu and select the ‘System Preferences’.
  • Then click on the icon of a printer also known by the name of “Printers and scanners” from the System preferences
  • Simply click on the “+” sign present in the lower left-hand corner following the pop-up window will pop up.
  • You’ll find your printer’s name on the left-hand pane of your screen if it’s already connected to the network. Click it to start the configuration process.
  • When the process is complete the printer will show a green and be ready for use.

How do I connect my Canon Printer to iPhone?

Follow these steps to connect your Canon printer to your iPhone Follow these steps to connect Canon printer to iPhone

  • The first step is to first download your “Canon print” app in your iPhone or any iOS device from the app store.
  • After the application has been installed, ensure that the printer is connected and switched on.
  • Once the green light has remained solid on your printer press the “WiFi” option in your printer.
  • A blue light will start flashing at the top of the printer. If the light does not appear after a few seconds, select the “WiFI” button once more and hold it for several seconds until you hear the alarm sound two times.
  • After hearing the two alarms then release the button. Now, the light from the WiFi button will flash.
  • On your phone, open from your phone, and then open “Canon printer” app. Follow the instructions on the screen and accept your user’s agreement.
  • Then, select the option to adding the printer.
  • Click on the option ‘register print’. Then, scan the printer’s setup and then keep an eye out for additional instructions.
  • There are two options on the mobile screen. The first is “Connect via wireless router (recommended) and the other “Direct connection” “Direct connectivity”. Select the option “Connect via wireless router”.
  • On the next screen, you will be instructed to connect your phone via your WiFi for the final configuration in “Canon printer”.
  • Choose the “settings” button and join the WiFi to the wireless network “Canon setup”.
  • Go returning to “Canon printer” app on your phone. When the screen displays the option of connecting WiFi to the Canon setup, tap “OK”.
  • Then, select a name for the wireless network.
  • Then, click on the choice of wireless network, and then enter your WiFi password and click “OK”.
  • The settings of your setup will be sent towards your printer. Then, click “OK” once again.
  • The name of your printer will be displayed on the screen. Choose it, and then click “OK”.
  • Thus, it is the final step in connecting your printer to Canon printer and iPhone.

Install Canon inkjet printer using ij.start Canon

Follow the most frequently used and straightforward steps to set up your Canon IJ printer. Check the following steps;

  • First, you need to start your system as a laptop or PC.
  • Second Connect your Canon Inkjet Printer to the system via either wireless or wired (If you own a Wireless Canon device)
  • Third, open a web browser (default or another) and type ij.start.canon within the bar.
  • Enter the code, then be patient for Canon website to load. It will guide you through various ways to proceed.
  • Click the Configure button and open a new window to prompt you for the model number.
  • Enter the Canon model’s number. press Enter then install the configuration.
Download the Canon Printer Drivers
In the current Canon model, you won’t see the CD. However, in the event that you are using previous versions, you could install CD. Otherwise, check the entire download procedure through ij.start Canon for Canon driver download from the following procedure.

  • Install the Canon printer and then open the web browser on your computer.
  • Go to ij.start.cannon site and enter the Canon Model number when you are asked.
  • You can also pick from the bottom menu options and click “click here” to activate “click this link” from the list.
  • Begin downloading Canon drivers as well as software using the page at ij.start.canon page.
  • Double click now on the program and then install it for you Canon product.

A Complete Guide to Installation for Canon IJ Setup

Follow the guide below and configure your Canon printer.

  • Download the software – Visit ij.start.canon to download your Canon driver.
  • Install and select connection type – Double tap on the file and choose the wireless connection as well as USB connection.
  • Switch ON the Canon printer. Hit the button power on the printer.
  • Connect WiFi – To establish an internet connection make sure you press while holding the wireless alarm until you connect.
  • The lamps are flashing green and blue If you notice this type of situation, it is a sign that the printer is connected to WiFi.
  • Accept the terms of install and install. Read and accept the terms of license that Canon setup for installation.
  • Complete with the setup of your printer from Canon Click Complete to complete the last step.
Process to Install the Canon Printer Driver via Ij.start.canon

To learn step-by step instructions for installing the ij.start.cannon driver for your printer on your system You must follow the steps below.

  • Start the installation of ij.start.cannon driver after connecting the printer with the internet. There are a variety of options to establish the connection. You can select one of the WPS method or the Standard way of connecting. If, however, your printer isn’t compatible using wireless connections, then you could utilize the ethernet option to establish the connection.
  • Next step accessing the file you downloaded. If you did not change the file’s location by hand the downloads file within the folder Downloads. Double-click the file to start it.
  • Once you have granted the permission, you’ll be able to view the wizard to install.
  • The first window allows the ability to modify the settings using the wizard’s language. Make the necessary changes before moving on through the steps.
  • You’ll now be required to create the connecting your PC and your printer. Select the most suitable option from the options that are available and then create an internet connection. Instructions to do this will be displayed on the screen.
  • If your printer is attached to the system When it is connected successfully, you will receive the list of printers. You must select the one that you are using.
  • On the screen for selecting software Make sure to check the boxes of the program you want to use.
  • After that after that, you will see the agreement to license be displayed you with a screen. Go through these terms in detail and then agree to them before moving further.
  • The installation is now in progress. Within a few minutes it will be completed.
  • You are now able to take the print test following the steps and completing your ij.start.cannon setup of the driver.
How to Establish a WIFI Connection on Canon Printer?

Your printer needs to be connected to the internet ahead of connecting to http//canon.com/ijsetup . To do this, you need to follow the instructions in the following steps:

Wireless LAN Setup

  • Switch on the printer to start the setup process. Press the power button. The light on the Power LED of the printer needs to remain steady and green.
  • Click the menu button of the printer, following which, the Network Settings will be shown on the screen.
  • For creating connections, there are many options. It is necessary to choose one of the Wireless LAN Settings options out of the other options. A pop-up will be displayed on the printer’s screen which you must click “OK.
  • Select the Access Point by selecting an SSID settings option. Select the network you prefer and then enter the WiFi protection passcode without making any mistakes.
  • Keep going until the printer’s screen doesn’t appear Connected. Then hit the OK.

Basic Need of ij start canon setup to Install and Download Driver

In this blog, we have the procedure to arrange Canon printer wired and wireless on Windows and Mac tool. In order to setup printer, it is essential to fit the latest drivers. It is also necessary to know about the model number, so you can find latest canon IJ Setup drivers.

You must have a router or modem at your home to do this link and the contact points should also work correctly. You should have a piece of equipment with an internet connection to make this Canon ijsetup on PC or on Smartphone.

Before you start setting up your Canon printer, there are a few things you should know.

  • Before beginning the setup procedure, keep model number of your printer.
  • Make sure you have enough storage space on your device to install the driver.
  • Make that the printer is correctly plugged into the power outlet.
  • Ensure that your device is connected to the internet.

In this article, we will find process of setting up the printer. Follow the instructions in proper way as mentioned below.

Setup Canon Printer On Windows (Wireless) – Canon ij Setup Guide

  1. To begin, go to ‘Canon com/ijsetup’ and install software your printer’s driver.
  2. Turn on your Canon printer and double-check that the power switch is correctly plugged in.
  3. After that, open the downloaded driver setup file and click next until you reach the screen where you may select “Wireless Setup.”
  4. Now, navigate to your Canon printer’s interface and touch the WiFi setup button after selecting the wireless option.
  5. Click OK after selecting the device settings.
  6. Next, Choose Device Settings>LAN Settings and press ‘OK’ button
  7. LAN Settings>Wireless Lan Setup and press on ‘OK’. Now your printer will search for access point.
  8. Make sure you turn on your WiFi router. WiFi flashlight is now going to blink on the printer.
  9. Next on the screen is a network list. Select from the list your WiFi network and click ‘OK.’
  10. Show your WPA/WEP key (WiFi password). Enter the right password and click “OK.”
  11. Your printer can connect to the WiFi network in a few moments.
  12. You may therefore quickly complete the wireless Canon ij setup for your Windows machine by using the preceding instructions.

Setup Canon Printer on Mac using http://ij.start.cannon

  • First, download and setup the driver through http://ij.start.cannon Mac.
  • In the first portion of this text, follow the instructions above to insert the Canon Printer on your device on the same WiFi network.
  • Then open the Apple menu and then click on System Preferences. Open System Preferences.
  • Now, from the system preferences window click the printer shaped icon called “Printers and scanners.”
  • Click the “+” sign in the bottom left of the screen, which shows a pop
  • If it is connected already through the network, you may see your printer name in the left pane. To start the setup procedure, click on it.
  • Check and you’re going to be ready for use.

Download the software:

Nowadays, canon does not provide manual CD driver installation. Hence, it is necessary to download the proper printer model driver. Make sure that you have downloaded driver according to your OS version (windows or MAC).

Select wireless connection for printer:

Once you downloaded the printer driver successfully, click double on it to start the installation process. Now look at the screen, where it shows “select the method to connect the printer”, click on the option” wireless connection”.

For wired, select the option “USB connection”.

On the canon printer:

At this step, you need to switch on the printer. Make sure that printer is connected well with power mode in order to prevent any loose connection problem.

Wireless setup:

After selecting the “wireless connection” option from the desktop, press and hold the Wi-Fi alarm lamp key on printer till it flashes.

Green and blue flashes:

At this point, you will have two lamps flashing blue and green. This will indicate that your printer has been connected with your Wi-Fi router and prepared for cable-less connection.

Agree to the terms and Condition:

Now you have to follow the mentioned steps to agree the license agreement and other details. You will get the printer model on the screen with wireless network.

Completion of printer setup:

You select now the option “complete” when you see the wireless network with the printer model.

Hence, in this way arrange of canon printer finished. This can be helpful for anyone with new printer or older one to do wireless connection.

Canon Wireless Printer arrangement on Windows

We can have below instructions to do the step by step process to setup the canon printer on windows using the wireless connection .

Switch on the power button of printer:

  • First, click the “setting” option on printer screen and select “down arrow” button to select the “device settings” option and press “ok”.
  • Now choose the “LAN settings” option and press “OK”.
  • Again click the “down arrow” button to choose the “wireless LAN setup” and press “OK”. Now your printer will find out the wireless network and flash lamp will flicker.

Find wireless link:

Choose the Wi-Fi network from the available network displaying on the printer screen. On the next screen, put the WPA/WEP key or Wi-Fi password and press ‘ok’.

Again at this, click the ‘OK’ button to finish the wireless link.

Download the driver:

Now go to the website, to download the exact printer model driver and hence complete the installation process.

You can see the option:

  • Control panel> device and printer> click on the “add printer” option from top left part.
  • Click on “control panel” option in the PC system and press on the “view devices” and printers.

Add printer:

Choose your printer model from the window and wait for a while. At last your canon printer has been completely setup on your

Canon wireless printer arrangement on MAC

In this article, we have some guidance and steps for linking canon printer on MAC using wireless connection.

Switch on all devices:

Turn on printer, MAC and Wi-Fi router.  and connect with wireless router to mac.

Learn ij Start Pimxa TS3322 Setup

Pixma Printers have been recognized as the best printers in the world for their quality and usage. They have made work easy for most businesses, like you can use the feature of WiFi as well as for Printing. It is like you can do remote printing. There is no need to connect the system to the printer using the wired method, and you can print your file while sitting in the new room. So, most of the brands of the printer are not providing this feature for you to make your life easy. So, isn’t it the best choice for printers? Now, if you are looking for the best printer and that too in your budget then the pixma Printer TS3322 is the best choice.

Moreover, it is very easy to do its setup by just following the official download link. The required printer drivers are available for download at https ij start pixma ts3322. This link also provides assistance in the steps while downloading so that you could complete the download easily and without any trouble. So, let’s learn to do the setup with ij.start ts3322.

Explore IJ Start Pixma TS3322

Now, we are going to explore the link ij start pixma ts3322, which is used for the setup of the printer. The very first thing you need to do is unpack the printer, as if you will not connect the printer to the system, till then, the installation will not get complete. So, let’s get started!

Unpack the Printer

  • Step 1: First, take the printer out from the box and keep it at a convenient location that is accessible from every location even if we are using it via WiFi method.
  • Step 2: Take the power cord from the box, and connect it to the power supply to turn on your printer.
  • Step 3: Take the print cartridge that has been given along with the printer. You may find that in the box too, and insert it in the printer and do the proper alignment of the cartridges in the printer. It is an important step as only then you will be able to get the right printouts.

So, after the proper assembly of the printer, you can start with the setup process of the printer. Therefore, let’s move to the download process for the printer driver.

Download the Printer Driver

This is the point from where the real job starts. Now, you have to download and install the software in this section. You need just to follow the steps carefully in sequence:

  • Step 1: Therefore, now start the system and open the web browser.
  • Step 2: Now, in the URL field of the web browser, type the official download link- ij.start.canon setup , and select the required printer driver for your printer model.
  • Step 3: On the completion of the download, the downloaded file will either appear on the Desktop or in the Downloads folder. Double click over the downloaded file to install the printer driver.
  • Step 4: Wait for some time, till the installation of the printer driver gets complete.
  • Step 5: The window will open with the on-screen instructions for the installation. Follow the instructions properly till the end to get the driver installed for the printer in your system.

So, with the completion of these steps, the installation of the printer driver software is complete. In order to use the printer in the wired method, you need to connect the printer to the system using an ethernet cable. In case, you want to use it wirelessly, then you need to move to the next section in order to complete the wireless setup.

IJ Start TS3322 Wireless Setup

In case, you want to do the wireless setup, then both the devices, your router, and printer should have a WPS button. This function will let you print from anywhere in the same network like you can take the print while sitting in the other room. So, no physical connection is required between the printer and your system. Moreover, this will allow you to take your prints from the phones or tablets as well. So, follow the steps given below to complete the wireless setup for the printer:

  • Step 1:: Push the WPS button of the printer for a few seconds. Different models have a different time limit. So do check for this in the instruction manual.
  • Step 2: After the start of the printer WPS button, wait for 1-2 minutes, and push the WPS button for your router as well.
  • Step 3: Now, download the printer driver software from the download link, as mentioned in the previous sub-heading, and you are all set to take prints from anywhere in the network.

Therefore, these are the steps that you must take for the installation and setup of the printer for wired and wireless methods. The only thing you need to take care of is that you should not miss any steps in-between as it can create the problem at a later stage.

Print Remotely!

With the pixma printer TS3322, you can do remote printing, and that too at a very low cost. Now, there is no need to transfer the files from the phone to the system as you can directly give the print command from the phone itself. The only thing you need to do is the wireless setup with ij start ts3322. So, this is going to make your life so easy. So, keep enjoying printing!